Floating candles are a lovely way to add a little fire to a floral centerpiece and they are surprisingly easy to make using metal tart molds. Made with sweet smelling beeswax, these floral-shaped DIY floating candles will be the buzz of the party.
Flowers are the ultimate pick-me-up. Whether you are giving a bouquet to a loved one, arranging them to brighten up your home, or planting them in the garden to attract bees and butterflies, flowers add life, colour, and joy to any space. Next time you are feeling a bit blue, head out and smell the roses. It will certainly help to improve the day!
That’s why I love to bring them inside or use them to decorate whenever I get the chance. Clipping a few blooms here and there from my garden brings me so much joy!
I use these DIY floating candles and fresh flowers to make gorgeous centerpieces for the home. You can put them in practically any vase that has a wide enough mouth to fit the candle in. Beyond a centerpiece, you can also put them in a pool, a garden water feature, and in large bowls to decorate inside or out. Before we learn how to make floating candles, let’s talk about how to properly use them!
How do Floating Candles Work?
Every candle can’t be a floating candle. The secret is to use candles with oversized tops and small bottoms to keep stable. The candles displace more water weight than the weight of the candle, ensuring that they won’t tip or accidentally invert themselves.
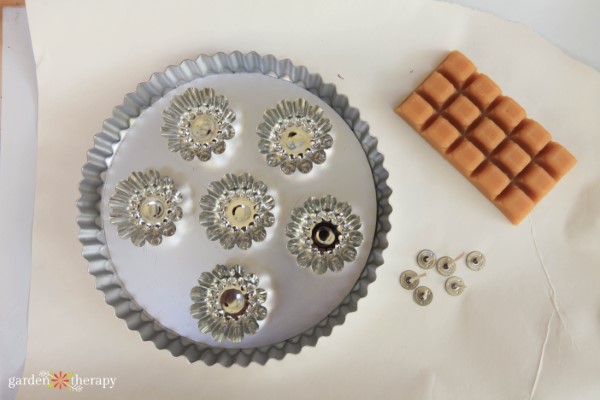
The trick to making floating candles is finding the right kind of mold. And they aren’t as tricky to find as you may think! I actually use mini tart molds that can be found online or in the kitchen section at a home goods store.
Because of their shape, they burn relatively quickly. Consider them more like tea lights. Keep an eye on them throughout the night and refresh them as needed. Any wax that doesn’t burn away should keep on floating, so feel free to scoop them back up and save for future candles.
You can also add any colouring or essential oils that you like. Citronella oil may even help to keep the mosquitoes away during an evening outdoors!
However, avoid using these essential oils and colour for pools or garden features as the oils can leak into the water. They’re best kept to the vase displays.
Floating Water Candle Safety
As with any candle, you do want to practice regular fire safety with these candles and never leave them unattended or under anything that could catch fire. Keep away items from the sides of the water so they don’t accidentally burn anything.
That being said, there are minimal safety risks with these DIY floating candles. The water themselves makes them safer than the average candle. Once they burn down, they extinguish themselves.
You also don’t have to worry about the flowers inside the vase. They will be too waterlogged to catch fire and should also sit completely underwater the whole time.
How to Make Floating Candles
Makes six floating water candles
Materials:
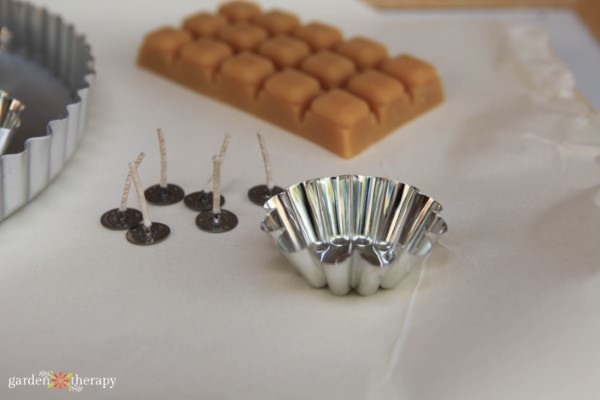
- 8 oz (225 g) of beeswax
- 1 tsp mold release
- Six waxed and wired 1” tea light wicks with tabs
- Six mini metal tart molds
- Large, wide, glass vase
- Fresh or artificial flowers
Equipment:
Make it!
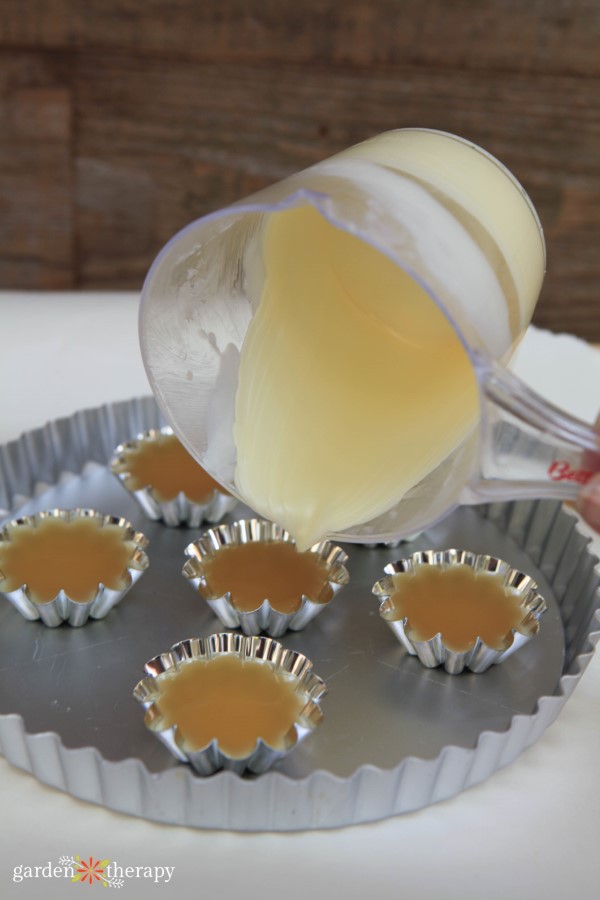
Melt the beeswax in a double boiler. Keep a close watch on it so that it can be poured as soon as it’s completely liquid.
Wipe out the tart molds to be sure the insides are quite clean. Place the tart molds on a baking sheet lined with paper to protect the countertops from spills.
Carefully pour the wax into the tart molds, making sure that they stay level and wax doesn’t pour over the edges.
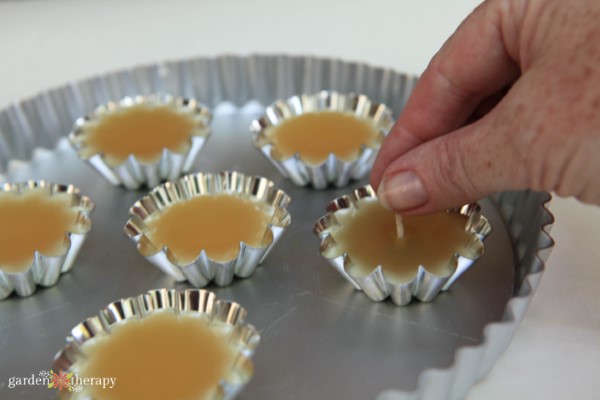
As the wax starts to cool and turn opaque around the edges, place a wick into the center of each one. The wicks are short and should easily stay in place.
Let the tarts cool and cure for 24 hours undisturbed, then remove them from the mold.
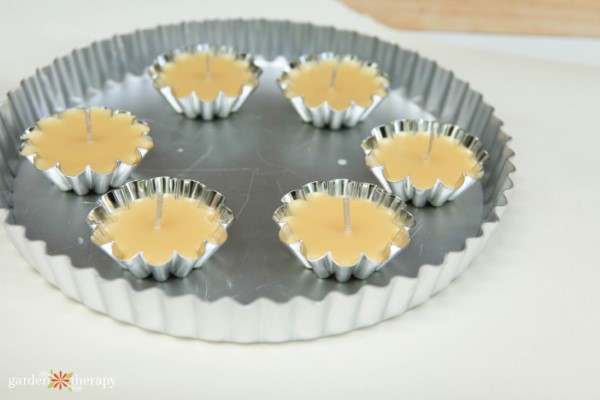
Note: when making candles in a container that you want to remove them from, choose a wax formulated for votives or pillar candles or use a candle release additive or spray to allow the wax to pop out of the mold more easily.
In the event that the wax doesn’t release, pop the mold in the freezer for ten minutes, then try again. Keep freezing at ten-minute intervals until the candle can be removed. Just be sure not to leave the candle in the freezer for an extended period of time or it may crack.
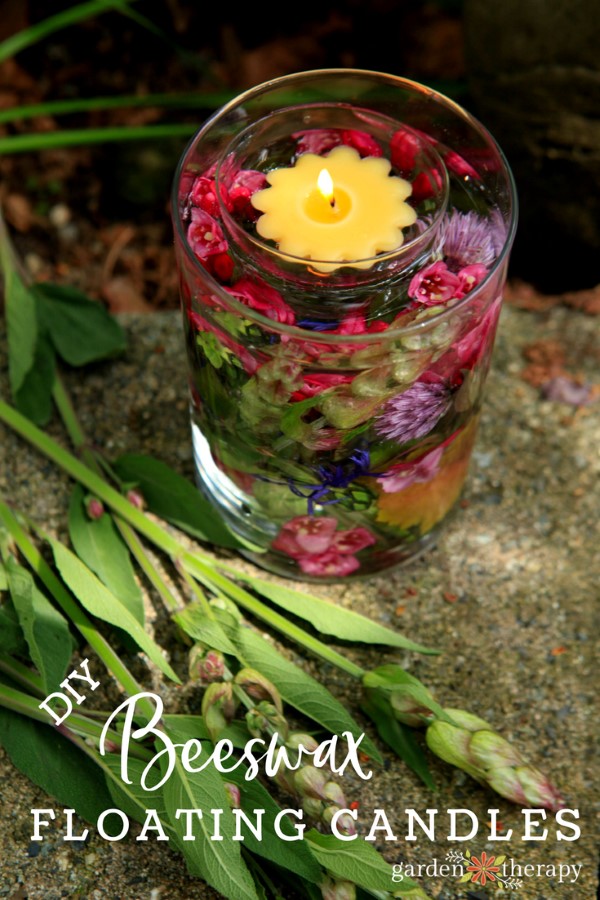
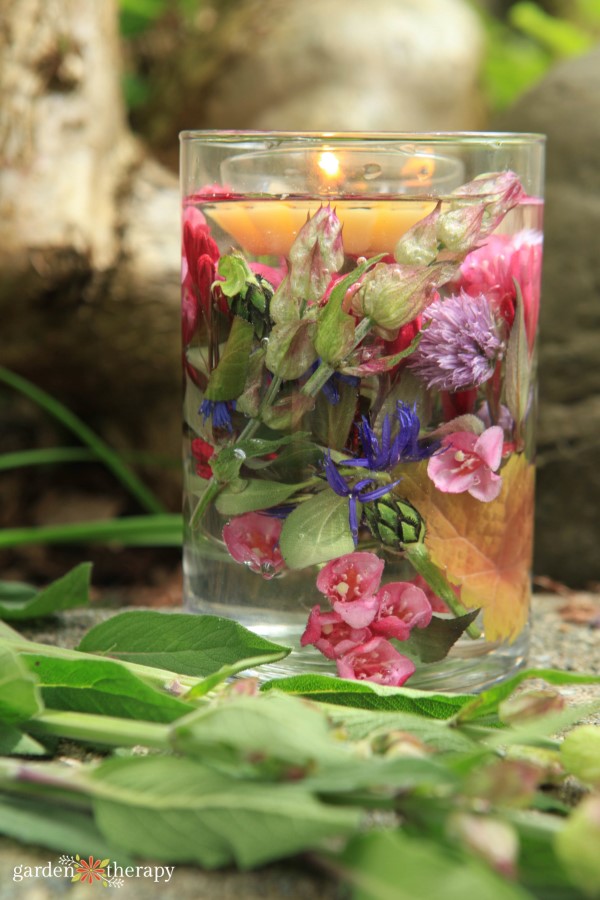
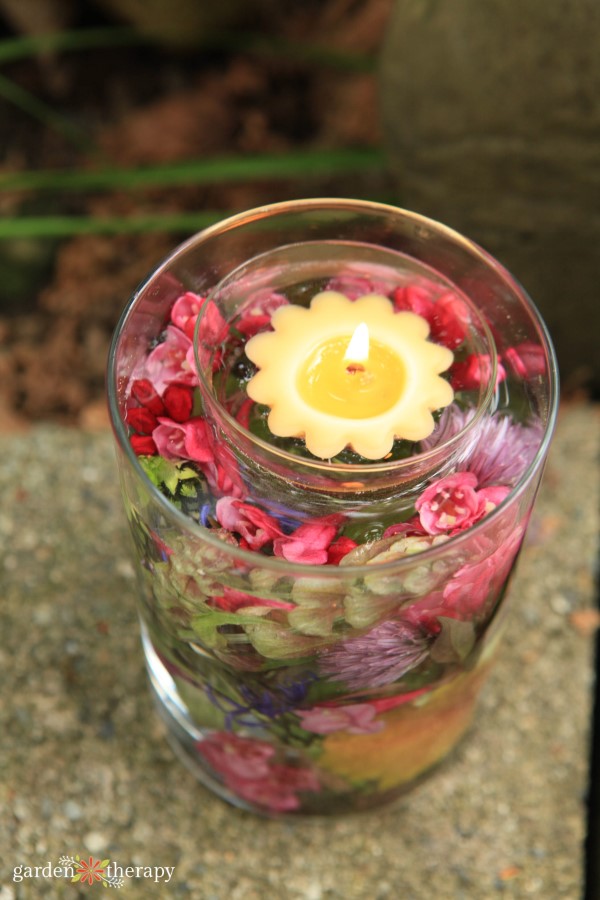
Create a Floating Flower Candle Display
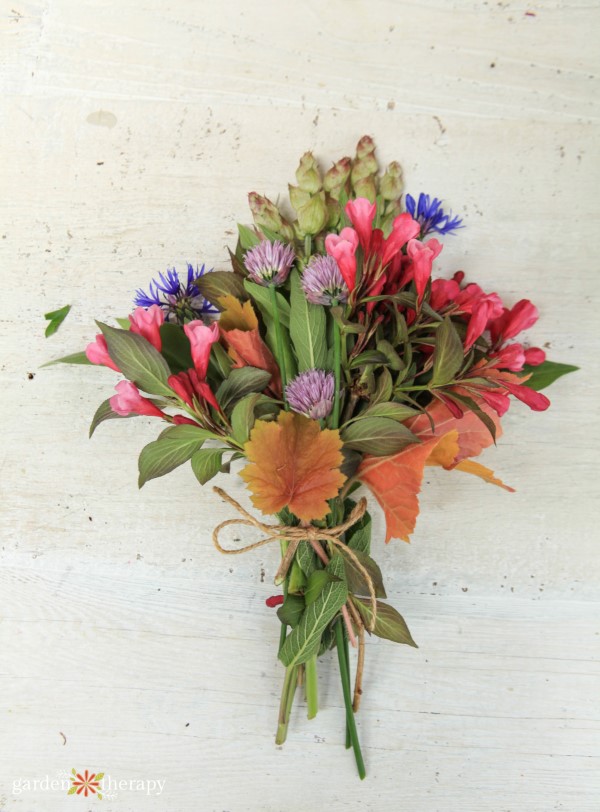
To create a lavish display with these floating flower candles, fill a wide vase with freshly cut flowers and fill it with water to cover the blooms completely. Go out to the garden and pick anything that looks pretty to you. My selection included chive flowers and sage, which are a bit unusual to add to arrangements but they look really pretty.
Submerge the flowers in water in a large glass vase. Then float a few candles on the surface and light them up!
Be careful when dropping the candles into the water and make sure you don’t get the wicks wet. Most wicks are 100% cotton and it can affect the burn time. You want them glowing as long as possible.
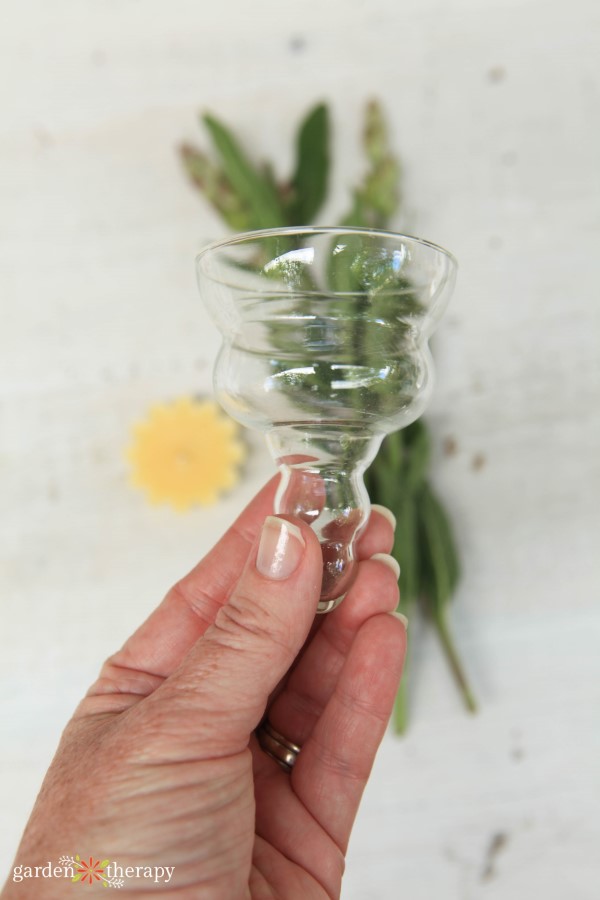
You can use one of these nifty glass floating candle holders to keep the candles separate from the flowers in the vase, if you prefer.
That’s it! This arrangement makes a beautiful summer table centerpiece or hostess gift. The flowers will continue to look great for a few days submerged in water.
You May Also Like These Candle Projects:
- Rosemary Pressed Herb Candles
- 10-Minute Outdoor Candle Planter
- Seashell Beeswax Tea Lights
- How to Make Citronella Candles
- Beeswax Succulent Mason Jar Candles
- Soy Beeswax Jar Candles

DIY Floating Candles
Equipment
- Baking sheet
Supplies
- 8 oz beeswax
- 1 tsp mold release
- 6 1" tea light wicks with tabs waxed and wired
- 6 mini metal tart molds
- glass vase for displaying the candles
- fresh or artificial flowers
Instructions
- In the double boiler, melt the beeswax until totally melted.
- Meanwhile, place clean tart molds on a baking sheet.
- Pour the wax carefully into the molds. Don't allow the wax to go over the edges of the molds.
- Then, allow the candles to cool a bit. Once they begin to turn opaque, add a wick to the center of each.
- Let the diy floating candles dry for 24 hours. Arrange in the vase with submerged flowers and enjoy!


Loved the article, but where can you get those nifty glass floating candle holders?
This is such a great idea. Very impressive.
These are GORGEOUS!!!! And I’m planning to make some as soon as I have time…your tutorial is so clear that it’ll be easy-peasy. 😃
Thank you so much!!!
Beautiful. Thanks for sharing your garden beauties with us. You will be missed. Garden therapy will be missed. Hopefully you can come back to it soon.