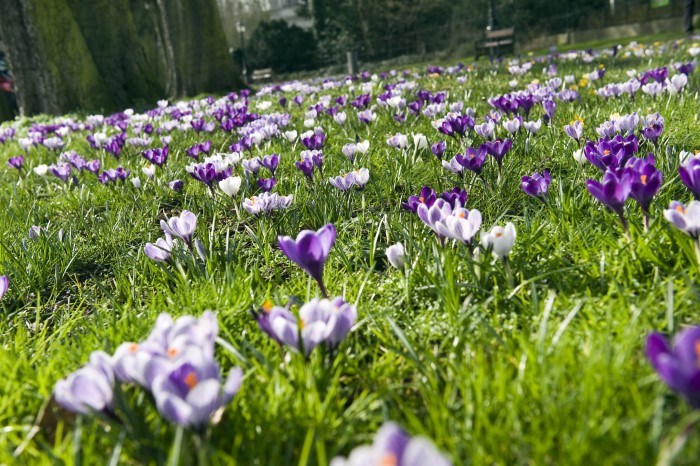
A bulb lawn is one of the most beautiful ways to usher in the spring. A wave of colourful flowers erupts across your lawn, creating a welcome display for your enjoyment and the pollinators after a cold winter. Follow along to see how I designed and planted my front yard bulb garden.
When I first moved into my new home, the front yard was struggling. Patchy grass, muddy puddles, and shrubs that were just begging to be chopped down. It was one of the first things I wanted to revamp.
So when Flowerbulb.eu offered to send me 1500 bulbs to create a front yard pollinator garden, I leapt at the opportunity.
My front yard space is small, about 600 sq. ft., and very patchy. And after years of poor drainage and neglect, it’s not level. So you could say that a bulb lawn makeover was very much needed!
Follow along to see how I designed and planted my front yard bulb garden.
- What is a Bulb Lawn?
- Preparing for Your Bulb Garden
- Make Your Design
- Mixed Bulb Pockets
- Tulip Border
- Plant Your Bulbs
- Repairing the Lawn
- My Methodology
- Growing a Natural Lawn
- My Bulb Garden Results
- FAQ About Bulb Gardens
- More Tips for Growing Bulbs
Sponsored Content: Thank you to Flowerbulb.eu for sponsoring this post and providing me with all the bulbs for my planting. Flowerbulb.eu is an amazing resource to help you learn about all the different kinds of bulbs and how to plant them. Be sure to check them out!
What is a Bulb Lawn?
Bulb lawns are exactly what they sound like! You plant spring-flowering bulbs in the fall in your lawn, and come early spring, they begin to bloom across your grass. It’s a practice that began in Europe hundreds of years ago and is popular in many botanical gardens today.
Most gardeners choose naturalizing bulbs. These are bulbs that you plant once, and then they return and multiply over the years, such as snowdrops, crocus, and daffodils. Over time, it will slowly cover your lawn into a spectacular display of spring colour.
I’ve written an extensive guide about naturalizing bulbs that you can also read.
Front bulb gardens provide many ecological and aesthetic benefits. No matter the type of lawn, it’s easy to start planting bulbs to spruce up an otherwise empty space.
The bulbs will provide early-season pollen and nectar for pollinators when little else is blooming. Spring-flowering bulbs are some of the first flowers to awaken, providing lots of colour and texture after a sometimes gloomy winter.
Bulbs in lawns are incredibly low-maintenance. After planting, you only need to water them once to help them establish themselves. You don’t mow in the spring, as the flowers bloom. Then, the naturalizing bulbs return on their own, slowly multiplying every following season.
Here’s how my boulevard bulb garden project turned out at my previous home!
Preparing for Your Bulb Garden
Before you begin planting, you’ll want to mow your lawn ahead of time so it’s easy to dig into and map out a design.
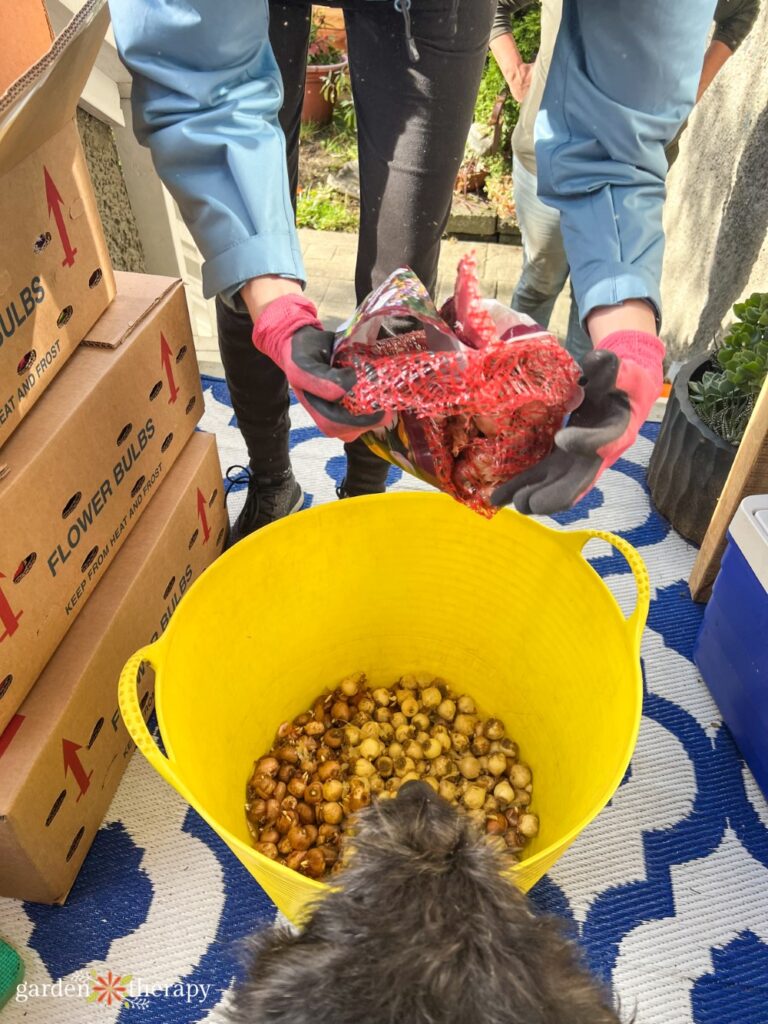
If you haven’t already grabbed your bulbs, then make sure you get them ASAP before the frost comes and the ground freezes.
For a front yard pollinator garden, make sure to include single-flower blooms. Double flower blooms are beautiful, and you can certainly plant some, but pollinators need single flowers.
Here is the mixture that I ended up planting:
- 100 Narcissus “Tete a Tete Tops”
- 200 Anemone “Blanda”
- 50 Chionodoxa luciliae “Alba”
- 100 Dwarf iris “Alida”
- 100 Dwarf iris “J.S.Dyt”
- 100 Dwarf iris “Louise”
- 100 Snowdrops “Floreo Plena”
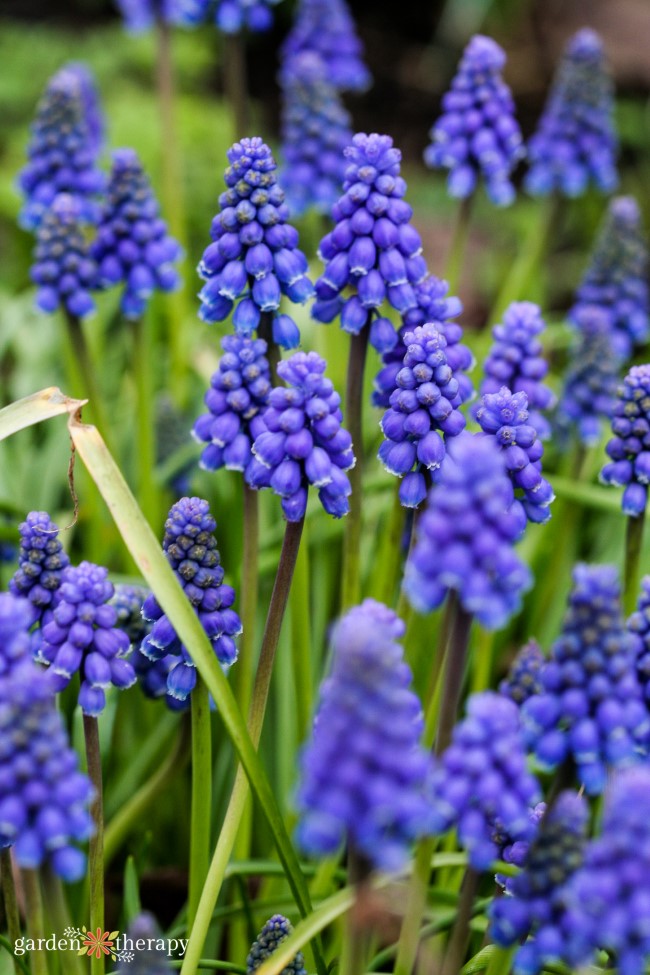
- 400 Muscari
- 200 Crocus Large Mix
- 200 Tulips
Make Your Design
My front yard is a small south-facing space. In front, there are two large trees on the city property, plus a 3-foot tall fence surrounding the yard.
So here’s what we did…

Mixed Bulb Pockets
To achieve the naturalized look I wanted, we decided to do little pockets of mixed bulbs throughout the lawn. We mixed all the bulbs together to create a much more natural appearance.
When planning out your design, you want to ensure you can still access the garden if you need to. You also want to place them in a low-traffic area so the bulbs aren’t disturbed when blooming.
For my pocket design, you can still walk across the lawn between all the bulbs that will grow like lily pads popping up in the spring.
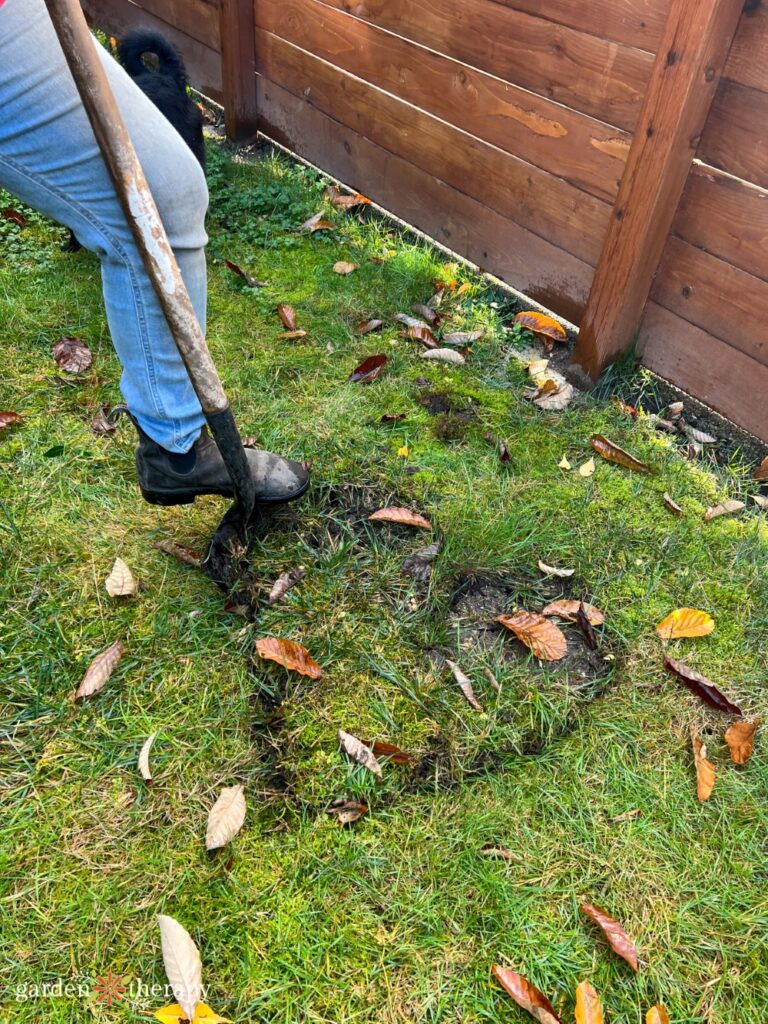
This design also allowed me to level the lawn. We found small natural depressions in the lawn (like the heart shape below) and lifted the soil. Once we placed the bulbs, we could put chunks of the lawn on top. This helped to lift the area so that the lawn is now semi-graded.
When planting a bulb garden, you want to try to place it in full sun. While the bulbs can grow in partial shade, they thrive with lots of spring sunlight.
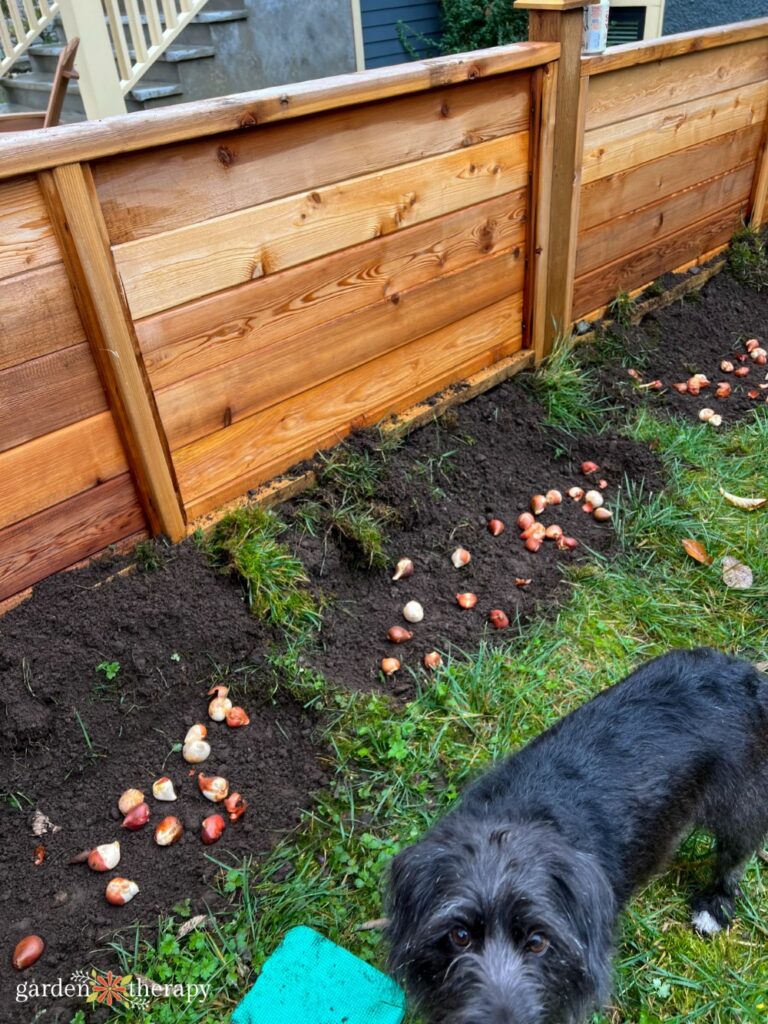
Tulip Border
In my bub garden design, I also included a tulip border. For this, I mixed 4 varieties of tulips in a wave along the fence. You can use spray paint or a hose to help you map out a design. We just went freehand and dug it up. We will see how it looks in the spring!
Here are the varieties of tulips I planted:
- “Couleur Cardinal”
- “Purple Prince”
- “Continental”
- “Sunny Prince”
Plant Your Bulbs
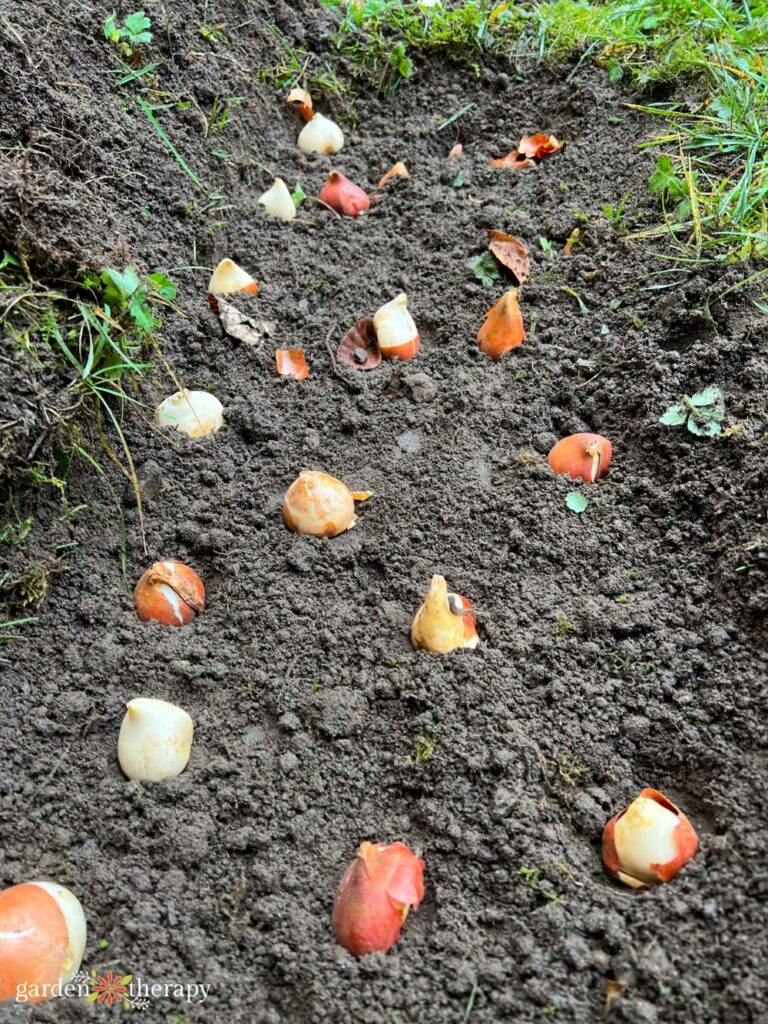
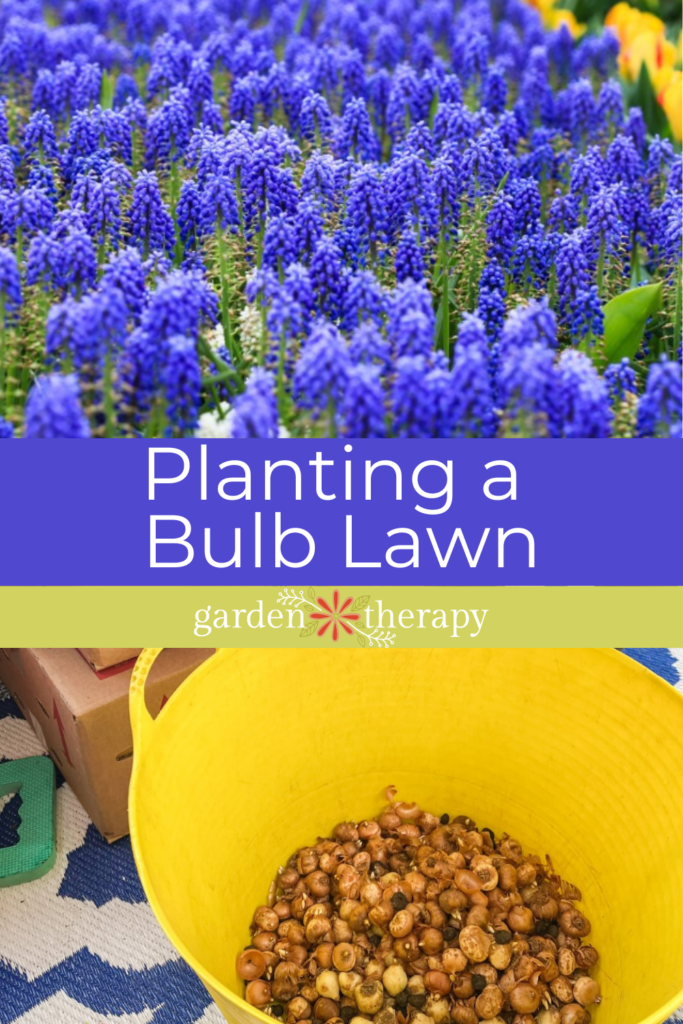
Finally, we were ready to plant! With the tulips separate, I mixed together the 1300 remaining bulbs and dug about 20 different-shaped pockets.
For the tulips, we dig about 6 inches deep, though colder climates may want to go to 8 inches deep. Most large bulbs can be planted 6-8 inches deep, while smaller bulbs can be planted 3-4 inches deep. Refer to the package for the exact planting range in your climate. I suggest grouping the bulbs based on their size when mixing them.
I then placed a couple of handfuls of bulbs, so it looked like they would fill the space quite nicely. Then, we turned them all around so that the roots were pointed down and the tips up while laughing and shouting, “Bums down!”
Then, we backfilled with the soil and placed the turf back on top. Of course, the turf was falling apart due to the heavy percentage of moss and weeds. Not enough turf roots were there to hold the structure together, so it became a mishmash of placing as many of the puzzle pieces back in as possible and topping the rest off with new soil and seed.
Yes, the lawn won’t look the prettiest after the initial bulb planting, but it does bounce back quickly. I started my project a bit later than I would want the lawn to recover well before winter, but I’m still confident it will look fabulous in the spring!
Repairing the Lawn
After planting, my lawn looked a little patchy, but truly, if you hadn’t seen us plant all those bulbs, you would never have known. I watered my lawn to help settle everything and help establish the bulbs.
Since my lawn needed some TLC in the first place, I then topped the entire lawn with more topsoil and then reseeded it with a wildflower blend in the spring.
My Methodology
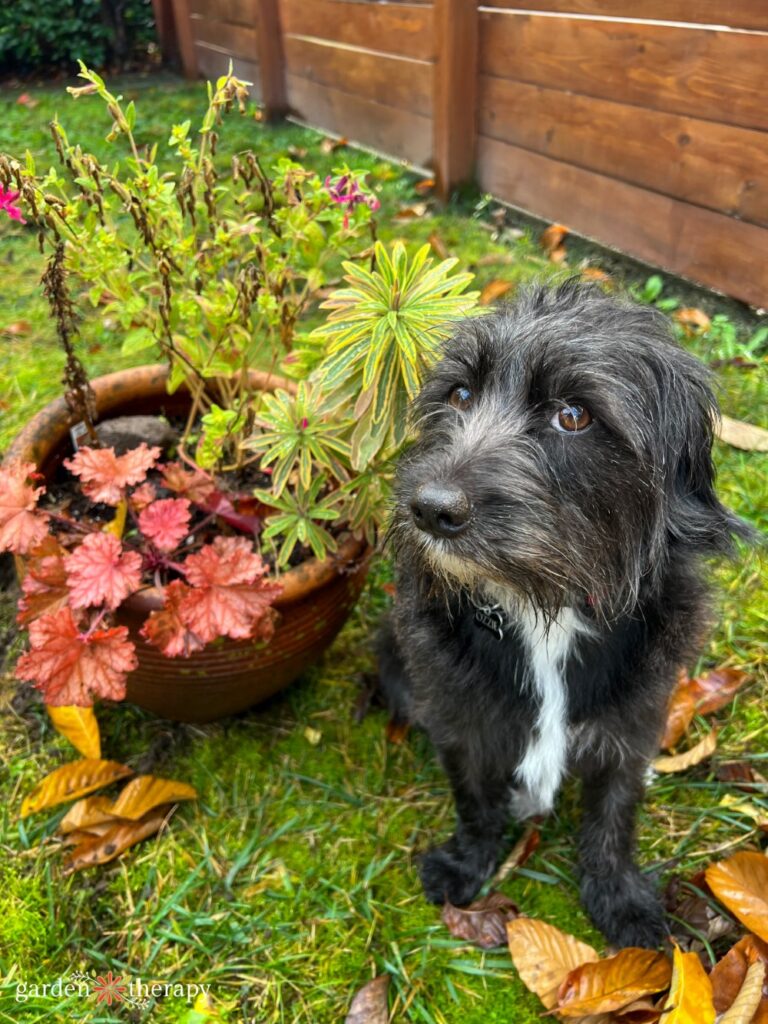
While planting my bulb garden, a friend visited for the weekend. While she doesn’t identify as a gardener, she did agree to help me. Her previous experience with bulbs was buying a package from the garden centre, bringing it home, and letting a couple of years pass. She still has that package, although I broke the news that they were now compost (but most likely dust). She had the best intentions but became overwhelmed by the spacing and location and wasn’t sure how to do it.
When we started planting, she was quite surprised that we didn’t add any fertilizer. Generally, home gardens have enough phosphorous in our soil, so adding bonemeal isn’t necessary.
Bulb fertilizers are often labelled as ‘bloom boosters’ because the high phosphorous levels encourage plant flowering. If you notice that your container plants aren’t flowering as much as they should be, adding additional phosphorous could be the key to more blooms.
That being said, the ground soil in a home garden probably has adequate amounts of phosphorous. Adding more than the plants need can run off into water systems, creating environmental issues.
Even more concerning is that phosphorous is a finite resource, and humans are consuming it for agricultural purposes at alarming rates. While farmed land may need phosphorous to be replenished, in the home garden, it is only needed when a soil test shows a deficiency or when fertilizing plants in potting soil.
Growing a Natural Lawn
I was very surprised when I lifted the grass to see how healthy the soil was below. It was a beautiful surprise full of microorganisms and some organic matter. It was light and fluffy, dark black, and well-hydrated. What a treat!
Immediately, I was encouraged that this would make a beautiful garden because the soil was so healthy.
Since I garden from a permaculture standpoint, I try to make all my projects regenerative. Topping the soil would encourage plants to grow besides turf and bulbs. Those wild plants are great for the soil, improving the nutrient mixture to help the bulbs flower.
Over the years, I’ll keep adding some nice compost and continue to support the soil health with the addition of microclover, turf, and wildflowers.
Then, the bulbs in the lawn will become more like a meadow space and naturalize in a way that looks effortless, all while helping out local wildlife.
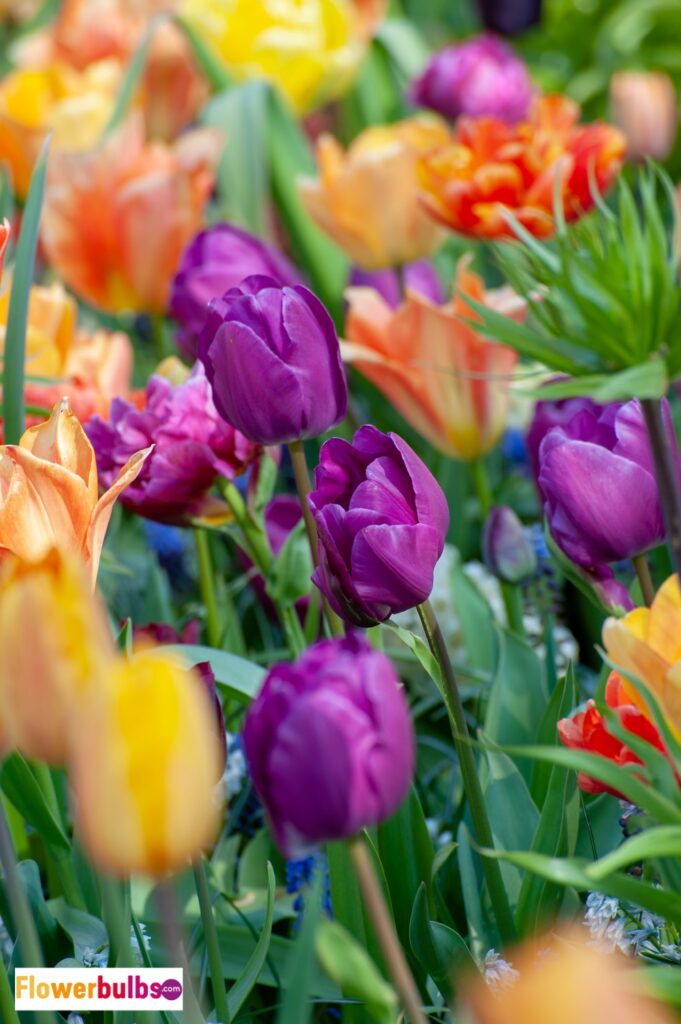
My Bulb Garden Results
When I first wrote this post, I had to wait months to see how it would turn out. I’m happy to say that it turned out spectacularly, and I’m now awaiting my third spring with my bulb lawn.
I wrote a follow-up post about everything I learned from planting this lawn, and what I would have done differently. I highly recommend reading that next for more tips.
In the meantime, here’s a sneak peek at how it turned out!
FAQ About Bulb Gardens
You want to plant your bulb garden before the first frost and the ground freezes. Here are some recommendations for zones from Flowerbulb.eu
Zone 4-5 — September to October
Zone 6-7 — October to early November
Zone 8-9 — November to early December
Zone 10+ — late December to early January
In the spring, do not mow. Wait as long as you can until your foliage turns yellow. Then, you can mow normally. You want to avoid mowing until the plant dies, as it needs to gather energy to store in the bulb so it returns the following year. After blooming, your bulb lawn will look like a regular lawn.
Squirrels love dirt and loose soil. So, after planting bulbs in the lawn, you’ll notice that squirrels might come flocking to your garden. You can peg chicken wire down over your lawn for the first few weeks until the grass appears normal again. You can also sprinkle grass seed over the top to help encourage the grass to fill back in quickly.
Planting at the right depth also means the squirrels might not dig that deep. I have a hard time picturing squirrels digging down 6 inches!
Watch this video to see how I handled the squirrels in my bulb garden last year.
More Tips for Growing Bulbs
- Naturalizing Bulbs for Spring in the Garden & Lawn
- The Unknown World of Tulips: Types of Tulips to Grow in Your Garden
- Beyond Tulips: 12 Extraordinary Spring Flowering Bulbs to Plant in Fall
- How to Store Bulbs Over Winter: Save Your Summer-Flowering Bulbs
A city girl who learned to garden and it changed everything. Author, artist, Master Gardener. Better living through plants.


I planted crocus, daffodils and tulips. It’s hard to choose a favorite, but I like daffodils the most.
Tulips are my favorite and I also enjoy daffodils because they are one of the first bulbs to bloom in the spring here in Kentucky.
I like Dwarf Iris Alida, Anemore Blanda, Chinodoxa Lucilia, and tulips of all sorts. Thanks
Tulips are my favorite bulb plants. Does anyone have a way of marking your bulb plants so you do not dig them up when planting perennials or annuals in your garden? I have often dug up bulbs while planting other plants.