It is a wonderful feeling to discover a gardening hack that saves you time and effort without decreasing the health of your garden. Imagine the extra time you would have by adapting to no-till gardening! But, guess what? Not only can you save time with a no-till garden, but you can actually improve the quality of your soil that way too! Win-win!
If you are looking for some of the best gardening hacks when it comes to growing an organic garden, look no further!
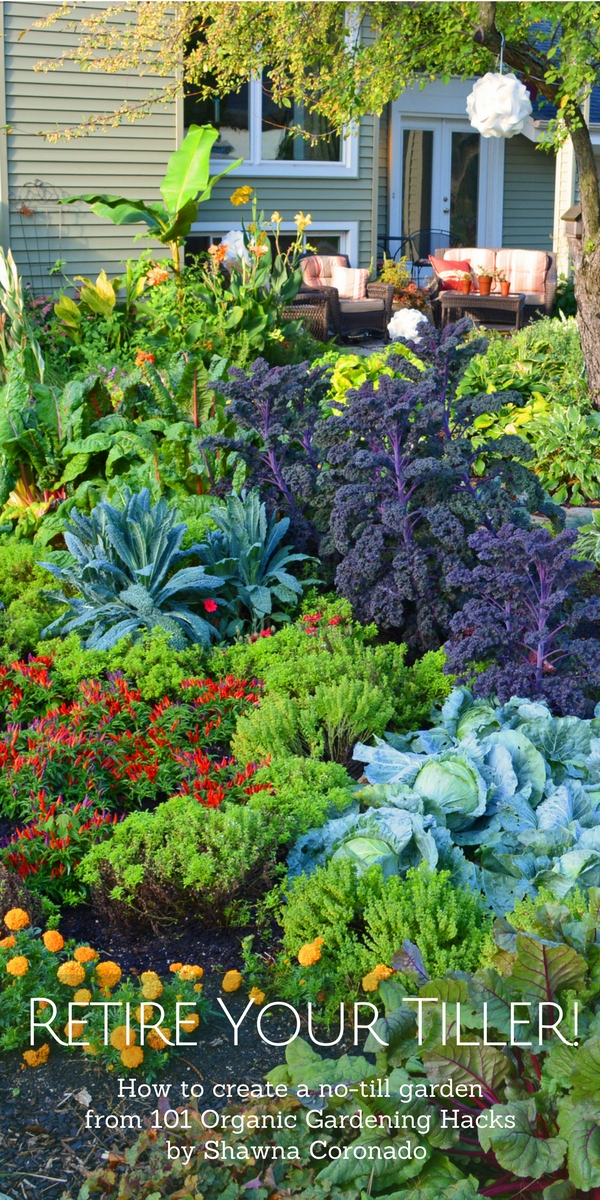
My friend Shawna Coronado is an incredibly talented gardener, promoter of green lifestyles, and garden-hack pro. Today, Shawna joins us today to share the details on how to create a no-till garden from her wonderful book 101 Organic Gardening Hacks.
Read on for Shawna’s methods on no-till gardening and grab a copy of the book. If you like this time-saving, soil-improving, organic gardening hack, you’ll love the other 100!
Note: This post was originally a guest post from Shawna, and was updated in April of 2020 to add more information about no-till gardening. Quotes used throughout are excerpted from Shawna Cornado’s 101 Organic Gardening Hacks © by Shawna Coronado. Used with permission from Cool Springs Press.
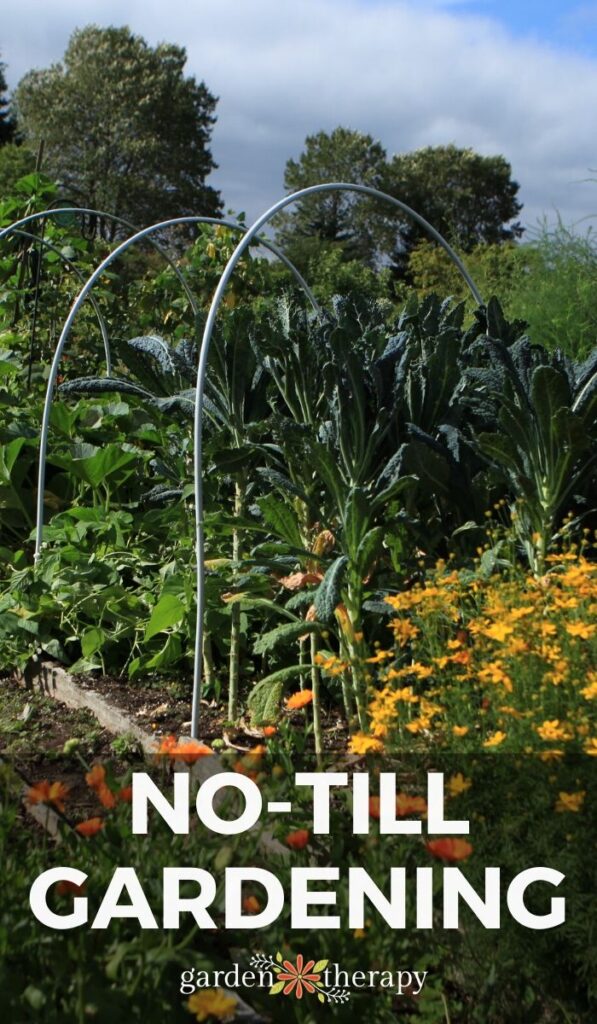
No-Till Gardening Guide
“If you love your soil, stop flipping it over.” – Shawna Coronado
Sometimes the best way to improve something is to let it be. A no-till garden is a perfect example! And, creating one also means less work for you.
Imagine building a large garden without having to turn the soil over in your garden beds.
According to Shawna, “Turning soil kills the microbes living beneath the ground that contribute to a healthier root system by living symbiotically with your roots. There are billions of bacteria, millions of fungi, thousands of protozoa, and scores of other nematodes and organisms found in one small tablespoon of healthy soil.”
Hacking your garden soil with a few simple no-till tips can make for hugely successful growing because you keep those vital creatures alive and happy in your garden beds.
A no-till garden has other benefits too!
“Because you are consistently smothering weeds with mulch or compost, they struggle to grow there, and an undisturbed, enriched soil requires far less fertilizer in order to support successful plants,” Coronado said. “The no-till technique works in almost any garden space and can help grow extremely healthy organic vegetables and herbs.”
No-Dig Organic Garden
Before I turn the reins over to Shawna to share how to create your own no-till garden, I wanted to tell you a little bit about my good friend, Kevin from Epic Gardening. As an urban gardener myself, I was delighted when he took the time to review my new book, Garden Alchemy, and I let him know about this no-till gardening post.
He shared that he had gone to visit Charles Dowding’s legendary no-dig garden in the U.K. and had even done a video with him!
So, if you are wondering what a no-dig organic even looks like, take a look at this video below and follow along with Kevin as he tours the amazing Charles Dowding’s organic no-dig garden!

That was amazing. Thanks for sharing, Kevin!
Now, are you ready to start your own garden using this technique? I am!
Back to you, Shawna!
How to Create a No-Till Garden

Here are some of the best tips and hacks I have learned from Shawna when it comes to creating my very own no-till garden.
Shawna says: “Instead of turning your soil over for a garden, start by removing all of the grass, either by stripping the sod or smothering the grass (see Hack 79: “Kill Grass by Smothering It”).”
Here is the process of how to create a no-till garden, directly from Shawna herself:
1. Spread A Layer of Compost
The first thing you want to do is spread a 2-inch layer of rotted manure or compost on top of the bare soil. Do not turn the soil over. That’s it. No tilling, no digging. Just spread this out.
2. Dig Holes
Next, you are going to dig holes to plant your plants. How deep will you dig? This depends on your plant! Look up the planting techniques for each plant before you dig.
3. Mulch The Garden
If this is your first year, then you need to mulch your garden. Use wood chips or any another natural mulch such as pine needles, rotted leaves, or straw. Mulch protects your garden from invasive weeds so make sure to not skip this step.
4. Leave the Roots In the Ground
After the harvest at the end of the season, do not pull out the vegetable or herb plants by the root; cut their stems at the base of the soil and leave the roots in the ground to overwinter and eventually rot. Compost the cut plant matter.
5. Spread Out More Compost
When you are ready to plant your garden again in the next planting year, cover the garden with another 2-inch layer of compost. You won’t have to till your garden or turn the soil. Just spread out more compost and you are ready to create your garden all over again.
6. Do Not Pull Out Roots
When planting new vegetables and herbs, only pull out roots from the previous year if they block an area for a new plant. Be sure to rotate the crop so that no plant from the previous season is planted in the same location in the current year.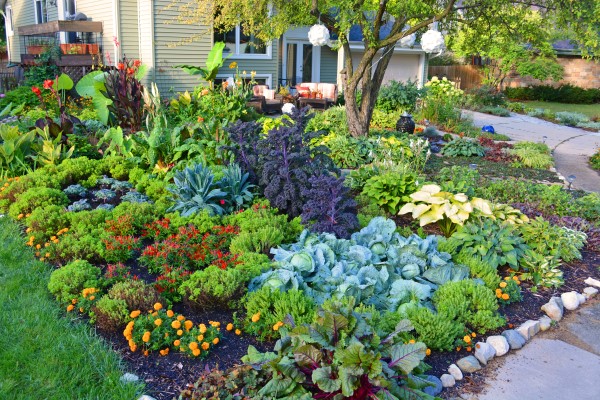
7. How to Take Care of Soil In Each Planting Year
There is a specific method you need to follow in each consecutive planting year. Shawna has already shown us above how to plant a no-till garden in the first two years.
Here is what you do in the 3rd planting year and beyond.
- In your third planting year, follow the same practices, but add a layer of mulch instead of a layer of compost.
- In your fourth planting year, follow the same practices, but add a layer of soil instead of a layer of mulch.
- In the fifth planting year, follow the same practices, but add a layer of rotted manure instead of a layer of soil.
- In the sixth planting year, follow the same practices, but add a layer of compost instead of rotted manure.
- Continue every season layering up the compost, mulch, soil, and rotted manure without ever turning over the soil.
No Till Gardening: Garden Compost
One of the most important parts of a no-till garden is the compost!
You can actually make your own healthy soil out of old fruits and vegetables. If this is your first time ever composting, I suggest reading this composting guide first. It demystifies the entire process and explains it so you can do it.
There are three parts to composting: energy materials, bulking agents, and air and water. Once you learn the easy recipe, you can start making your own compost.
Then, you’ll turn this compost into nutrient-rich soil that will give you the no-till garden of your dreams!
More Gardening Tips
Whether it is your first garden or you are just looking for tips as an experienced gardener, I hope you find these articles helpful.
About Shawna
Shawna Coronado is an author, columnist, blogger, photographer, and spokesperson for organic gardening, green lifestyle living, and culinary preparation who campaigns for social good. Shawna’s goal in authoring gardening and green lifestyle books is to promote a world initiative to encourage healthy and sustainable living. She was featured as a Chicago Tribune “Remarkable Woman” and speaks internationally on building community, simple urban garden living, and green lifestyle tips for the everyday person. Shawna lives in the western suburbs of Chicago where she has a famous front lawn vegetable garden. You can learn more about her at www.shawnacoronado.com.


So I started mine last year, but now I’m wondering, do I still use the cardboard every year? It doesn’t look like it but I have weeds so how do I deal with that without tilling?
Our first year we used a lawnmower to cut the grass and weeds as low as we could. Then layed out our cardboard and added compost on top of that. We barely had any weeds, and would have had even less if we had mulched after planting. The following year you should not need any cardboard, only a few inches of added compost. If your weeds are out of control, you may want to treat it as though it is your first year and start with the cardboard again, topped with compost. Just be sure to mulch really well on top of that once you get everything planted and your seeds have sprouted. Then each subsequent year just add a few inches of soil, compost, mulch or rotted manure being sure to rotate which one you are using each year. Over time it will layer up like an earth lasagna!
There are 4 steps to till a garden without a tiller. Step 1: make sure it’s the right time for digging. Step 2: improve the soil’s quality. Step 3: dig your first row. Step 4: dig your next rows.