I like my backyard to be a happy, healthy space for everyone who visits it, and that includes local birds! Providing a habitat for wildlife benefits you as much as it does them. Birds help to pollinate plants and eat up bad bugs, so they help your garden out in return for giving them a place to stay.
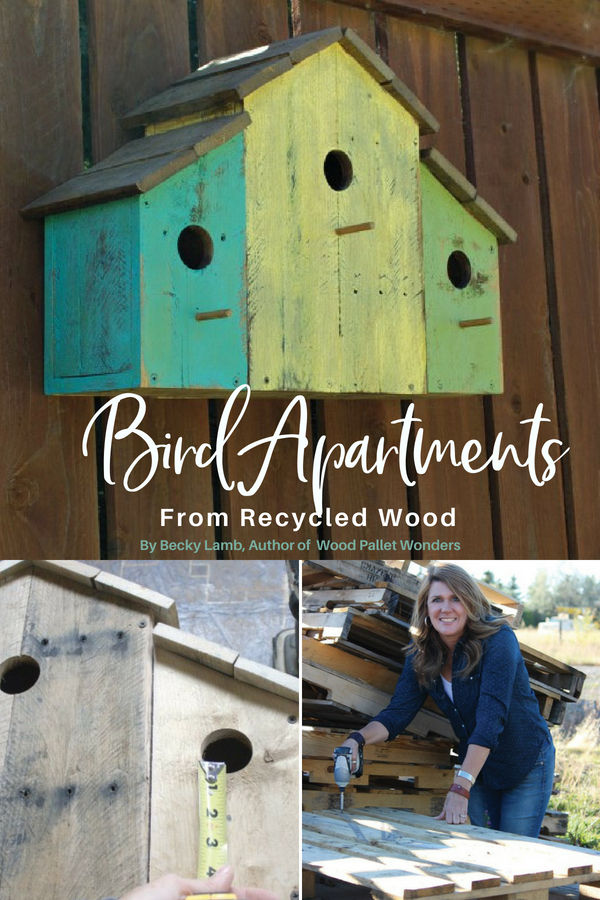
These cute bird apartments are a stylish way to house local birds without taking up a lot of space, and they are made from upcycled pallets so you can feel good about making a project that reduces waste. This project comes from the amazing book Wood Pallet Wonders by Becky Lamb, which is full to the brim of creative ways to use pallets around the home and garden.
How to Make Birdhouse Apartments
By Becky Lamb
We love our feathered friends, and each year when I see the first robin, I know spring is just around the corner. Encourage birds to nest in your yard by building an adorable “apartment” for them. This birdhouse provides a safe and cozy nesting place for a trio of birds.
Materials & Tools
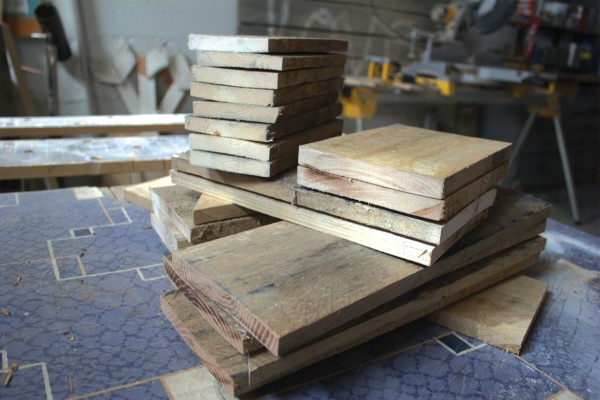
- Four 48” x 5¼” x ½” pallet boards
- Two 48” x 3½” x ½” pallet boards
- One 48”-long ¼” dowel
- 1¼” screws
- 1” screws
- Outdoor paint
- Paintbrush
- Clear outdoor sealer
- Stain
- Two heavy-duty D-rings
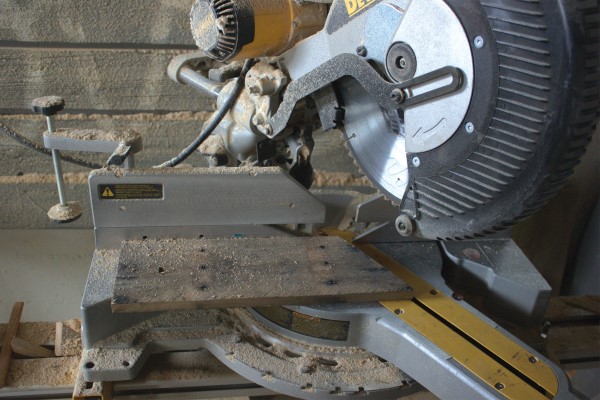
- Miter saw
- Palm sander
- Drill
- 1½” hole saw bit
- 19/64” drill bit
- Tape measure
- Clamp
Time: 1½ hours, plus dry time
Make it!
Measure and cut four 15” x 5¼” x ½” pallet boards and four 10½” x 5¼” x ½” pallet boards from two of the 48” x 5¼” x ½” pallet boards. These will make the front and back of the birdhouse.
Measure and cut one 21¼” x 5¼” x ½” pallet board from the third 48” x 5¼” x ½” pallet boards. This will be the base of the birdhouse.
Measure and cut two 6½” x 5¼” x ½” pallet boards and two 11¼” x 5¼” x ½” pallet boards from the remaining 48” x 5¼” x ½” pallet boards, and eight 7½” x 3½” x ½” pallet boards from the 48” x 3½” x ½” boards. These will be the walls and roof of the birdhouse.
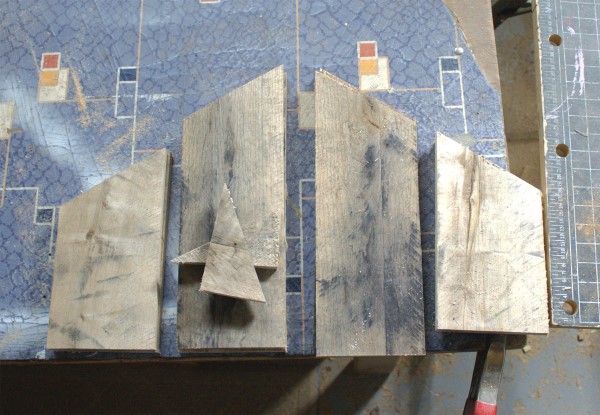
Cut three 3” pieces from the ¼” dowel. Sand all of the cut pallet board pieces.
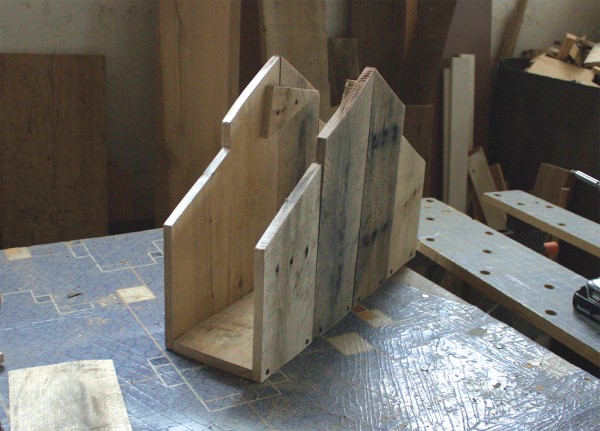
Using a miter saw, cut 20-degree angles from one end of each of the 15” x 5¼” x ½” and 10½” x 5¼” x ½” boards.
Save two of the triangles that you cut off.
Using 1¼” screws, attach the four front boards to the 21¼” x 5¼” x ½” pallet board, drilling two screws through each board. To keep the boards sturdy while screwing, prop them up on one of the 11¼” x 5¼” x ½” wall boards.

Using 1” screws, secure the top two middle boards together with one of the triangles you saved in step 5.
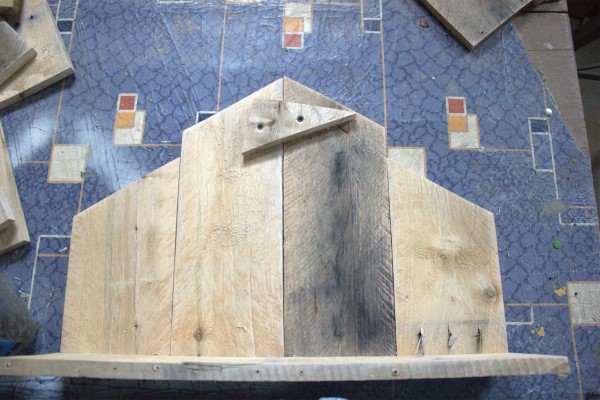
Before adding the four angled boards to the other side of the base, use 1” screws to connect the two middle boards in the second set of 10½” x 5¼” x ½” angled boards with the second triangle. You need to do this before attaching the boards to the bottom of the birdhouse on the other side, because the drill will not fit between the sides.
Attach the second set of angled boards to the other side of the base of the birdhouse with 1¼” screws.
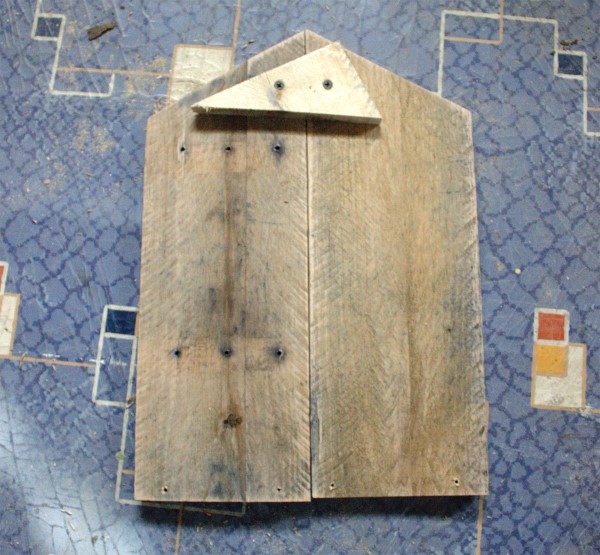
Place the two 6½” x 5¼” x ½” boards on the ends of the birdhouse. Use a clamp if necessary; I did not need one. Secure the boards in place with two 1¼” screws drilled through the front and back sides of the birdhouse.
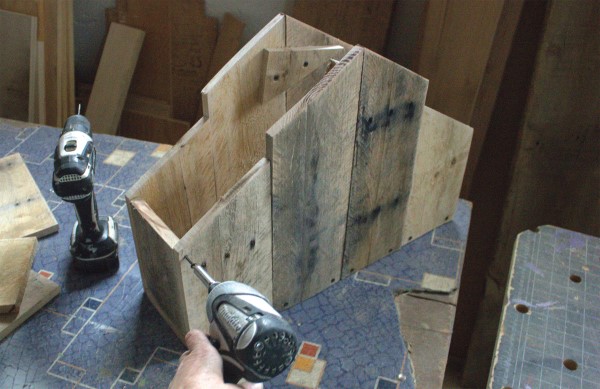
Place the 11¼” x 5¼” x ½” walls inside the birdhouse, separating the shorter angled boards from the taller ones. Hold in place with a clamp.
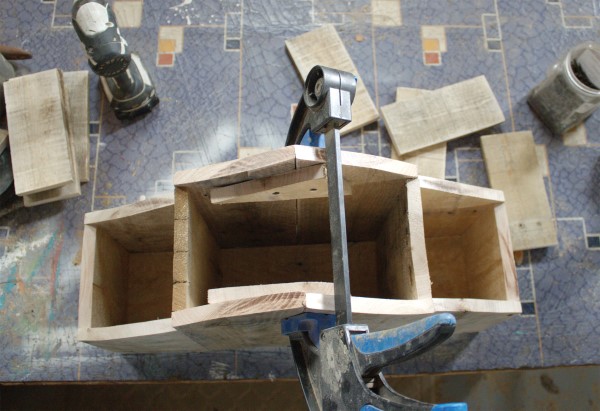
Secure the middle boards using two 1¼” screws per side, drilled through the front and back sides of the birdhouse.
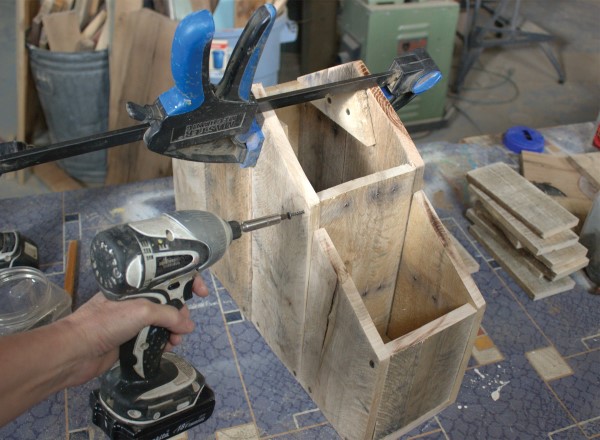
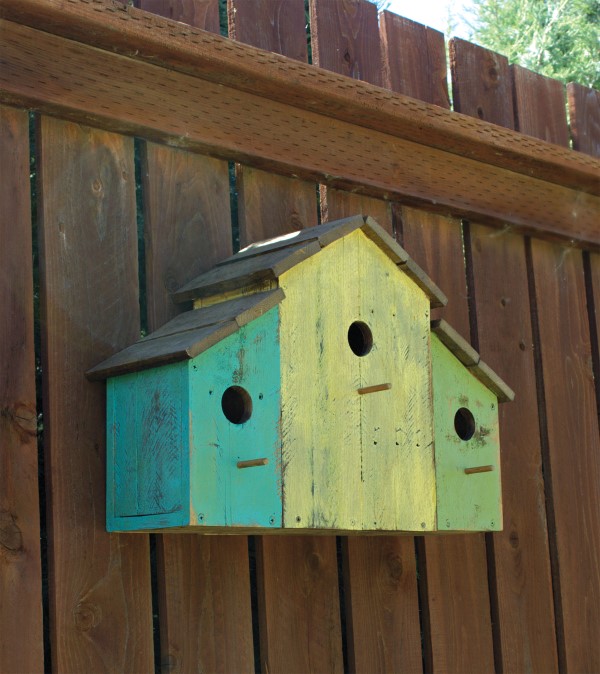
Measure and mark 4¾” up from the bottom of the birdhouse on the shorter birdhouses and 8½” up from the bottom of the taller middle birdhouse. Using the 1½” hole saw bit, drill a hole at each mark.
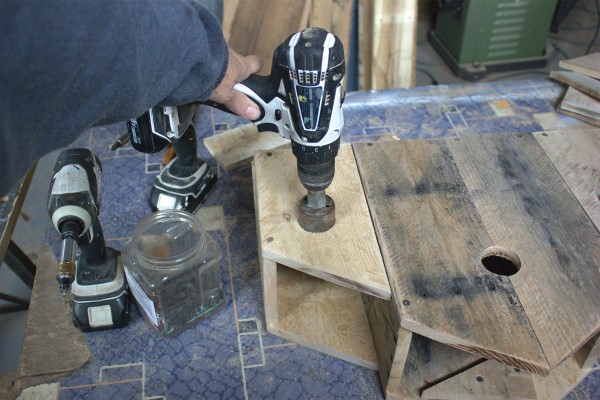
See the Pallet Pointers at the end of this post if you want to change the size of the opening for the type of bird that you hope to have nest in the birdhouse. Hand sand around the hole.
Attach the eight 7½” x 3½” x ½” boards to the angled tops to create the roof. I used only two 1¼” screws for each roof piece so that they are easy to remove when you clean out the birdhouse in the fall. You will notice there is a small space between the tallest birdhouse and the roof of the shorter birdhouses, which is not noticeable and will not affect the birds.

Measure and mark 2” down from each birdhouse opening.
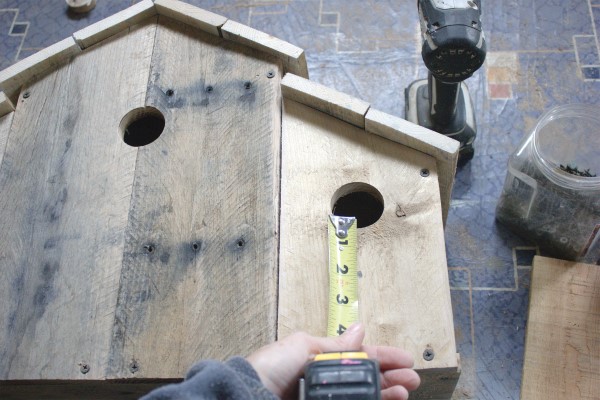
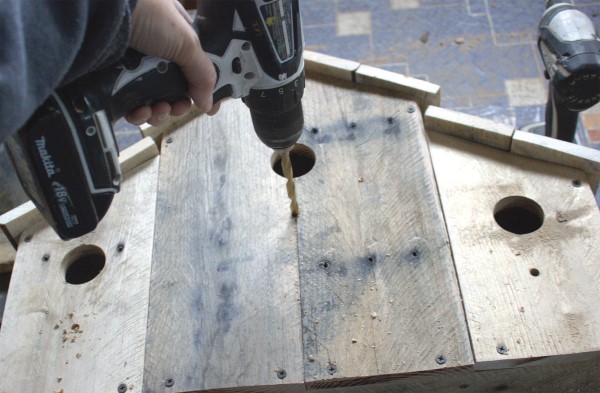
Using the 19/64” drill bit, drill a hole at each mark for the dowel perch.
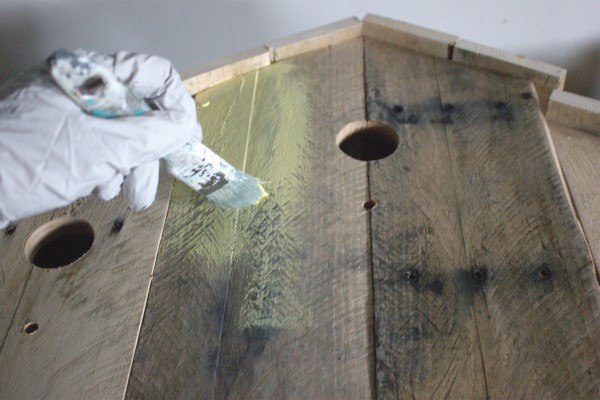
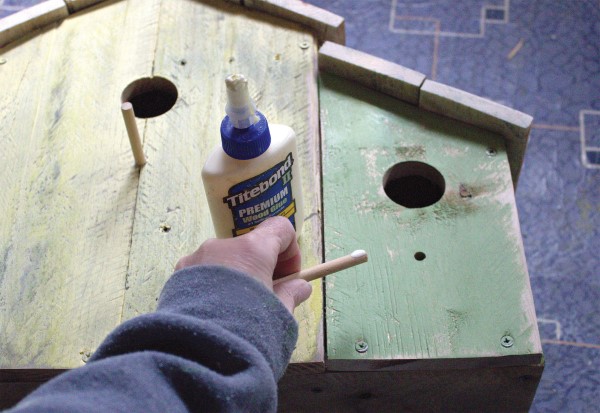
Before adding the perches, paint the birdhouses as desired. I painted each one a different color.
When the paint is dry, dip each 3” dowel in wood glue and place the dowels in the holes. It should be a tight fit, and you may need to “screw” the dowel pieces in.
To finish the birdhouse, I stained the roof and perches. Finish with a clear coat of outdoor sealant.
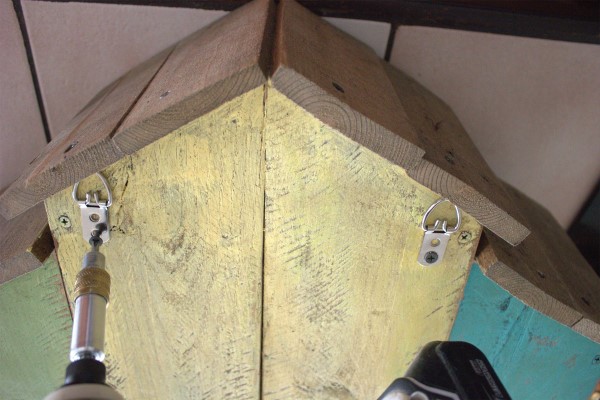
Attach two heavy-duty D-rings on the back to hang the birdhouse on a fence or the side of your house or shed. You also could secure the birdhouse to the top of a wood ladder to set in your garden area.
Pallet Pointers: Birdhouse Openings
If you have specific birds that you’re hoping will move in, you can customize the entranceway to your bird apartment to be just the right size for different types of birds. The measurements below give you the perfect openings for some common backyard birds of North America.
- Ash-Throated Flycatcher: 1½”
- Barn Owl: 6”
- Black-Capped Chickadee: 1⅛”
- Carolina Chickadee: 1⅛”
- Carolina Wren: 1½”
- Downy Woodpecker: 1¼”
- Eastern Bluebird: 1½”
- House Finch: 2”
- House Wren: 1¼”
- Northern Flicker: 2½”
- Prothonotary Warbler: 1⅛”
- Purple Martin: 2½”
- Tree Swallow: 1⅜”
- Tufted Titmouse: 1¼”
- Violet-Green Swallow: 1½”
- White-Breasted Nuthatch: 1¼”
Printed with permission from Wood Pallet Wonders: DIY Projects for Home, Garden, Holidays and More by Becky Lamb, © 2017. Published by Ulysses Press. Photography provided by Ulysses Press.
About the Author
Becky Lamb is a builder, junker, repurposer, blogger, crafter, teacher, wife, and mother of three. She likes to say that she was weaned on decoupage glue and feels blessed to be raised by a mom who decorated their home on a very limited budget. Becky has been crafting and creating as long as she can remember and discovered her love for building after “retiring” in 2000 from teaching elementary school. Her husband patiently taught her to use power tools and she has continued to hone and develop her skills and style. When not building, Becky enjoys spending time outdoors with her family in her home state, Montana.
Related Posts:
- Bee a Good Garden Host: Make a Bee Bath
- Put Backyard Birds on a Pedestal with this Flowerpot Bird Feeder
- Build a Bug Hotel
- Attract Butterflies, Bees, and Hummingbirds with a Small-Space Patio Pollinator Garden
- How to Make a Butterfly Feeder