No greenhouse? No problem! You can get started as early as February on growing your fresh greens by utilizing a greenhouse. Even small-space dwellers can start seeds outdoors with a few tips and these clever umbrella mini greenhouses.
Have you ever dreamed of having your own greenhouse? I think every gardener at some point in their life has taken a look at their garden and fantasized about where they would put their very own greenhouses.
A common misconception about greenhouses is that they are expensive and difficult to build. Many greenhouses can be made out of recycled glass, wood, and plastic. There are also many DIY kits available online too.
The other misconception is that only big backyards have room for a greenhouse. I think that everyone ranging from balcony gardens to sprawling backyards can find room for a greenhouse!
How to Make DIY Mini Greenhouses
All it takes is a little creativity and an assessment of your space to know what you need. These mini greenhouses are tiny and very affordable, needing only a balcony or patio to grow. While greenhouses can be an aesthetic part of your yard, they are also very practical.
Greenhouses help to stabilize growing conditions for plants. By shielding crops from excess cold, heat, nasty weather, and even pets such as bugs or birds, you can have happy plants almost year-round. These mini greenhouses help me to control the temperature and humidity needed to get seeds to germinate, starting as early as February!
This project is just one in the Seed Starting Series here on Garden Therapy. Check out all the projects and advice as you plan your garden this year. A great place to start is the Ultimate Seed Starting Guide.

Find Your Container
Containers are considered difficult environments for plants. When plants are planted in the ground, the soil helps to keep them warm at night and cool during the day. Once in a container, the limited amount of soils means the plants heat up and cool off quickly. That’s why these mini greenhouses are so important in helping to regulate the temperature for the seedlings to grow.
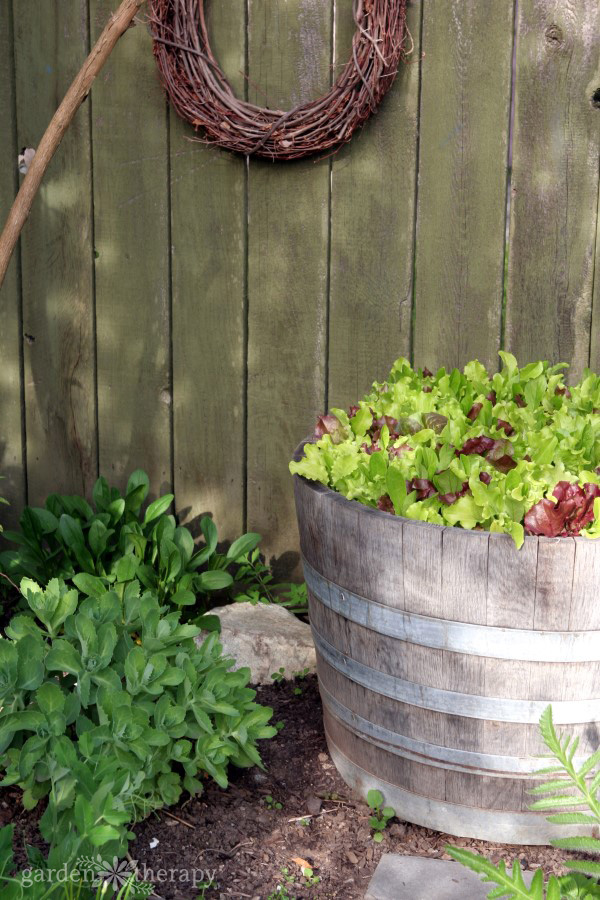
The size, material, and placement of the container can affect how your plant grows. For example, my climate conditions are chilly and wet in late winter, with a chance of snow/frost. With this in mind, I chose large wooden containers like raised beds or wine barrel planters for my early seeds. The moisture can move through the wood, meaning the soil can draw from the moisture in the air or release the excess. The large size of the container means the soil will stay warmer for the seedlings.
Prep the Soil
If you have a container with last year’s soil, turn it with a shovel or garden claw to fluff it up and mix from bottom to top. Next, we’re going to need to replenish the soil! Dig in a layer of compost six inches below the surface of the soil to prepare some future nutrition for the seedlings as they grow up.
Finally, cover the top layer of soil with a light, moisture-retaining material like seeding mix, peat moss, or coconut coir. The little seeds will have the moisture they need to germinate and the soil will not develop a crust too hard for the seedlings to emerge from.

Plant Your Seeds
In February, germination rates tend to be lower, so I plant densely. Typically, I will use a whole packet of lettuce seeds per wine barrel. Growing time is much slower at this time of year and thinning is fun—baby salad greens are the first vegetables I get to eat from my garden so I plant many and eat many.
This method also ends up being very economical as well. From one packet of lettuce seeds, I will thin and transplant lettuce all over the garden (and give lots away to friends), giving me a steady supply of salad from March through July.
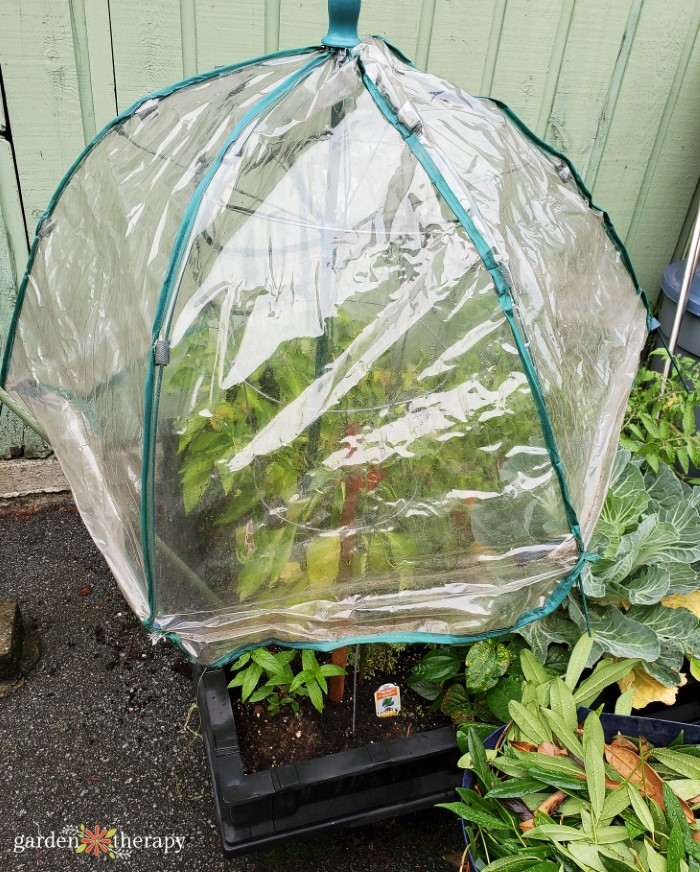
Cover
I was lucky to find some great greenhouse covers at my local garden centers for pretty reasonable prices. They have lasted me many years and I use them throughout each season in many different ways, from early frost protection of tomatoes to warming peppers and eggplants to covering my rosemary each time it snows.

Tips for Buying or Making Mini Greenhouses
These umbrella greenhouses work great for me, but there are a ton of different mini greenhouse options out there to choose from. Here are a few tips on what to look for when buying mini-greenhouses:
- It doesn’t matter if it has a vent or not, generally, you won’t use it.
- Buy one with plastic or rust-resistant parts—the ones that look the most like umbrellas have the same metal latching mechanism that an umbrella does and it will undoubtedly rust and become unusable in no time.
- Greenhouses with a center stake are best (over the ones with pegs to hold down the edges). You will lift the umbrella regularly to water, check the plants, and give them some air. This will be frustrating if you have to find and reinsert the pegs each time.
- The best greenhouses fold up for storage when not in use.
Update: because so many of you have asked where to buy one, here are some links: Umbrella Greenhouse![]() and Folding Greenhouse and Pop Up Greenhouse.
and Folding Greenhouse and Pop Up Greenhouse.

Venting and Watering
Managing the health of plants under mini greenhouses will be up to you as a gardener to decide what is needed. Weather and temperature conditions vary from year to year, zone to zone, so you need to check in on your seedlings frequently.
Rain will not water your plants for you, so it is now up to you to decide when to water. If it is getting too moist or hot inside, you can lift the greenhouse slightly from the ground or know that it’s time to remove the greenhouse for good.
Hardening Off
When the seedlings have their first true leaves and the weather is starting to warm up, I tend to start hardening off my seedlings. Remove the cover for a few hours each day, increasing the time slowly until they have a full day in the outside air uncovered.
I still cover the containers at night until my magical gardener’s sense tells me that they will be safe in the moonlight by themselves. Don’t worry, your magical gardener’s sense will only get better over time!
Thinning & Harvest
Om nom nom. This is the most rewarding part: start cutting and eating the plants by snipping seedlings at the base with sharp scissors to make room for the other plants to grow bigger. Baby lettuce, radishlings, and pea shoots are delightful in the spring.
Munch on snow peas in the garden while you plant other things and use them to get your dog to do tricks (my dogs LOVE fresh peas). And if you are like me, you’ll have so many that you’ll schedule in a 10:30 salad each day just to keep up with it. Enjoy!


where can I buy these garden umbrellas pictured on your site?
I put some links above, but it seems that they are all sold out. I can’t locate them online anywhere else, so perhaps look for a clear umbrella instead?