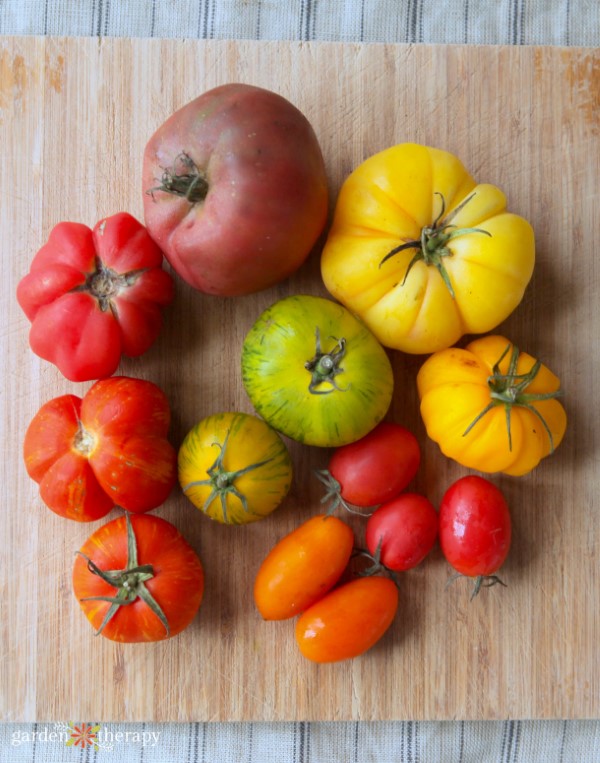
Forget seed catalogs, I’m shopping for my tomato seeds at the farmer’s market. Walking through the colorful displays of produce at my local farmer’s market, I’m brimming with anticipation for the next gardening year. The heirloom tomatoes that I pick out today—given they pass the all-important taste test—will be the garden bounty of my future.
Saving heirloom tomato seeds brings back those memories of science classes: beakers and safety goggles, anticipation and disgust, curiosity and pride. The seeds can’t just be scooped out and dried; they need to be removed with all the slimy tomato guts and left to ferment. The gross factor of fermenting these tiny seeds is about as fun of a science experiment as you can get, making it an ideal project to do with kids.
Related: Getting Back to Basics with Seed Saving
Now you may be asking yourself, “Why on earth do I need to ferment the tomato seeds? Can’t I just scrape them onto a paper towel and dry them?!” The answer is that fermenting the seeds is copying the natural process the tomatoes would go through to reproduce. The membrane around the seeds prevents germination and can carry disease. By fermenting it, it sterilizes the seeds and thus protects the next year’s plants. In addition, it gets them ready for winter storage so they will be primed for good germination rates when the time comes.
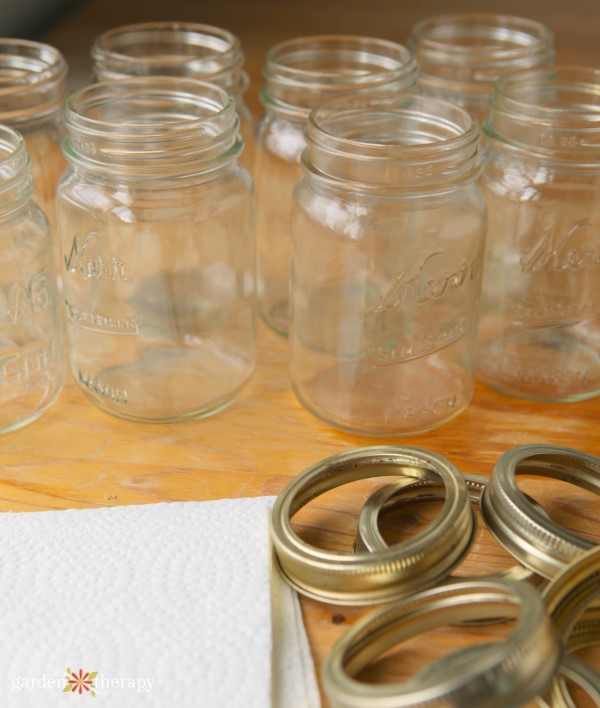
Here is What You’ll Need:
- Heirloom tomatoes
- Knife and spoon
- Mason jars and rings
- Paper towel
- Pen or marker
- Fine-mesh sieve
- Paper or glass plates / bowls for drying
- Coin envelopes

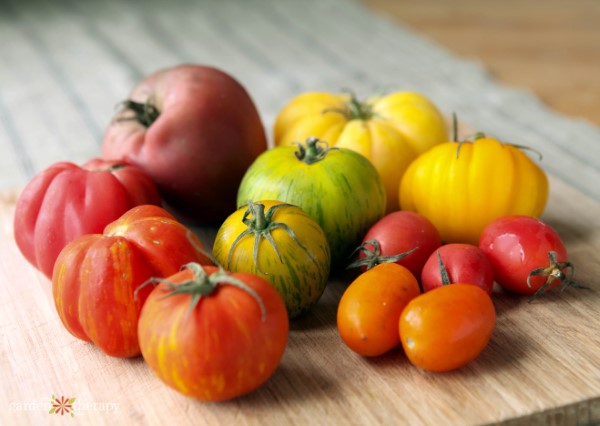
1. Choose Your Seeds
The most important part of saving heirloom seeds is selecting the best fruit to begin with. Whether you are purchasing your tomatoes or have grown your own, you should look for the best visual example of a variety: perfect color, size, and shape. Ensure there is no disease or pest damage visible, and don’t forget to taste them. Yummy tomatoes make seeds that make yummy tomatoes.
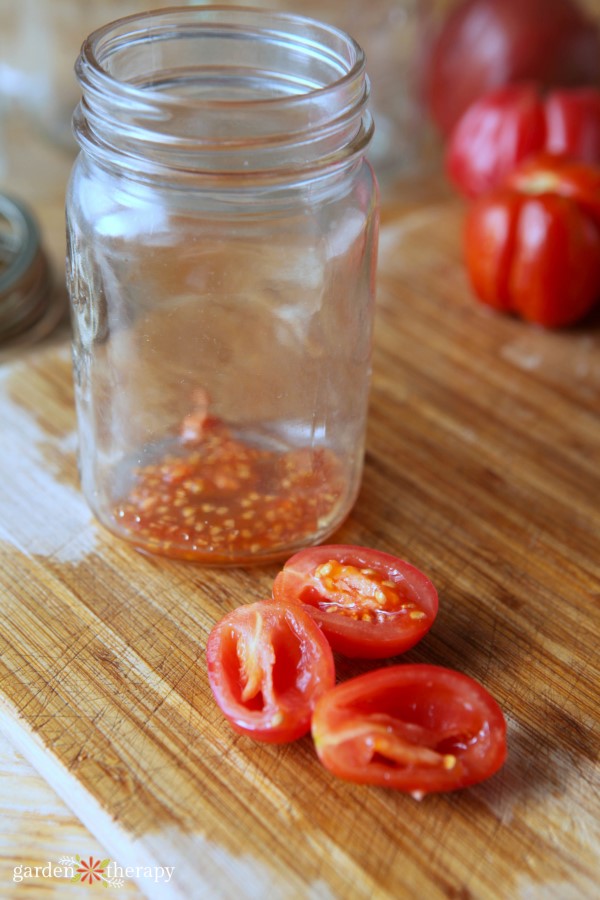
2. Scoop Out the Guts
Gently cut your perfect tomato into sections.

Grab a spoon and scoop out the seeds and the gel-like membrane that they are surrounded by. This whole glob goes right into the Mason jar so it’s going to get a bit messy. Fill up each jar with about ¼ cup to ½ cup water, just enough to cover the goop.
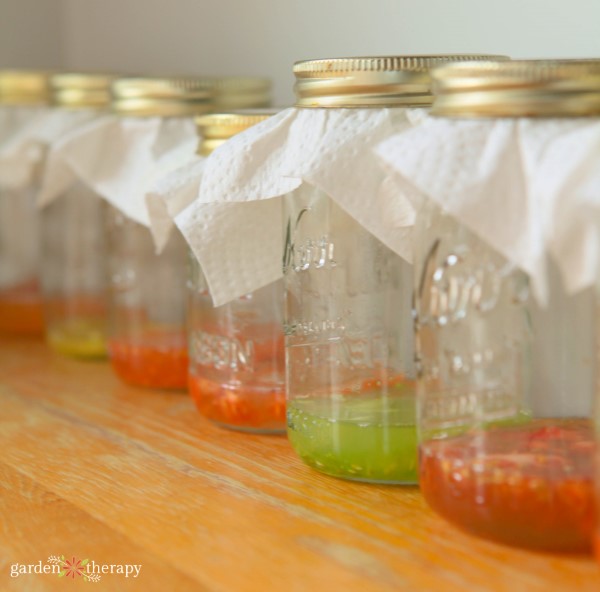
3. Cover and Label
Write the variety name on a piece of paper towel folded square, and secure to the lid by screwing on the ring over top. This allows for air to circulate to the mixture as it ferments, but also makes sure you don’t forget the variety.

4. Store in a Warm Place
Now set the Mason jars someplace warm, out of direct sunlight where they won’t be disturbed for a few days. Depending on the temperature, it could take 2 days to a week so be prepared to stick around and keep an eye on them.
5. Check for Mold (You Want Mold)
Within a few days, the top of the liquid should have a grayish rim of scum and even later, a full cover of mold. At this point the seeds should have sunk to the bottom of the muck as well. Congratulations! This means that the fermentation process is complete. This is also great news because the jars are likely smelling quite awful by now.

6. Strain and Rinse
Add another ½ cup or so of water to the jars to dilute the gunk and allow the viable seeds to sink to the bottom. Gently pour off the top layer of fermenty-goodness and then strain the seed into a fine-mesh sieve.

7. Drying
Next, you need to dry the tomato seeds. Place the strained tomato seeds on a plate or bowl and set back in the warm dry place for a few days to dry out. Many people use paper plates, but my little glass bowls work just fine for me. Make sure that you attach or set your paper towel cover / label to the seeds – there is nothing worse than going through the process of fermenting seeds and then forgetting which variety they are!
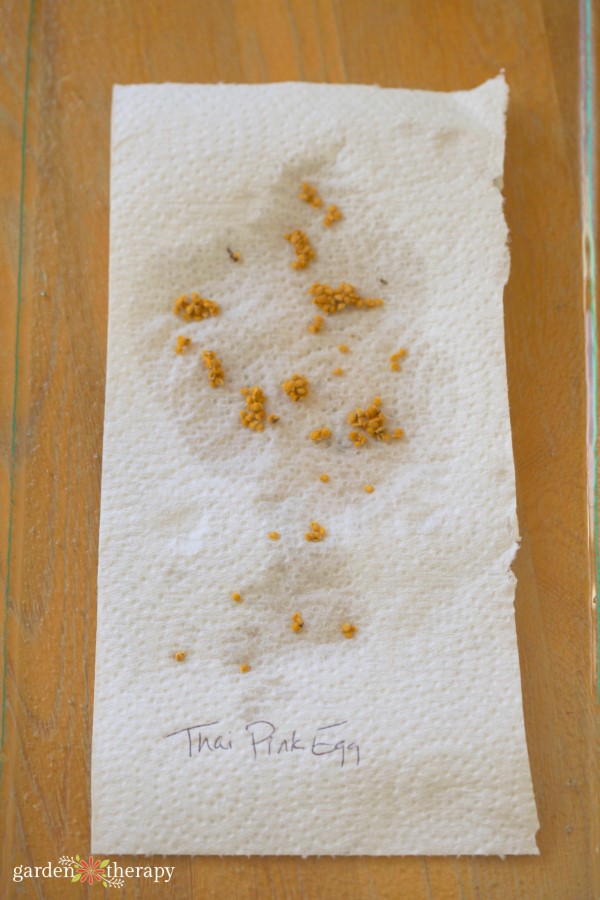
8. Storing
Once your tomato seeds are dry, you can shuffle them into some handy little coin envelopes, label them up, and store in a cool dry place until next spring. You have graduated from science-class geek to a true heirloom-tomato alumnus.
What’s an Heirloom, Anyway?
Heirloom seeds have been saved and passed on for many generations and so the plant, flowers, and fruit are true to type of the original great-great-great-(insert 50 years here)-grandmother plant. The seeds have been saved for their outstanding qualities, be it beauty, flavor, and yield, or disease, pest, and weather resistance. Heirloom vegetables and fruits provide much diversity from the standard fare mass-produced by industrial food production.
There are many colorful and unique tomato varieties, but beauty and diversity doesn’t mean it’s an heirloom. Hybrid tomatoes have been created by cross-pollinating strong characteristics of different varieties, making brand-spanking new varieties. While the tomatoes can look and taste as good as heirlooms, saving these seeds comes with problems.
Some seed companies create franken-fruits that only contain sterile seeds, ensuring that you always have to buy from them. Even if you could save and germinate the hybrids, there is no guarantee what characteristics the new plant will have. Remember, they cross-pollinated before so who knows what they will get up to with the other tomatoes, nor what the offspring will be.
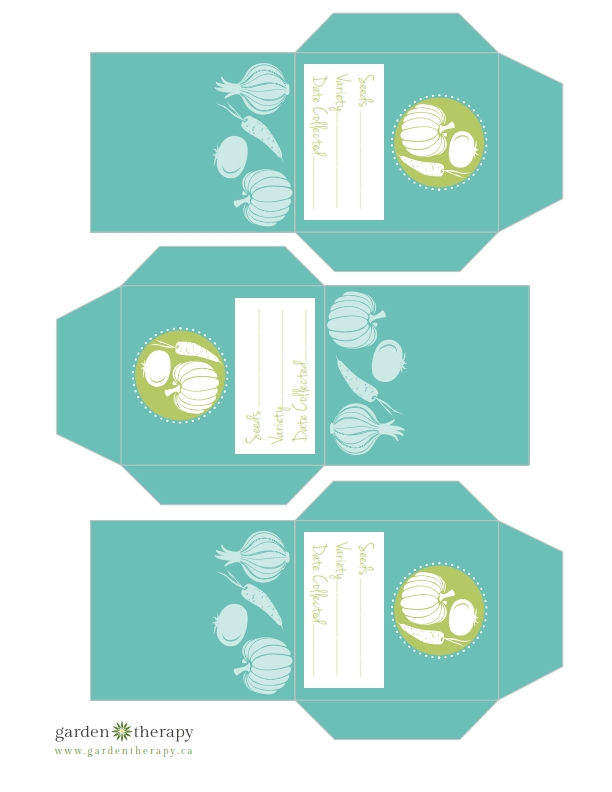
Hey! Now that you have your tomato seeds ready, how about some printable seed envelopes? Download them here:


Hi, Might you have a printer friendly version?
Thank you for this recipie, i will try it with other seeds aswell :)
Do tomatoes need to be fully ripe to harvest the seeds of an heirloom?
yes.