Whether you want to make keepsake tags that also double as Christmas tree ornaments or embellish a tag with someone’s initials for their birthday, these DIY gift tags can also become keepsakes. Personalize your presents with this clay gift tag tutorial.
Gifting season is upon us! Every year, I make homemade gifts, and they’re always a huge success. When I see someone smile after opening the gift, I can’t help but smile too.
The difference between a homemade gift looking good versus looking so good they can’t believe you made it is all in the wrapping and presentation.
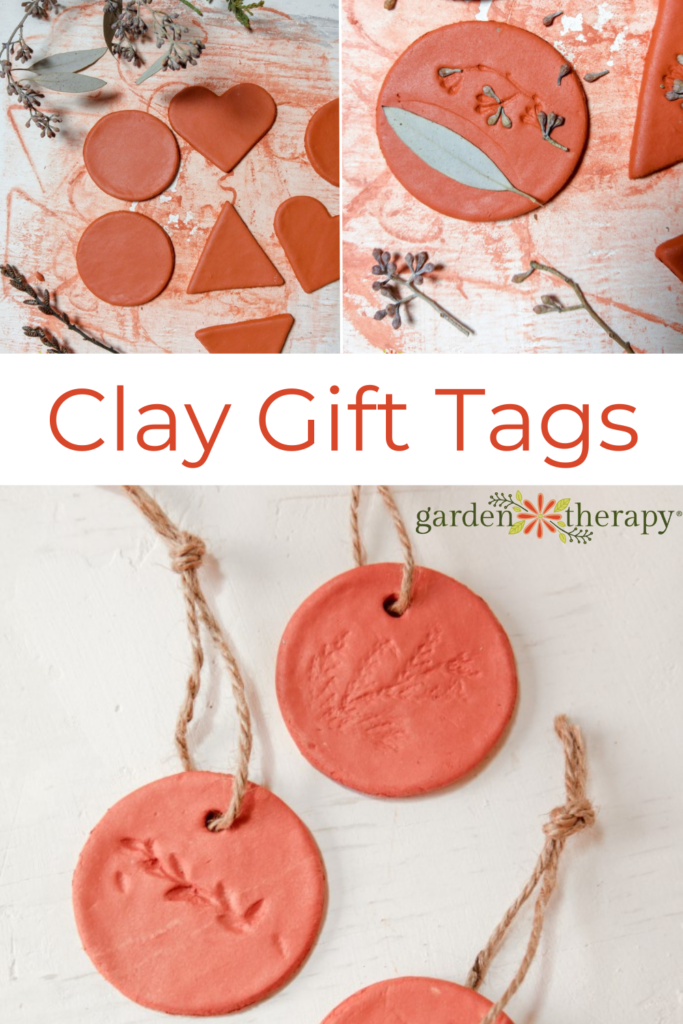
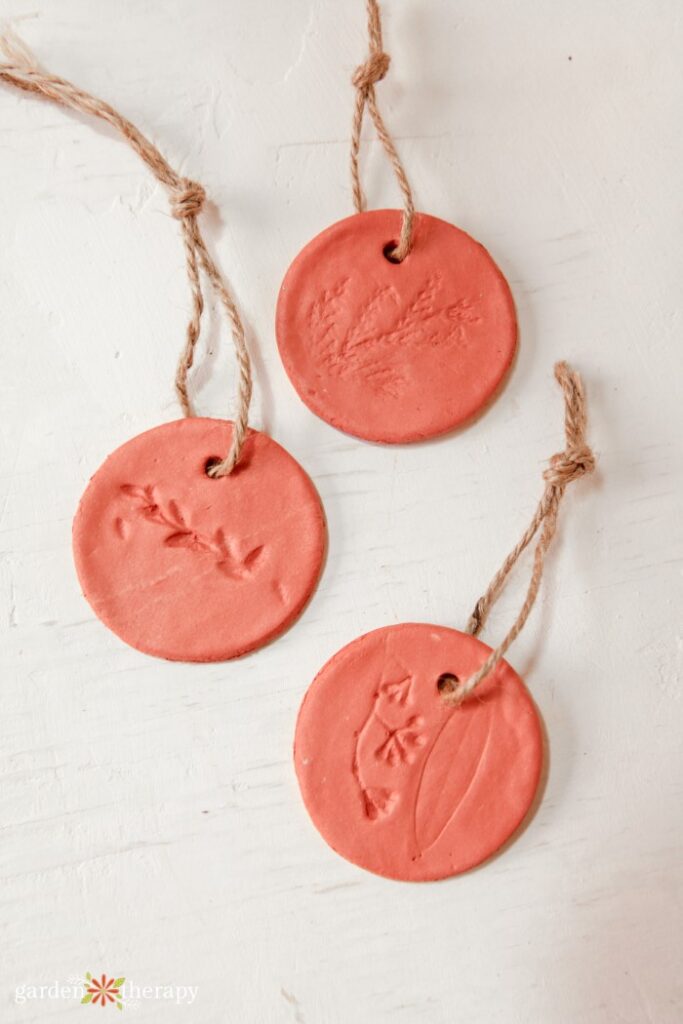
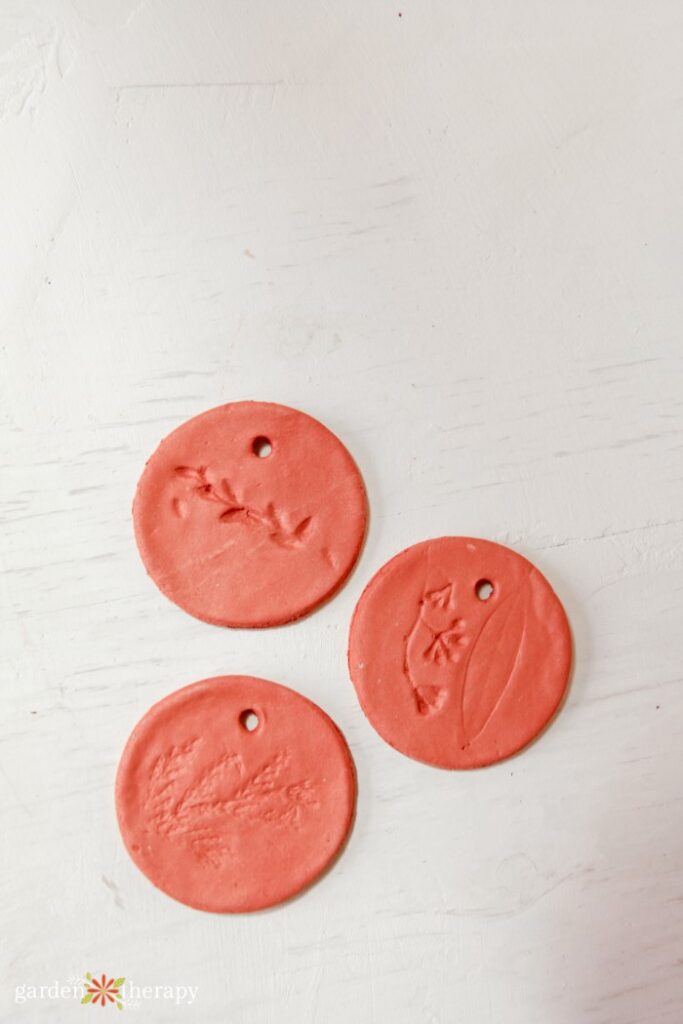
These DIY gift tags made of clay are really the cherry on top. I press them with leaves and flowers from my garden, so every one of them is unique and has a touch of me. I’m always game to pass on the beauty of my garden!
As a craft project, these clay gift tags are super simple to make. They require no oven or kiln. So, let’s roll up our sleeves and get crafty this gifting season.
This post will cover…
- How to Use These Homemade Gift Tags
- Clay DIY Gift Tags
- Materials
- Make It!
- Frequently Asked Questions About DIY Gift Tags
- More Amazing Gifting Ideas
How to Use These Homemade Gift Tags
Making them out of clay means that they won’t be like a classic paper gift tag. Instead, they’re a way to add decoration to your wrapping.
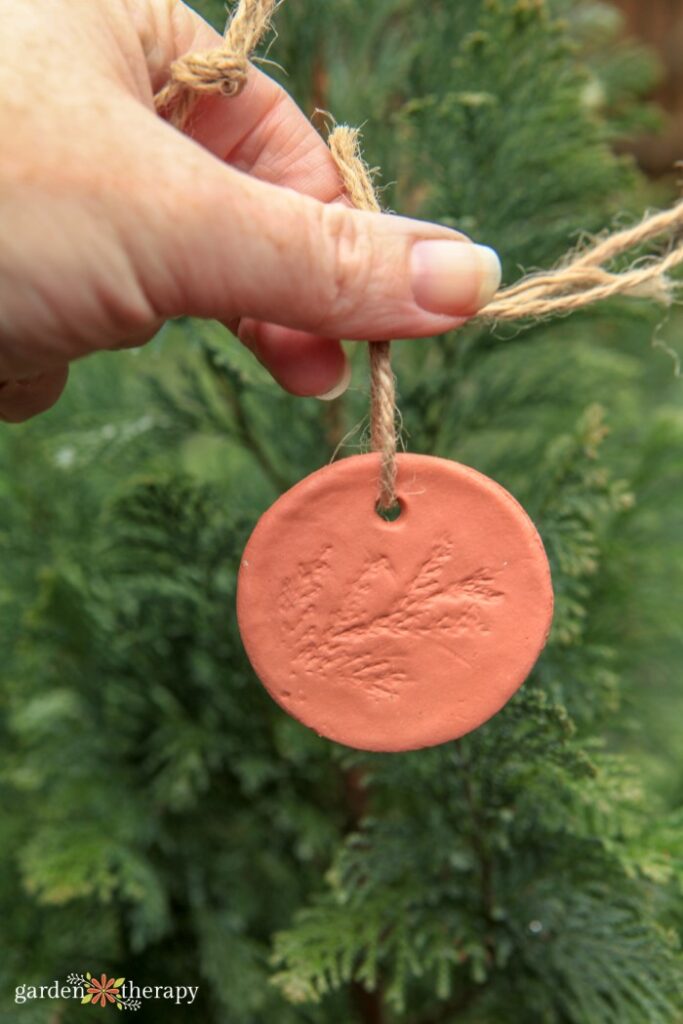
They become part of the gift themselves as a keepsake. After opening the gift, people can use them as an ornament, key chain, wall décor, or whatever else they enjoy!
If you want to customize them with names or letters, you can use stamps to add in the initial or name of the recipient of the gift tag. You can also use the pointy end of your bamboo skewer to write on the back, carefully etching in letters without ruining the design on the front.
Clay DIY Gift Tags
What I love about these DIY gift tags is that they can be used any time of year. Depending on how you make them, you can use them as DIY Christmas gift tags or for birthdays and other special events. They’re timeless and easy to change based on the occasion.
Materials
- Air dry clay
- Dental floss
- Rolling pin
- Parchment paper
- Cookie cutters
- Bamboo skewers
- Twine or ribbon
Make It!
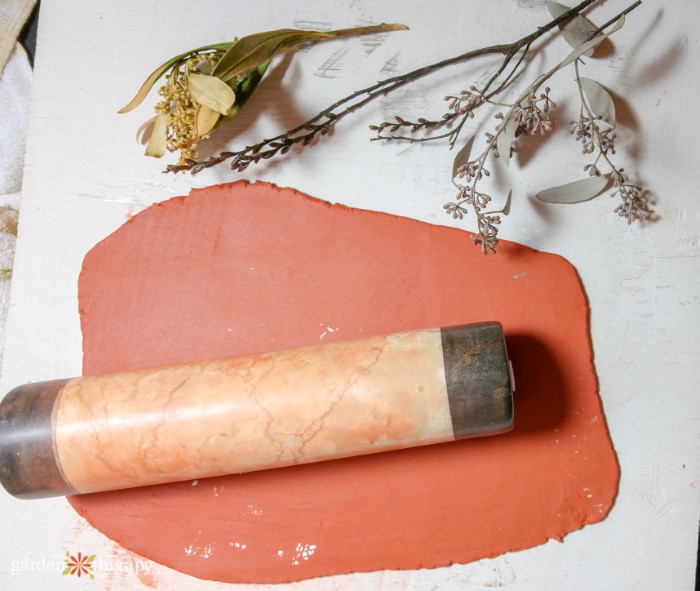
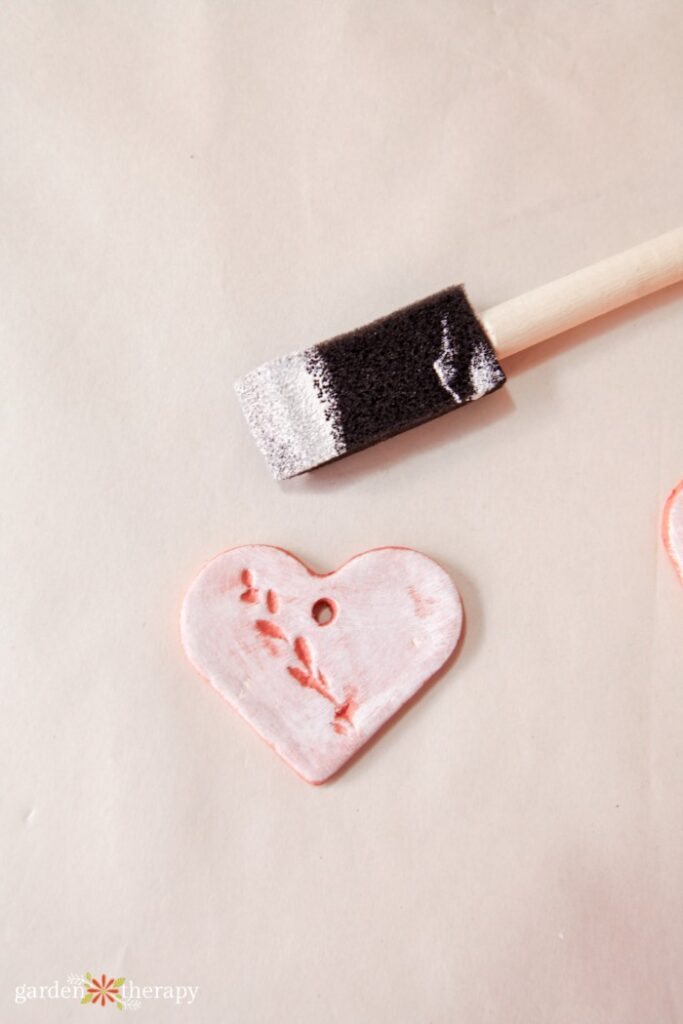
To keep things simple, I used air dry clay for this project. It can come in many different colours, so you can choose whichever one you like best. If you plan on painting them, white clay is a good choice as it’s easy to go over in paint.
For my DIY gift tags, I used a natural terracotta colouring.
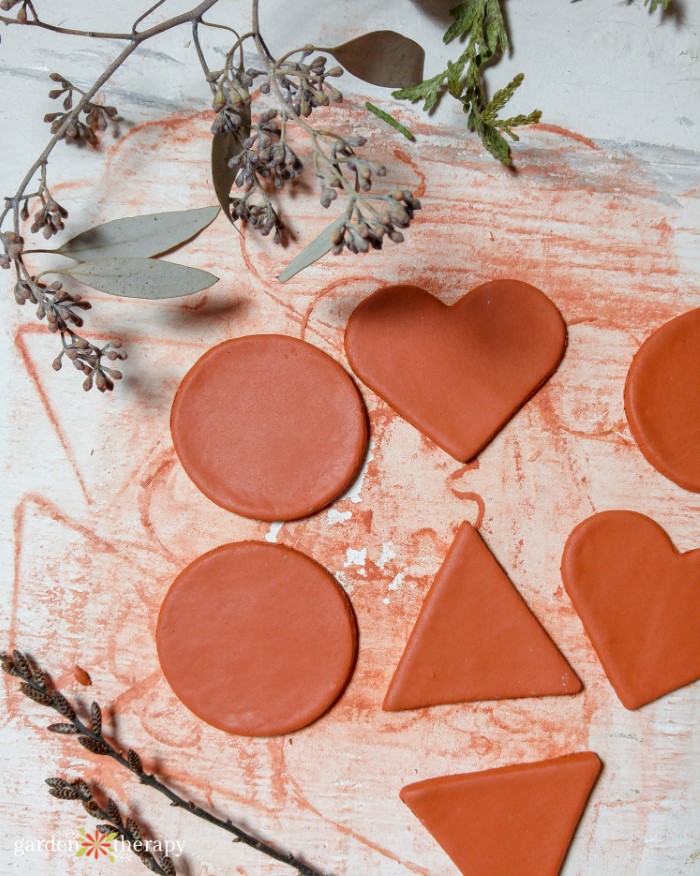
I use dental floss to help cut off some clay from the slab. Wrap the floss around your fingers and then pull the floss through the clay to cut it.
Once you have a hunk, roll it out with a rolling pin until it is a ¼ inch thick. If your clay isn’t fresh, you may want to work it in your hands with a hint of water to help rehydrate it.
Clay sticks, so make sure to roll over parchment or wax paper to protect your table.
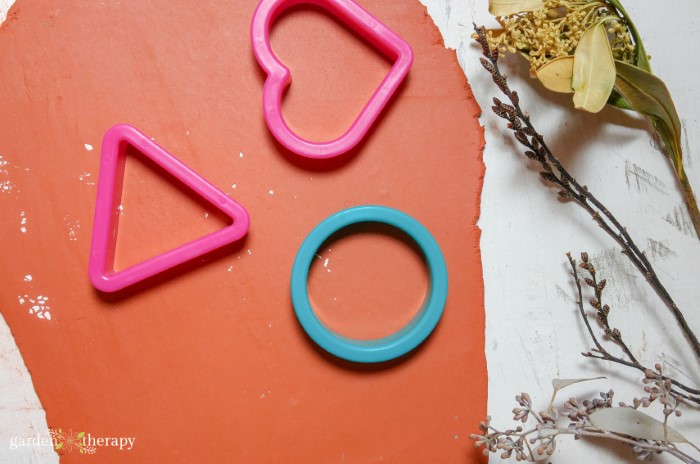
I use cookie cutters to make my shapes. You can also cut them out using a wooden knife for clay if you want something custom. Gently peel away the surrounding clay. A spatula can help to loosen the clay if it gets stuck to the table.
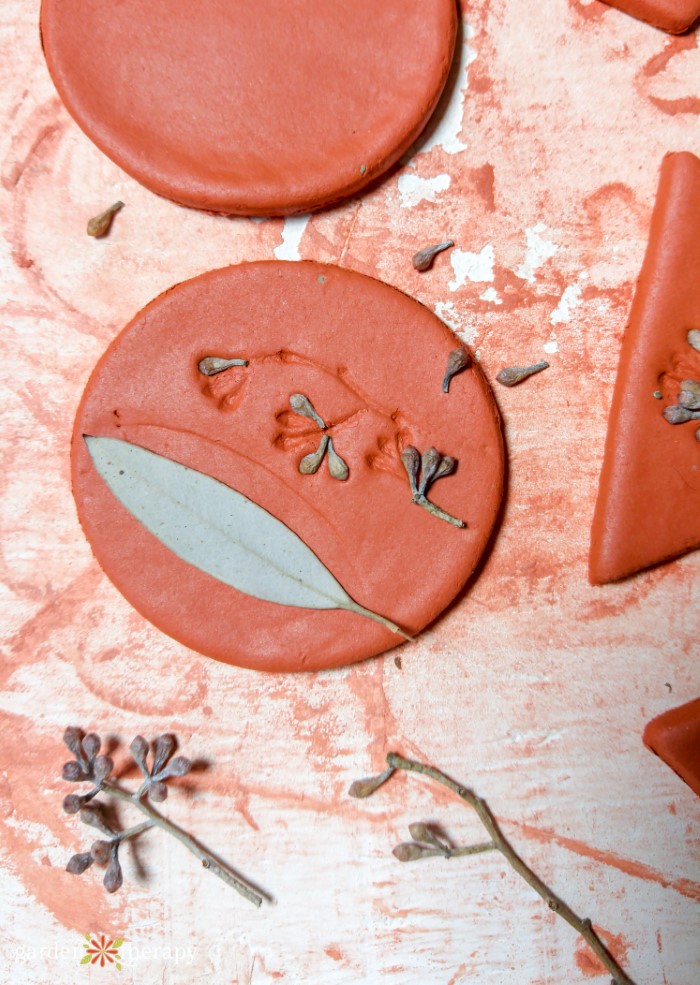
Take botanical elements such as fresh leaves and flowers and gently push them into your clay. You really want to make a deep imprint so that it shows up and is easily seen on the clay gift tags.
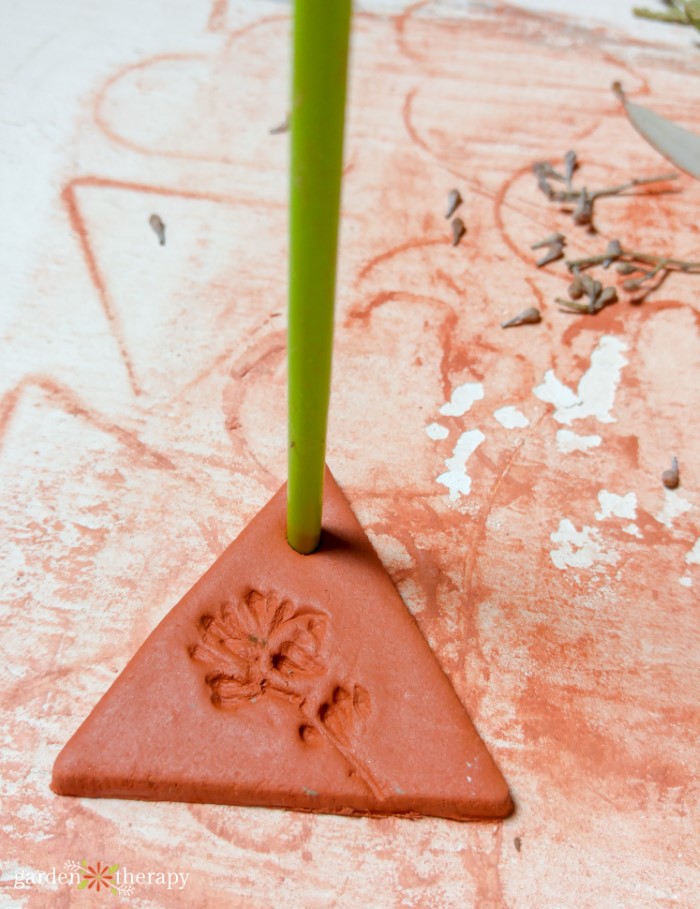
Use a baby skewer or clay tool to poke a hole in the top of the gift tag. Set your tags aside and let them air dry completely according to your clay’s instructions.
Once it’s fully dry, you can thread your twine, ribbon, or cord through the hole. Tie it up, and your homemade gift tags are ready for decoration!
Frequently Asked Questions About DIY Gift Tags
There are many kinds of stamps that have different fonts and sizes. You can get something smaller to create words, like this set. Or you can go for something more fancy, like these botanical letters designed for wax seals.
Yes! Before painting, you must ensure the clay is completely dry. White air dry clay is the best clay to use if you plan on painting it afterward. Acrylic paint works best for painting the gift tags.
More Amazing Gifting Ideas
- Dreaming of a Green Christmas With Natural + Recycled Gift Wrap Ideas
- 100+ Homemade Gift Ideas to Gift This Season
- Recycling Cards Into Gift Tags
- Chalk Painted Wood Ornaments and Gift Tags
A city girl who learned to garden and it changed everything. Author, artist, Master Gardener. Better living through plants.