I’m most taken with gardens that have a little mystery to them (as you can see in my previous post on Creating a Secret Garden). I spent many hours healing in the zen garden in my previous home and was eager to create a comparable space in my new home. I learned how to install a disappearing fountain in my existing mature shade garden to create a secret space in a public area. The project turned out better than I could have hoped and it is providing new enjoyment of the front yard. 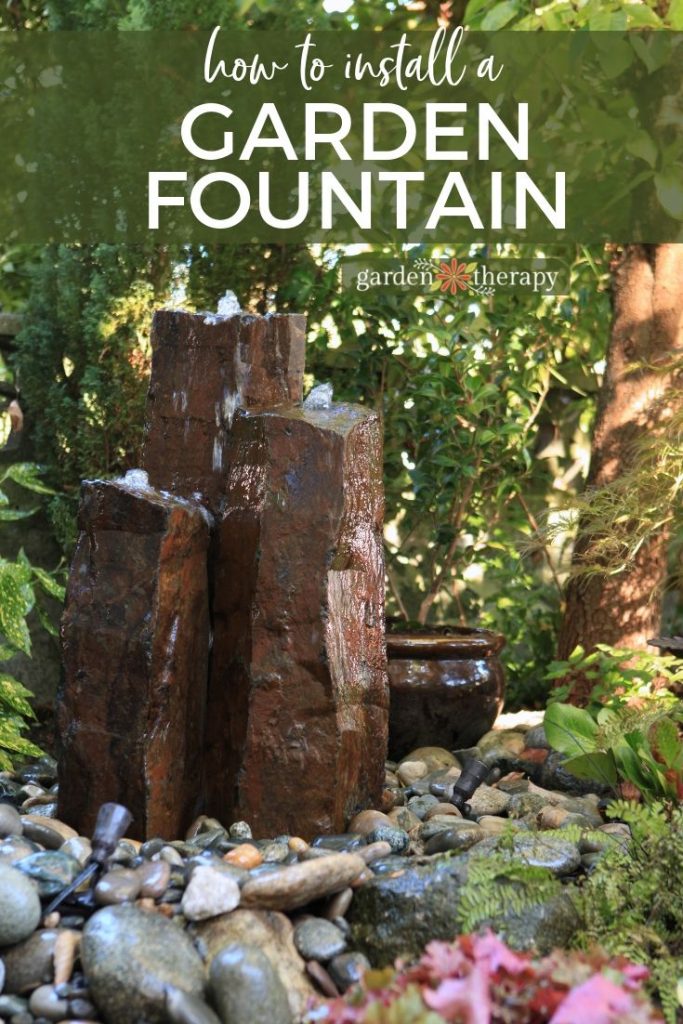
As there wasn’t a lot of room in this garden for a pond, I chose a columnar basalt fountain that spills over into decorative rocks. It is called a disappearing fountain because the water disappears into the rocks, which disguise a basin below that holds the water and the pump. It was a fairly simple project to install, although it took some time and there was a lot of heavy lifting. It’s a great workout if your back can handle it. If you want the glory but not the grunt work, have someone dig out the hole for you. You can then set up the fountain easily and plant the garden. Get someone to help with the rocks if they are too heavy, or work on them in stages. Even the electrical work was a snap! I’ll take you through the steps so you can design and install a disappearing fountain in your own garden.
I must take a moment to thank Aquascape for providing the fountain supplies. The content, design, and installation instructions come from the DIY team here at Garden Therapy.
How to Install a Disappearing Fountain
Materials
- Large AquaBasin® (45″ x 45″ x 14″)
- 1 Bag Sand
- Level
- Hand truck
- 36” Basalt Fountain
- 30” Basalt Fountain
- 24” Basalt Fountain
- Ultra™ Pump 2000 GPH
- 18′ Aquascape Kink Free Pipe, 3/4″
- Electrical Outlet
- Aquascape LED Garden and Pond 3 Light Kit
- Various large landscape rocks
- 1/4 to 1/2 Yard of 2”-6” Bulk River Stones
- 3 Bags of 1” River Stones
Make it!
If you have an existing garden, then the first step is to dig up and pot all of the plants that you want to save. A good rule of thumb when digging up plants is to imagine that the root ball size is roughly the same as the above-ground leaves/stems. Dig a few inches wider than the root ball all the way around and go as deep as the plant is high. This should preserve as much of the roots as possible and keep your plant happy until transplanting time.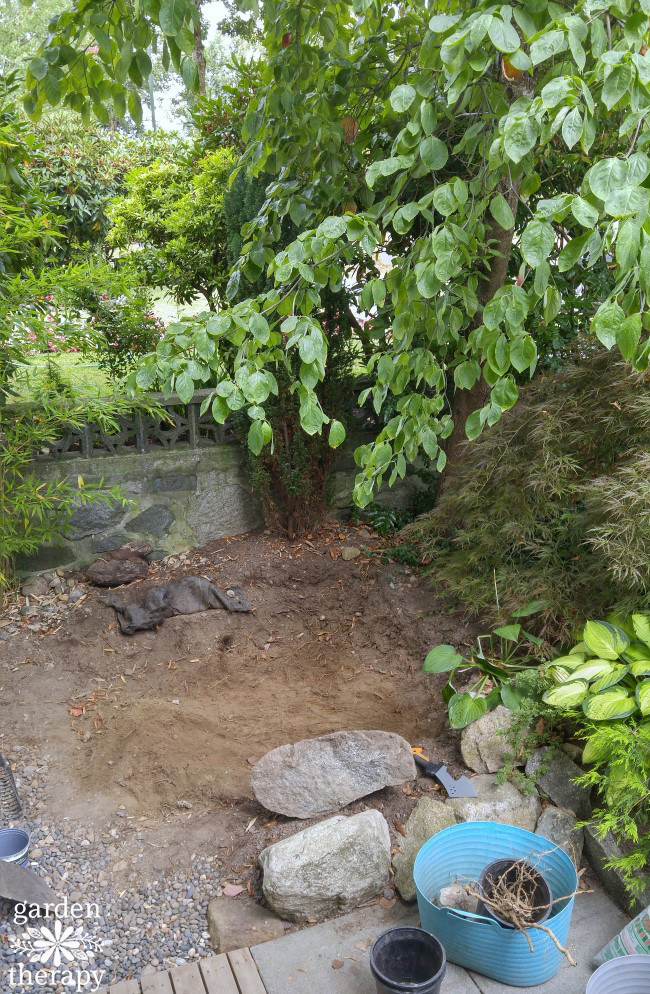
Preparing to Install a Disappearing Fountain
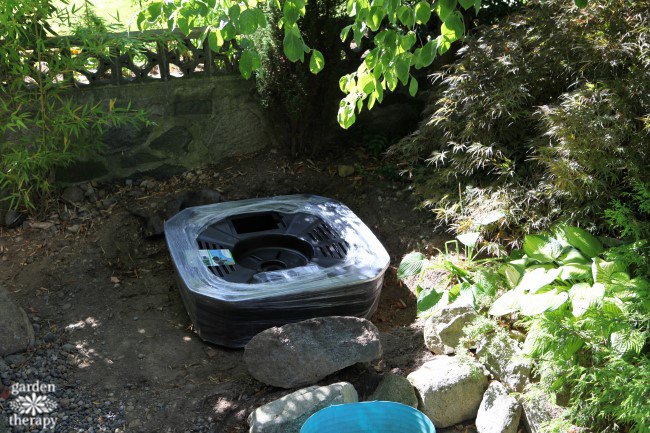
- Measure the space for the AquaBasin. The large AquaBasin is 45”x45” x 14”deep, so we made the hole 48”x 48” x 15 inches deep.
- Dig the hole for the AquaBasin. If the space is under mature trees, be mindful of the roots. We placed the hole as far away from the tree as we could, and even then were careful with the roots. Some needed to be cut, but we were cautious to not remove too many. Since the soil was loosened and amended after planting, I think that the trees will be much happier in the long run.
- Tamp down the soil where the Aquabasin will go. Spread a bag of sand on the soil, then screed it with a length of wood and a level to even out the hole in preparation for the basin. Screeding helps to fill the areas that are not level. Use the sand and/or tamp down areas of the soil to adjust the level. You want the hold to be level in all directions.

Install the Disappearing Fountain
Now you are ready to add the AquaBasin to the hole and backfill the areas around it with soil to hold it in place. We mixed the old soil in with soil amender (a mix of compost and manure) to improve the nutrition in the soil. The columnar basalt fountains weigh 900 lbs in total so they are very, very heavy. Move them carefully and use a partner.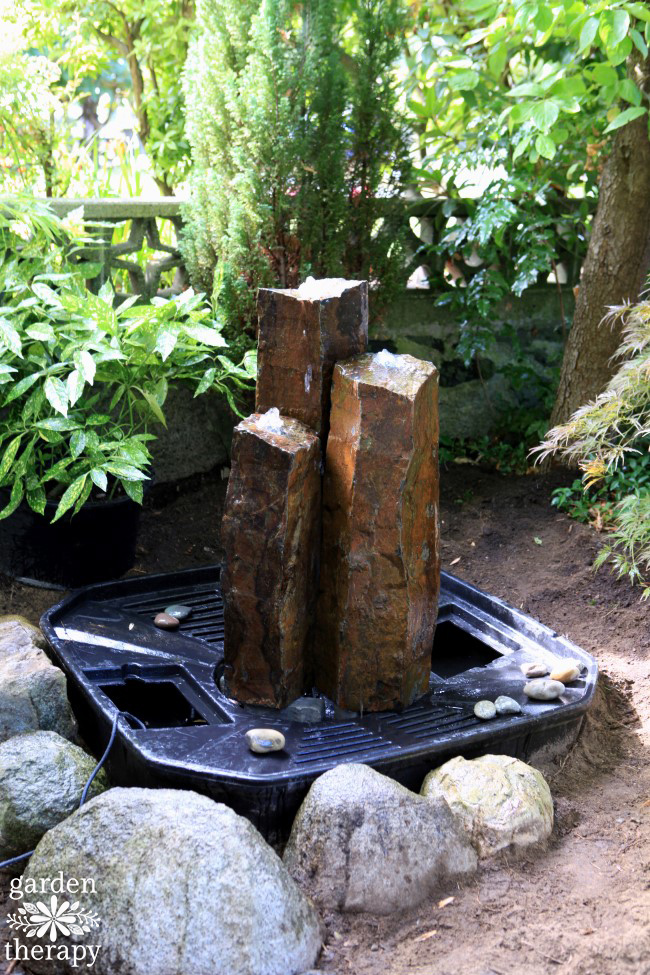
Tip: to have the basalt column sit flush with the top of the basin, place bricks inside the basin well surrounding the hoses (not on the hoses). The top edge of the 3½” wide bricks should sit flush with the basin.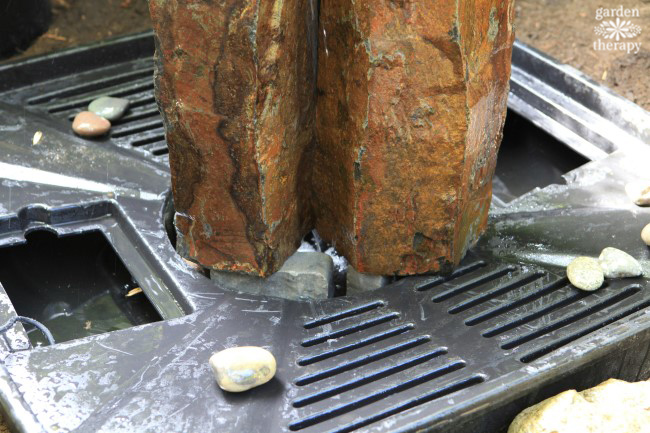
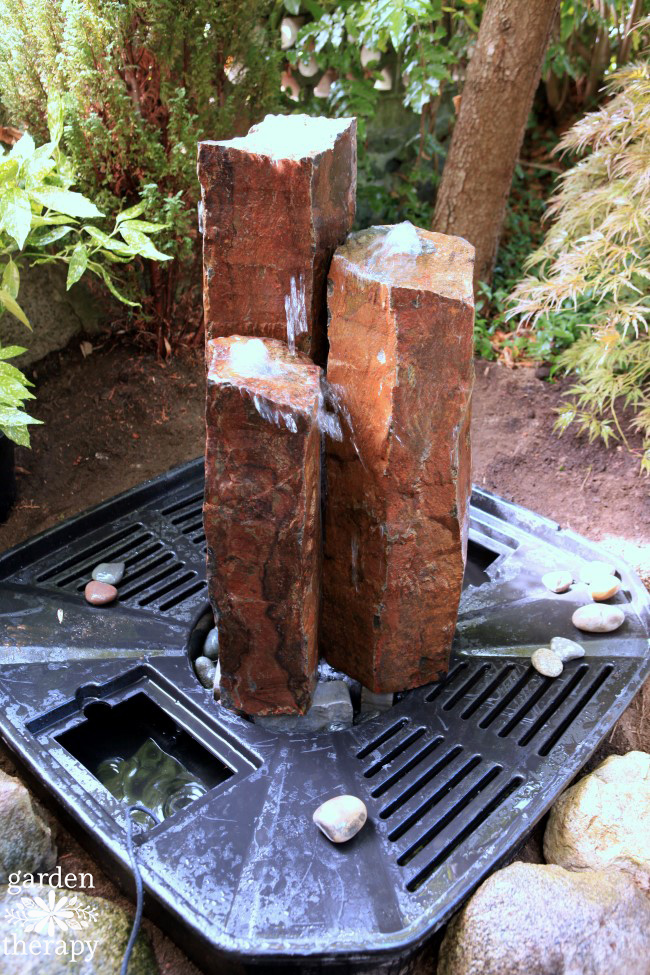
- Using a hand truck and a partner, carefully wheel each basalt column onto the basin. Lay the basalt column on its side with the bottom of the column pointing at and next to the basin’s center well. Ensure that you have the columns in roughly the location you want them when you eventually stand them up.
- Cut three hoses to length. Each hose must be able to extend from the pump inside the basin, through the center hole of the basin and up the length of the basalt column. Cut the hoses an extra foot or two long so that you have enough length to play around with during installation and future maintenance or adjustments.
- Attach the hoses to the fountain pump as per the manufacturer’s directions.
- Place the pump inside the basin and pull each hose up the center hole of the basin.
- Run each hose up the center of each basalt column. Push the hose end through the top of the column by about 2-3” so that you are able to manipulate it after the columns are standing up.
- Carefully stand up each basalt column so that it is sitting on both the support bricks and the basin edge all while ensuring the hose is not being crushed. This can be a bit finicky so use your partner to help.
- Make small adjustments to your basalt columns to ensure they are in the location you want them. Make sure the bricks do not fall over when placing the columns.
- Adjust your hoses on each column by pushing them back down the top of the column hole so they sit just below the top and are no longer visible. Your partner may have to pull the hose from the bottom.
- Using your bucket of river stone fill the gaps around the bricks in the center well with the stones. Ensure they are packed in tightly so that the bricks will no longer be at risk of toppling over.

Testing and Adjusting the Fountain
- Test the fountain by filling the basin with water so that the pump is totally submerged.
- Plug the pump into an electrical outlet. Ensure the outlet is reachable without an extension cord, if not install an outlet closer to the fountain or have an electrician do it for you.
- Make adjustments to the flow valves for each hose so that the water is flowing up the basalt columns in a pleasing manner.
Tip: if you are going to bury the pump’s electrical cord underground it is recommended that you place a piece of 1”x3” pressure treated lumber over the top to protect it from shovels in case someone starts digging there in the future.

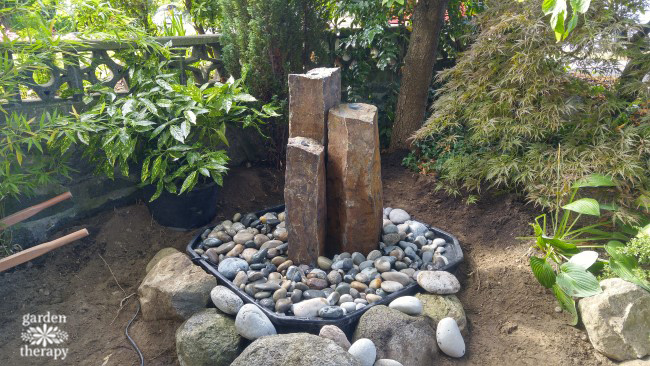
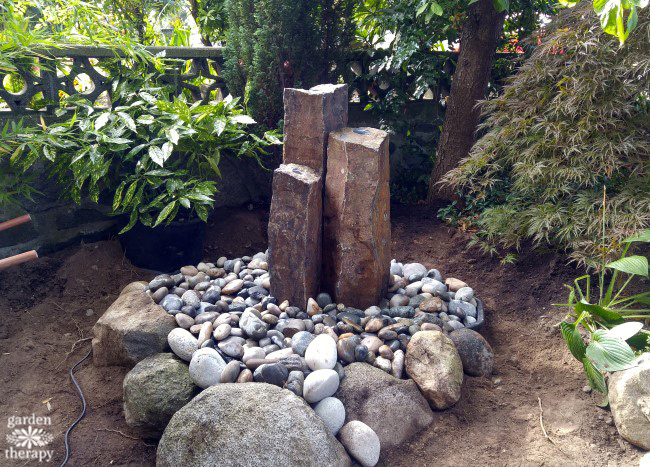
Tip: wash the river rocks first, before they go onto the fountain base or your water will quickly become murky.
The Final Design Work
- Place lights around the fountain so that they shine on the towers as well as the surrounding plants. I would also recommend LED lights inside the top holes of the fountain to remove some of the shadows.
- Place the 2”-6” river rocks around the base of the fountains to cover the Aquabasin.
- Move large landscaping rocks into place creating a natural structure and add more river stones. For this project, I created a small river stone pathway in front of the fountain where you would walk to the bench. It gives the look of a river going through the garden and breaks up the look of having so many rocks.
Add plants to the garden beds around the fountain, to make it look like it has been there forever! For this shady spot, I added Heucheras, Hostas, an Astilbe, a Bergenia, and ferns (maiden hair and Hart’s-tongue). They all have lovely foliage, many are evergreen in this climate, and some will even set blooms at different times of the year.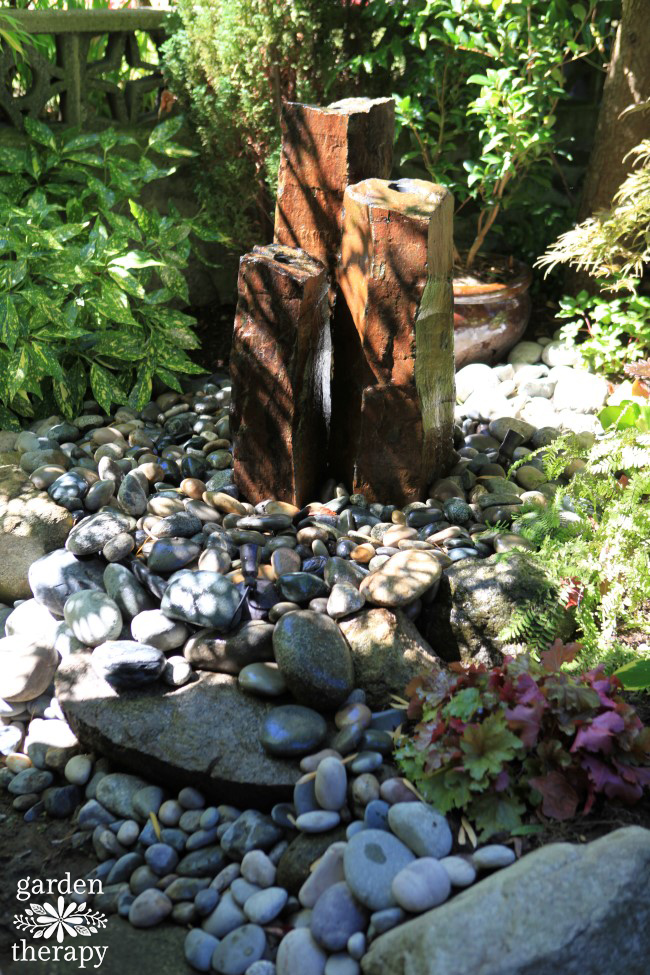
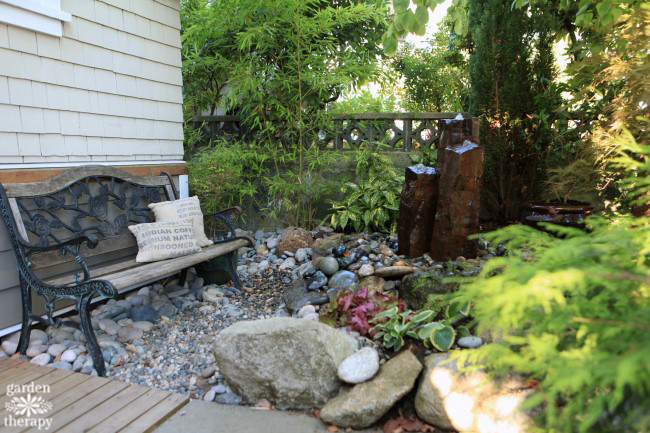
The three lights are pointed at the fountain and the surrounding plants to illuminate the area and extend the time it can be enjoyed. It makes for a very nice security light and helps to guide evening guests up and down the front steps with ease.
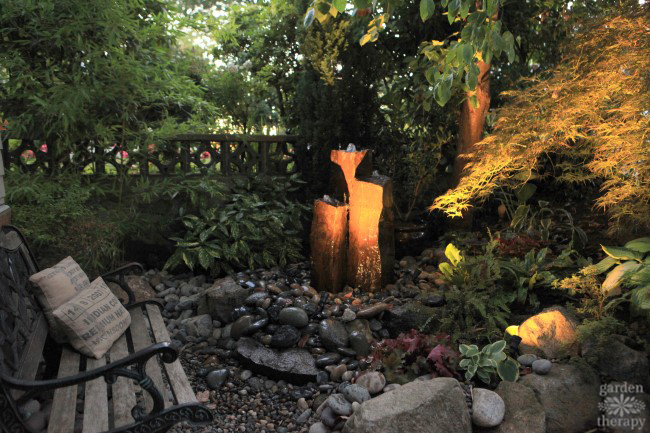
This secret garden was built as a weekend project but took many years to create. Designing a space that is personal and reflective takes much inspiration. Read more about secret gardens and the inspiration for this project in this post: Create a Secret Garden as a Therapeutic Outdoor Space.



We have one of these with the Mongolian Balalt Columns too. Talk about expensive, thank goodness I get them for wholesale. Absolutely beautiful but definitely not for your average homeowner; price and maintenance wise.
Adding a fountain to my garden is definitley next on the garden makeover to do list. There’s something so tranquil about relaxing next to running water. I have to say yours turned out brilliantly, I love that you’ve gone for something organic looking.