Natural dyes are fun to work with and can create a myriad of vibrant colors. If you have never made your own botanical dye before, this is a great first project to try because it is super simple, quick, and the results are beautiful! This marigold-dyed scarf project comes to us from Chris McLaughlin’s lovely new book, Growing Heirloom Flowers. The book is full of gorgeous ideas for using heirloom flowers and tips on how to grow them.
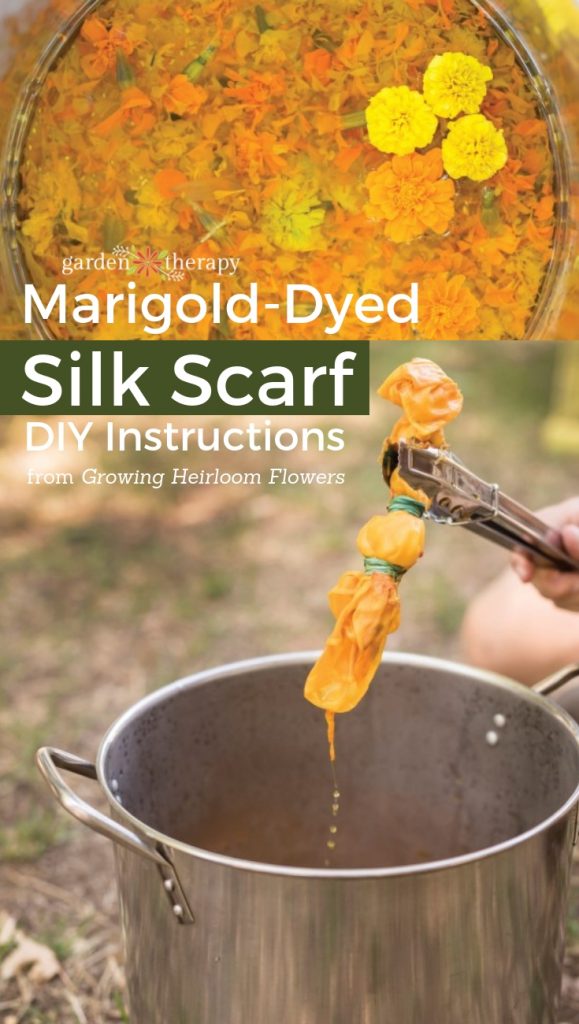
How to Make a Marigold-Dyed Scarf
By Chris McLaughlin
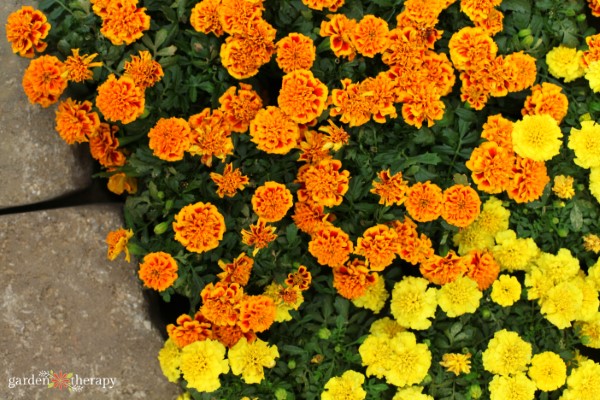
Heirloom flowers that make great natural botanical dyes include marigold, daffodil, dark-colored zinnia, calendula, bee balm, dark-colored cosmos (C. sulphurous), dark-colored hollyhock, dark-colored dahlia, coreopsis (C. tinctoria), and daylilies (the spent flowers).
Botanical dyes have a hard time sticking to synthetic (man-made) fibers and work best on natural fibers that are either protein (animal) or cellulose (plant). Fibers produced by animals include wool, mohair, Angora, cashmere, alpaca, and silk. Cellulose fibers include bamboo, hemp, ramie, wood, muslin, linen, and cotton (although cotton usually has to have more preparation for the colors to adhere well).
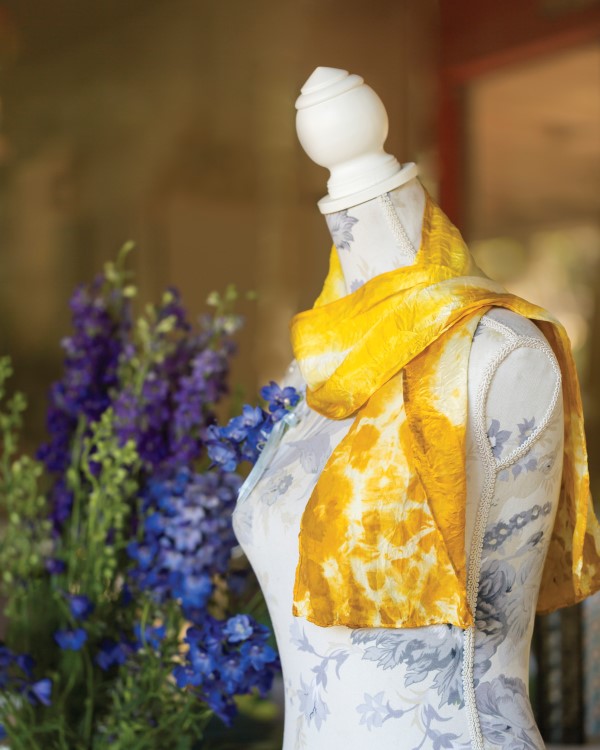
Silk loves botanical dyes, so let’s dye a silk fashion scarf with one of my favorite and most versatile flowers—marigolds. Marigolds are wonderful because they produce vibrant yellows that are easily extracted and stick to fibers brilliantly (with or without the aid of a “mordant” like alum).
Creating a botanical dye involves collecting the plant parts (in this case, flower heads), extracting the color from them, and straining the plant parts out, leaving you with a natural dyebath. Once the dyebath is prepared, the fabric or fiber is added to the bath and allowed to simmer in order to take up the color.
Although it isn’t necessary for us to pretreat our silk scarf with an alum mordant when using marigolds, I like to use it on everything I dye because it helps natural color adhere to the fabric fiber and makes colors just a little brighter.

Premordanting the Silk Scarf
As far as how much alum and cream of tartar to use, I add 10 percent of the weight of my fiber or material. A silk scarf is so light that you’ll only need about ½ teaspoon of alum. This simple mordant bath is often combined with cream of tartar to help brighten and clarify colors. Some dyers use it and some skip it, but I think it helps, so I keep it in the recipe. You can buy both alum and cream of tartar in the spice aisle in the grocery store.
Materials & Equipment
- Stainless steel pot
- Water source (kitchen sink)
- Silk scarf
- Stove
- ½ teaspoon alum (potassium alum sulfate)
- ¼ teaspoon cream of tartar (tartaric acid)
- Measuring cup or small mixing container
- Spoon or stirring stick
- Tongs
- Glass or ceramic bowl
- Fill the pot with enough water to allow the scarf to float around freely. Add the scarf to the pot of water and place it on the stove. The reason we’ve added the scarf now is so it can slowly adjust to the rising temperature.
- Place the alum and cream of tartar in the measuring cup and add a little warm water. Stir until they are dissolved and then pour the mixture into the pot on the stove. Turn the heat to medium. Bring it to a boil.
- Once the water is boiling, immediately reduce the heat to just simmering. Let it simmer for about an hour.
- Using your tongs, raise the scarf above the pot for a few moments, letting the water drain back into the bath.
You can use it again later if you want to. Then place the scarf in a glass or ceramic (nonreactive) bowl to let it cool down for a bit so that you can handle it easily. Rinse the scarf with warm water. - Your scarf is now ready for the dyebath! No need to let it dry, just prepare the marigold dyebath below and you’re ready to go.
Making a Marigold Dyebath
Step out into the garden and snap off a bunch of marigold heads. Another way to collect petals is to deadhead faded blooms and put them into a zip-top baggie in the freezer until you’ve saved up as much as you need. As far as quantity needed, my general guideline is to collect at least the same weight in plant material as I have fiber or fabric (1:1).
Materials & Equipment
- Mordanted silk scarf
- 2 stainless steel pots and lids
- Water source (kitchen sink)
- Marigold petals or entire heads
- Stove
- Rubber bands (optional)
- Mesh strainer
- Stainless steel tongs
- Glass or plastic bowl
- 1 tablespoon washing soda (optional; find it in the laundry detergent aisle)
- Make sure your silk scarf is thoroughly wet from the mordant bath.
- Fill the first pot with enough water to allow the scarf to float about freely in the water, then remove the scarf. There’s no need for more water than that. Add all the marigold petals (or entire heads).
- Put the lid on the pot, place on the stove, and heat the water slowly, bringing it to a gentle simmer (not boiling).

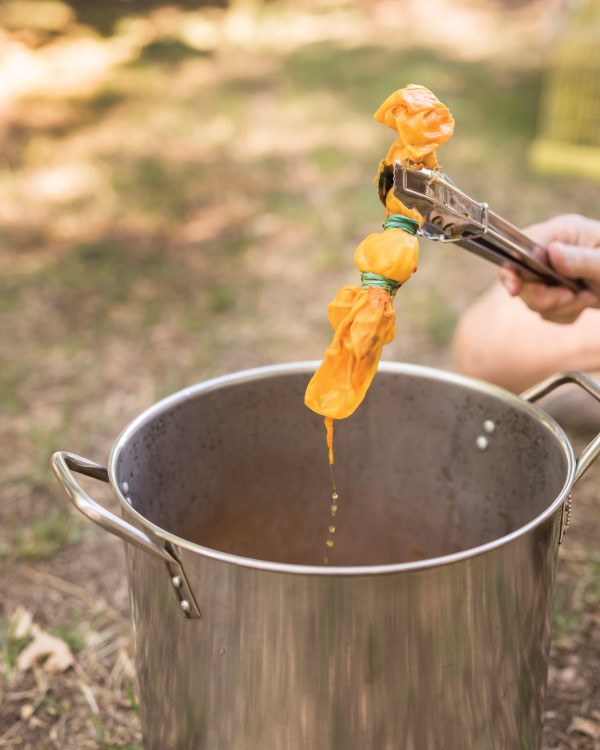
- Optional Step: You can skip this part if you want to, but I want to tell you how I got the pattern on the scarf in the photo. Take the wet scarf and fold it in half. Fold it in half again. Now wrap sections of the scarf with the rubber bands (as many as you’d like), making the scarf into a bundle. Go on to step 5 whether you create a bundle or not.
- Add the scarf. Slowly bring the water back to a gentle simmer, and simmer for about an hour. If you find that you can’t resist peeking inside the pot (and really, who can?), please don’t put your face over the pot while you lift the lid. Let the steam out for a few seconds before you peek, as steam can burn your face.
- After an hour, place the mesh strainer over the second pot and drain the bath through the strainer so that the marigold petals become separated from the bathwater. Now place the dyebath (now in the second pot without the marigold petals) back on the stove. Once the bath is simmering again, add the silk scarf to the pot (either bundled or free-floating).
- Let the scarf simmer in the dyebath for about 30 minutes.
- Using the tongs, remove the scarf from the bath and place it into a bowl to cool down. Once it’s cool enough to handle, rinse it off with fresh water from the sink.

- If you left the scarf free-floating, you can hang it up to dry in a shaded, well-ventilated area that’s out of direct sun. You now have a botanically dyed fashion scarf!
- If you made a bundle with your scarf, after the bundle has been rinsed, add more rubber bands to the bundle.
- Now, add the washing soda to the dyebath on the stove. Washing soda is a modifier and will change the color of the marigold bath slightly.
- Add the now double-rubber banded bundle to the dyebath. Let it simmer for about 20 minutes.
- Use the tongs to remove the bundle and rinse it under running water in the sink. Once it’s cool enough to handle, remove the rubber bands and rinse the entire scarf again.
- Hang your one-of-a-kind marigold-dyed scarf to dry in a shaded, well-ventilated area that’s out of direct sun.

Excerpted from Growing Heirloom Flowers: Bring the Vintage Beauty of Heritage Blooms to Your Modern Garden © Chris McLaughlin, 2018. Used with permission from Cool Springs Press. Photography by Nadeen Flynn.
About the Author

Chris McLaughlin is a writer and author whose hands have been in the soil for nearly 40 years. She became a Master Gardener in 2000, followed up with specialty certificates in wildlife, children’s, and vegetable gardening. She’s the author of seven books, including A Garden to Dye For (St. Lynn’s Press) and Vertical Vegetable Gardening (Alpha Books). Her work can be found in Fine Gardening Magazine, Hobby Farm Home Magazine, Urban Farm Magazine, The Heirloom Gardener Magazine, and Mother Earth Living. Online, she’s a staff blogger for Finegardening.com and has written for a variety of sites. Chris and her family live on a flower and fiber farm in the Northern California foothills where they grow flowers, food, and Angora goats. You can track her down at her brand-spanking-new website, FlowersInk.com.


This is indeed a nice guide. I’m also with you on using natural dyes for fabric (as we all should be in everything else). Not only do they work great, but doing so also helps the environment.
Hi, great tutorial but I must be missing something. Step 5 says to add the scarf to the simmering pot with marigold petals. Step 6 says to strain the mixture into second pot creating a dye bath. However, the scarf is in the mixture as well and now the strainer will contain the used petals and the scarf? So, the scarf must be rinsed free of the petals etc and then added back into the dye bath in step 6? Can the scarf not be added to the pot in step 5 and just added to dye bath in step 6?
I must be misreading this as the scarf mixed with petals would be a bit messy to clean off. Just some clarification would set me on the right track ;)
Thanks so much!
Carol
Hi Carol,
Yes, you can certainly do it either way! If I’m doing a bundled scarf, I like to put it into the bath as soon as possible right along wth the petals. I just enjoy the results. It isn’t very messy when you’re doing a bundled scarf, as I just do a quick rinse using the tongs.
But, yes, a free-floating scarf would be a little messier, for sure. I’m sorry, I should have been a little clearer. :)
Best,
Chris
I just bought a bunch of marigolds! Do you use fresh or dried marigolds or does it matter? Thanks so much for the tutorial!
Do you use a tannin at all when dying with Marigolds? Have you used fresh Marigold petals as opposed to dried?