What gardening trend is hotter than vertical gardens, succulents, or edible landscapes? Miniature gardens! You may love them or have yet to be introduced to these tiny landscapes, but after today you are going to run out and grab Miniature Gardening Guru Janit Calvo’s book Gardening in Miniature: Create Your Own Tiny Living World so you can sink your teeth into the mini world.
Now hold onto your floppy hats people, today Janit has joined us to share a project to make a patio in your very own miniature garden. Oh yeah, this is your lucky day. So read up, enjoy, and you can go get the book after the tutorial.
~
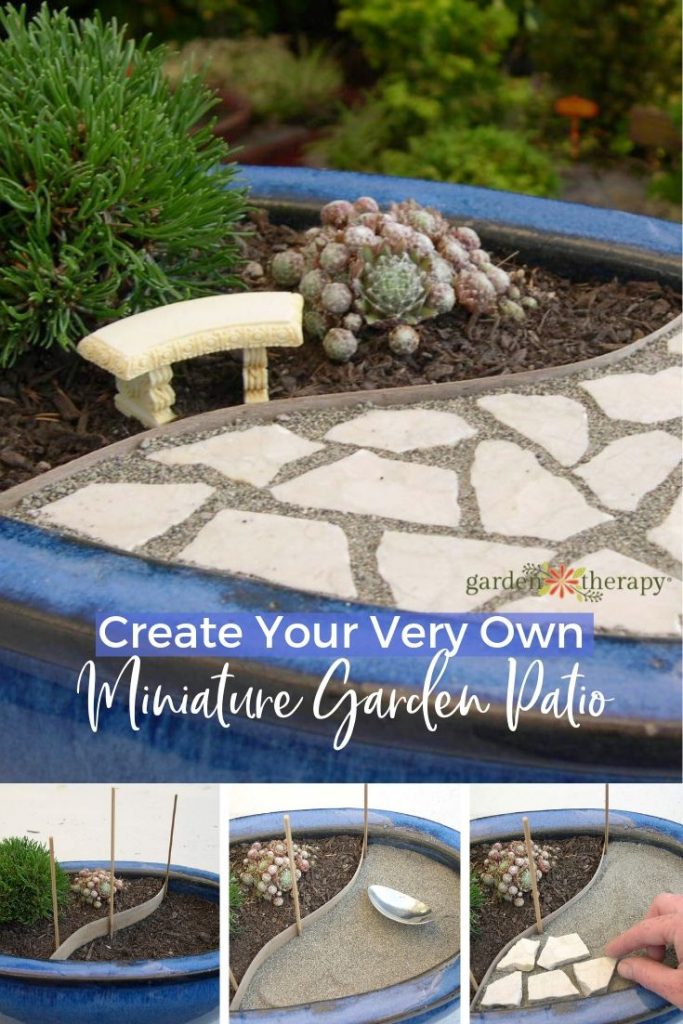
Create Your Very Own Miniature Garden Patio
A tiny patio area in a miniature garden is the perfect place to put a wee bench or pot, but is also helps to deliver the message to the viewer that it is a true garden in miniature. Any well done, realistic miniature of any kind compels us to look closer, and quickly enchants and delights because what is supposed to be full-size, is suddenly very small – and very real. It’s this “Hey, how can that be?!” moment that creates the surprise and generates the fun (otherwise known as “the squealies” in the world of miniature gardening).
A miniature garden patio combined with a tiny bench, or any in-scale accessory, illustrates the scale of the garden instantly to the viewer because you know how big the patio and bench are supposed to be in full-size.
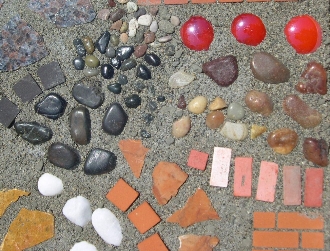
In this project, you will create a permanent miniature garden patio that will not wash away by using the Mini Patio Mix Kit from Two Green Thumbs Miniature Garden Center. It can be used with brick, tile, marble, stone, pottery, china, seashells, or even pennies and it is especially made with the miniaturist in mind with in-scale miniature sand (Details matter in miniature ;o). This project only takes an hour or two and it’s an excellent way to use broken pottery from Grandma’s china set, or tile pieces from your latest home renovation project.
Before your begin to build the patio, have your soil surface 1 inch to 1 1/4 inches deeper than ground level, depending on the depth of your patio material. The bottom 1/2 inch of the cleared area will be filled with dry grout mix. When the patio is done, it should be even with the surrounding ground, so adjust the cleared depth accordingly. Create the S or U shape of your garden bed from your chosen design.

Find thin wood strips at your local wood-working shop, veneer strips at your local builder’s supply store, or cut up a plastic pot or yogurt container. You can eventually remove this border after the patio cures, if you want, but wait a few weeks for the cement to cure and harden before doing so. The border allows you to keep the patio mix from getting messed up in the soil while you work with your design.

Materials
- Dry miniature patio mix, about 1 pound
- Sand, 1/2 pound
- Patio material, here we used marble-tile pieces
- Border edging, 1-foot length
- Wood skewers, 3
Tools and Supplies
- Gloves
- Hand clippers
- Scissors
- Spray bottle with a mist setting
1. Whatever border edging you’ve chosen, cut a little off the end to follow the inside curve of the pot so it is a snug fit—whether it is straight, curved, or slanted. This will keep the dry grout mix from washing into the garden bed when it is sprayed with water. Hold the cut end of the border edging where you want it on the inside of the pot. Use a skewer to help hold it in place, while bending the border against the edge of the garden bed and across to the other side, butting up against the other side of the pot. Note where you want to make the second cut with your fingers, then cut the border edging a little longer than the mark.

2. Put the border edging back in the pot using the skewers to help keep it in place. Take it out to shave more off the end gradually, if needed. Again, you want a snug fit against both sides of the pot and against the garden bed. Place skewers in the corners to hold the border firm. Then place a third skewer to hold the middle bend, creating a firm and level garden edge. The top of the border edging should be level with the top of the pot. Fill in with soil to help get it to the right place. Your miniature garden is now ready for its patio. Don’t water now—the soil in the patio area must be dry before moving on to the next step.
3. Top off the patio area with more dry potting soil, leaving at least 1 inch from the top of the border edge. Level the surface all around the patio area by adding more soil if needed. Tamp lightly to make sure there are no air holes in the soil. Pour sand into the contained area, about 1/4 inch deep. This sand base will buffer the dry grouting mix from the soil and roots. Smooth out the sand until even throughout the patio area. Gently push some into the corners if needed. Pour a pile of dry grouting mix into the contained area. Smooth out mix until even throughout the area. Make this layer about 1/2-inch deep.


4. Lay out the patio pieces or tiles so you can see the different shapes and sizes. Get your cobblestone pebbles or your pebble sheet ready, too. If you are putting a pathway in the middle, lay this in first, then work around it with the patio stones. Think of it as a jigsaw puzzle and start with the corners first. Place them, working from one side to the other, adjusting pieces for the best fit. Stone tops should be level with each other and the pot’s edge. When laying the stones, eliminate smaller spaces as you go. If a tile fits perfectly on 2 sides but leaves a large gap on the other side, try another piece. The gaps between the stones should be consistent across the patio for a realistic look.

As you lay the pieces in, put your hand flat on top to see if they are level with each other and the garden border. Keep checking; if a stone is too low, gently lift it up, add a little sand beneath it, lay it back down, and check again.
5. When you are finished laying in all the stones, gently tamp them down with a flat piece of wood or one of the unused tile pieces. This will level the top of each stone to create a smooth surface.

6. Gently pour a small pile of the dry patio grouting mix onto the middle of your patio, over the stones. Be careful not to pour it into the garden by using your other hand as a barrier. Then with a flat hand, smooth the mixture into the spaces, corners, and edges of the patio between stones. Carefully tap the stones to get the mixture into the cracks. Then tap the pot itself to settle the stones and the mix. Check the surface again to ensure that all stones are level with each other.

Using caution—the edges of the tile, marble, or glass pieces may be sharp—sweep off the excess with your hand or a brush and return it to the bag for future use. Take care to not disturb the stones. If some mix gets into the garden bed, clean it out later when the patio has cured awhile, so as not to upset the work already done. You can remove the skewers gently if they are not holding the border in place any longer. If your border edging still needs to be held in place, cut the skewer in half and bury it just beneath the surface. Gently firm up the soil on the plant side of the border.


7. Gently mist the patio from one side to the other. Wash the stones and wet down the dry mix as you work across the patio. Stop when the water starts to pool on the surface.

8. Let your patio cure slowly. The slower it cures, the stronger it will be. If you have made your patio in a moveable container, place the pot in the shade for a couple of days so the patio won’t dry out too quickly. If your patio is in a sunny garden bed, cover it with plastic (a plastic bag is fine) and keep the plastic in place with wood skewers or rocks, for at least one day. Mist the patio often throughout the first day to slow the curing process, too. Wait to brush off sand or excess mix until after the patio has cured—otherwise, the texture will be ruined and it won’t look real.

9. If you must water plants in the garden bed while the patio is curing, do so gently and sparingly from the back side, being careful not to get any on the patio. Your patio will set up within a few hours, but curing takes longer. Treat the area gently, keeping it damp and out of the sun for at least 24 hours. After that, add accessories to complete the scene.

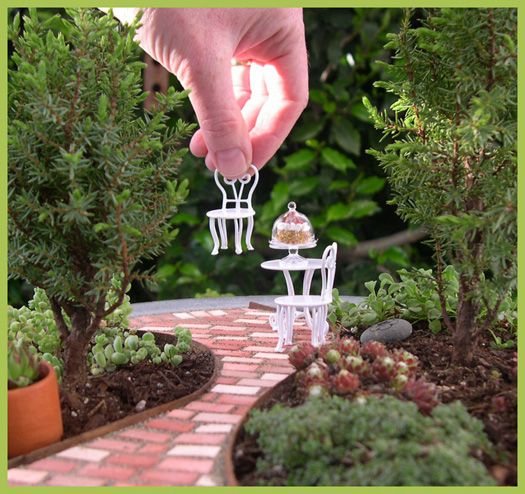
Once cured, your patio is ready for accessories. You will find these in the Two Green Thumbs Shop. In fact, they have just about everything you could ever possibly imagine for a miniature garden.
Now go grab a copy of Janit’s book, Gardening in Miniature!
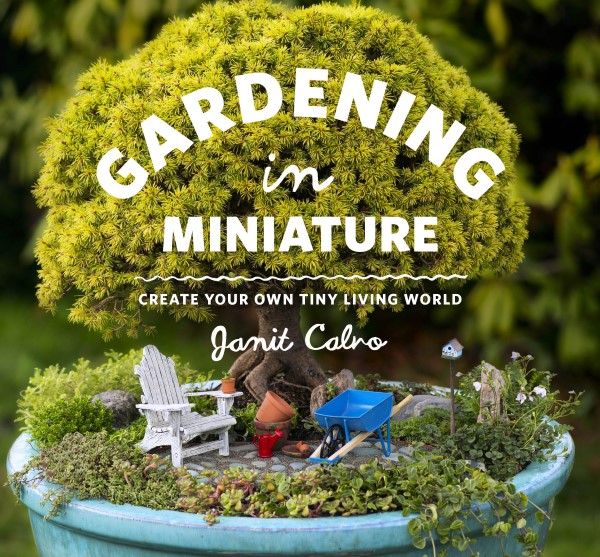
It has everything you need to pick up this new hobby, including scaled down garden designs, techniques for creating tiny hardscapes, miniature garden care and maintenance, tips on choosing containers, how to buy the right plants, and where to find life-like accessories. Inspiring step-by-step projects feature basic skills that can be recreated in any number of designs, like a tiny patio, a trellis, a pond, and a secret garden.
You can see even more whimsical tutorials from Janit here.
Janit Calvo is an artist, miniaturist, gardener, and entrepreneur. Janit resides with her husband in a full-size house and garden in Seattle. Inspired by her first miniature garden’s long life and easy maintenance, Janit started Two Green Thumbs Miniature Garden Center in 2001. She has won many garden and miniature show awards, and her gardens have appeared in the Seattle Times, Dig Magazine, and Dollhouse Miniature Magazine.


Toddlers need more fat in their diets than adults, so I often sub in whole milk and whole milk yogurt.
10 in the morning for 3 to 4 months can help with weight loss for obese people.
How many grams in a tablespoon of sugar
The camera takes the photo with the events plus it
delivers for the DVR being recorded. In earlier times protection camera arrangements happen to be monitored insurance agencies a separate monitor
located around the premises in which the cameras and DVR
are pinpointed. Sds cctv Wireless CCTV systems utilize wireless transmitters from your camera to
the receiver to prevent having to operate wires.
Reviewing particular situations and discussing how you can increase your company’s response within the future can be a great strategy to teach by answering real world situations.
Is there a method of minimizing disk usage on your CCTV video with out sacrificing quality.
That pic with the chairs was SO CUTE. And wow, the stones you had for the mini garden looked really good.
Like the stones look like a real pathway/space from an actual garden.
This is the best idea ever! Love it so much! Can’t wait to draw my miniature patio garden then build it! Thank you for sharing the post! <3
Really loved this hand craft… great work… Thanks for sharing… seems possible to do a enlarged one. Looking forward to it.