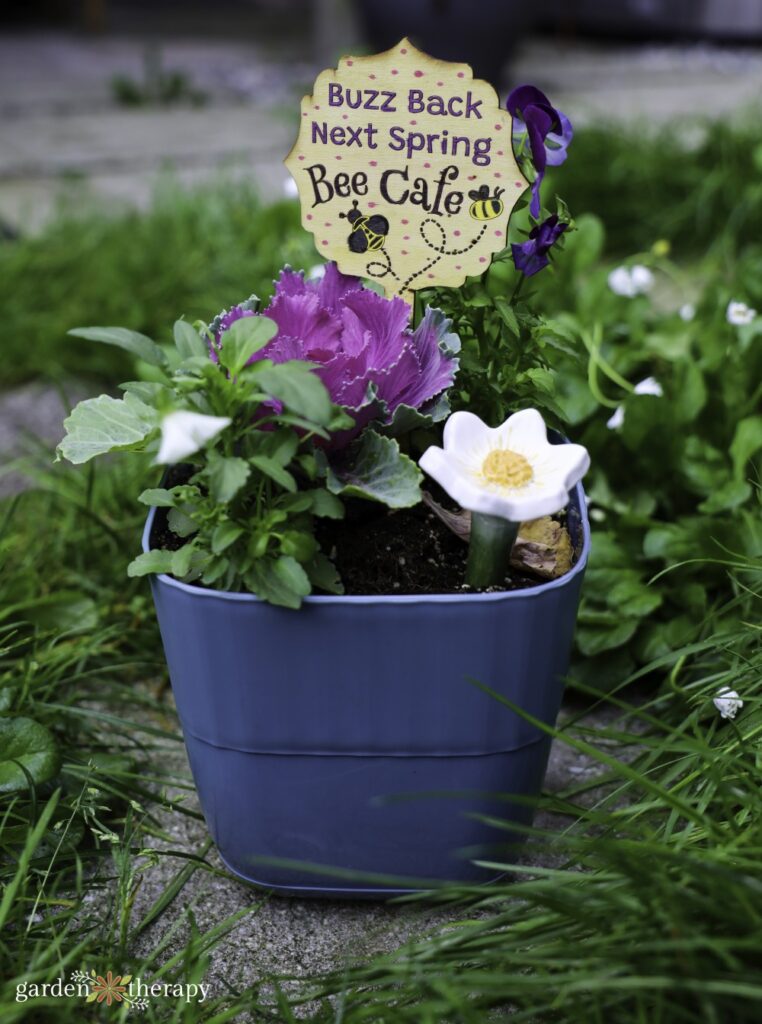
Bee cups are a smaller take on the bee bath, providing both beauty and decoration to planters and garden beds, as well as a safe place for bees to stop by and get hydrated. Here’s how you can bring a little bit of creativity and a bee watering station into your garden.
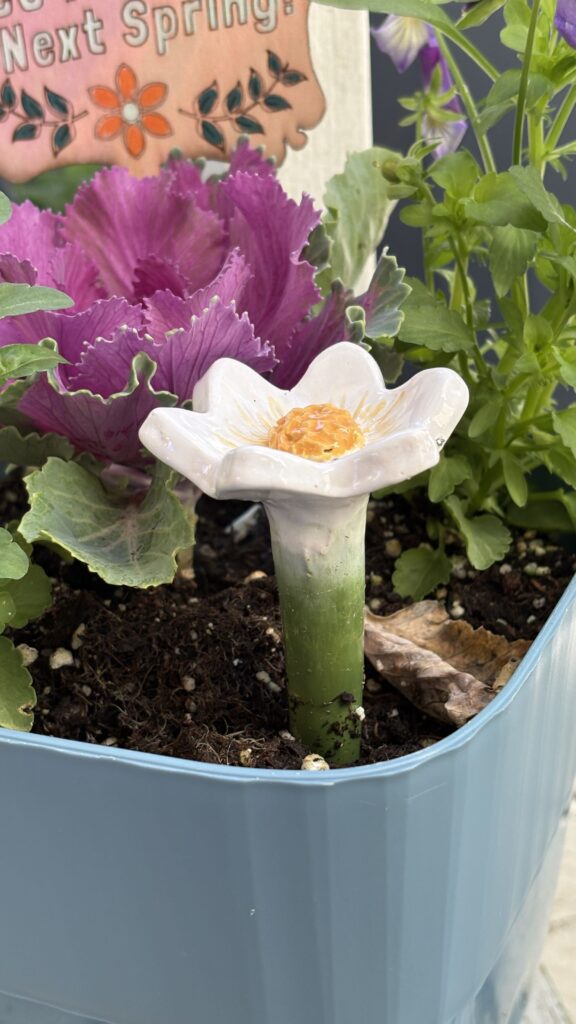
Last week I shared my project of making bee breakfast pots with the after-school care program, and I promised I would show you how to make the bee cups. These miniature bee water stations give visiting pollinators a place to safely stop for a drink. And they look pretty darn cute all on their own!
The cups were designed by the brilliant team over at Paper Crow Creative. My friend Julie Hebb is the very talented artist who started Paper Crow Creative as an after-school arts program in North Vancouver.
We’ve long talked about hosting a workshop together, and the bee cafes turned into the perfect opportunity to collaborate. Julie came up with the bee cups, and her team went ahead and designed them. I was so impressed with their level of thought, research, and artistic skill.
These aren’t just a simple kids’ craft. They approached making the bee cups as a high-level art, but in a way that was engaging and fun for kids and people of all ages. The cups turned out beautifully, and I look at them every time I walk past my planter.
Paper Crow Creative hosts after-school programs and summer camps for kids, but they’re about to open their very own studio and shop! They plan to host a bee cup workshop as part of their new class offerings, so if you’re local, keep an eye out, as adults and kids will have the opportunity to make bee cups and other pottery and art.
These clay bee cups are something you can do at Paper Crow Creative if you live in the Vancouver area, or at your local pottery studio if you live elsewhere. I also suggest showing this project to your local art programs, as it’s an amazing way to have fun while learning about how we can help pollinators.
This post will cover…
- Bees Need to Hydrate Too!
- How to Make Clay Bee Cups
- Materials
- Wedging the Clay
- Making the Bee Cups
- Drying, Firing, and Glazing
- More Ways to Help the Bees
Bees Need to Hydrate Too!
We often don’t think of insects stopping to take a drink, but they need water just as much as we do. Albeit much smaller amounts!
There are many things we can do to help the bees and invite them into our gardens, and these bee cups are a small way to say thank you to the pollinators gracing our gardens. They’re shallow and grippy enough for bees to drink safely without drowning.
Bees use water to dilute their honey, keep the hive cool, feed their babies, and aid their digestion. So, they must have a safe bee watering station to drink from and rest at.
From a practical gardening and wildlife standpoint, these bee cups aren’t the best way to keep bees hydrated, as the water won’t take long to evaporate. A larger version, like my bee bath project, is more likely to actually stay filled with water on a regular basis to be a viable water source for bees and other insects.
BUT that doesn’t mean we shouldn’t make bee cups or that they don’t have value. Here’s why.
These bee cups are a beautiful reminder that we love our pollinators. Each time we walk past them and admire them, we think about the bees and that we need to support them. They’re eye-catching and provide plenty of garden beauty, while also symbolizing our dedication to wildlife.
And in my case, they were a great jumping-off point to teach the next generation about bees and how it’s getting increasingly difficult for wildlife to find safe water sources in urban areas.
So yes, let’s build the bee cups as this important reminder, a bit of garden beauty, and a fun activity to activate your creativity.
But let’s also remember to take things one step further. Bees and wildlife need other sources of water as well. My book, The Regenerative Garden, has an entire chapter dedicated to water, and dives into the different ways to capture, store, and use water, including how to use it to support our wildlife. I encourage you to check it out if you want to learn more about how your garden can contribute to your local community and wildlife.
How to Make Clay Bee Cups
For this project, you’re going to need to use traditional pottery clay. Air dry clay will fall apart outside and with moisture, and polymer clay is not food-safe and therefore cannot be used for the bees.
This project does mean you’ll need a kiln to fire and glaze your bee cups. Luckily, there are many local pottery studios that offer this service. I suggest looking for local workshops and pottery studios that will allow you to use their studio to make your own projects or fire items for a small fee. Simply search for a pottery studio or kiln near me, and you’ll get plenty of results.
Materials
- Pottery clay
- Spray bottle with water
- Rolling pin (once it’s used for clay, it cannot be used for food again)
- Flower cookie cutter
- Basic clay tool set (including sponge, large ball stylus, and needle stylus)
- Kiln and glaze (found at local pottery studio)
Wedging the Clay
Before getting started with your clay, you need to properly prepare it. Wedging clay is the process of removing air bubbles so the clay doesn’t break once it’s in the kiln. You can’t skip this step.
To wedge, you want to stand at a table that is waist height. This will give you enough leverage to lean in and give the necessary force for kneading the clay. You also want to keep a spray bottle handy to lightly mist the surface or the clay if needed to keep the clay from drying out.
Start with a handful of clay. Throw the clay on the table a few times (perfect for getting out anger and frustration!). Use the table to make it into a general square shape.
Next, you’ll gently knead it forward with the palm of your hand in one motion. Before kneading again, scoop under the clay and pull it back towards you. Push it forward again with the palm of your hand. Repeat this process a few times until the formation looks like a ram’s head.
If you’re new to wedging, I highly suggest watching a quick tutorial, like this one, to see a visual of the process.
Making the Bee Cups
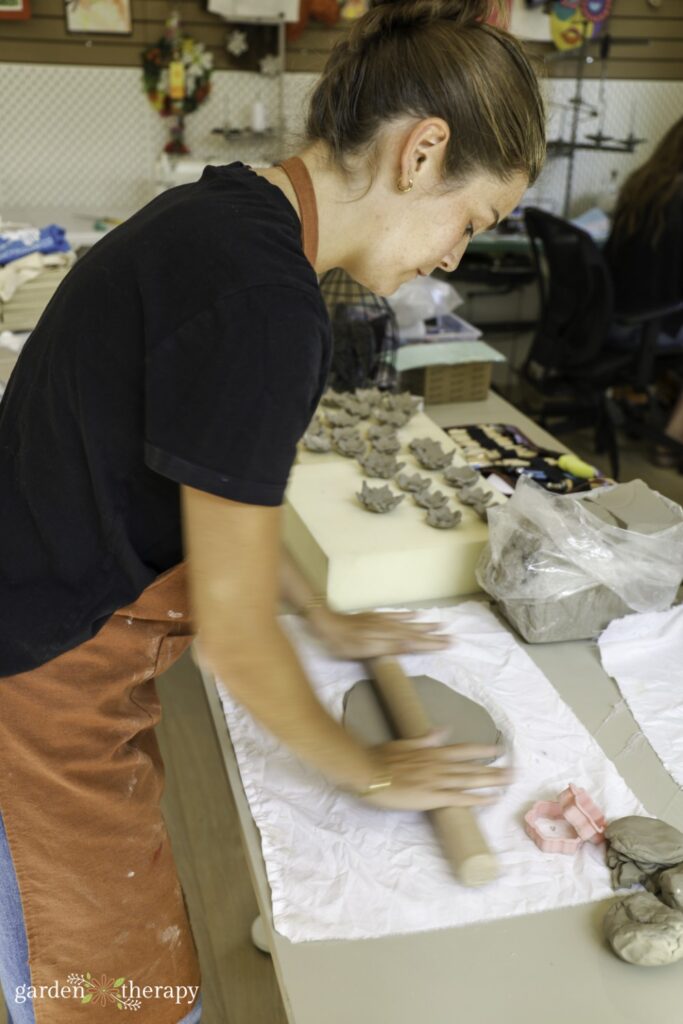
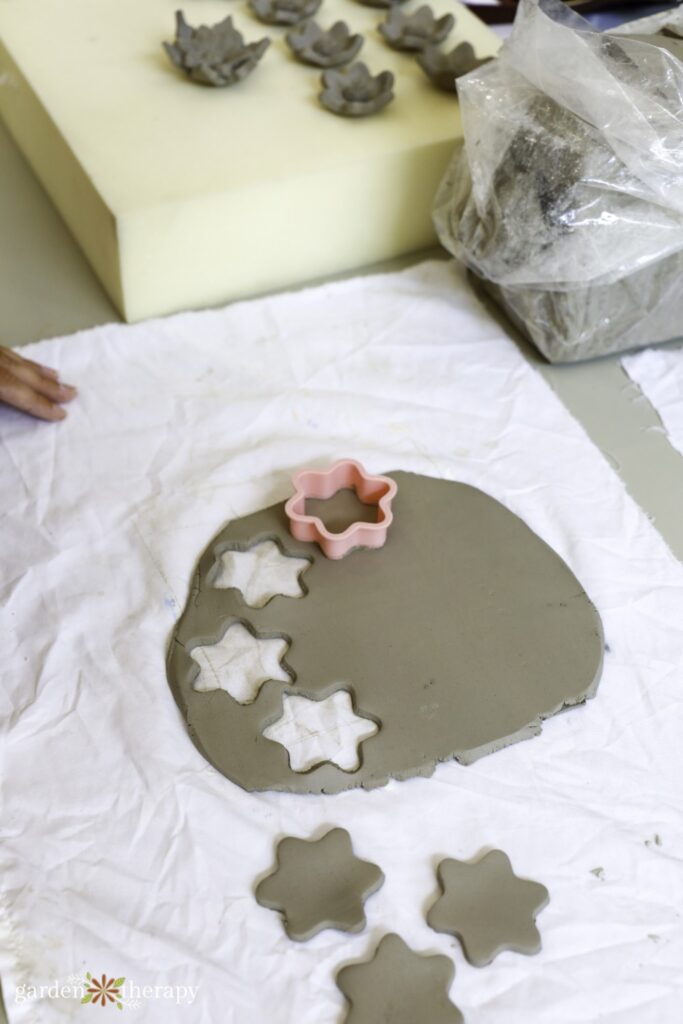
Once your clay is wedged, use a rolling pin to smooth the clay until it is about ½ inch thick. Next, we used a flower-shaped cookie cutter to cut out the flower shape.
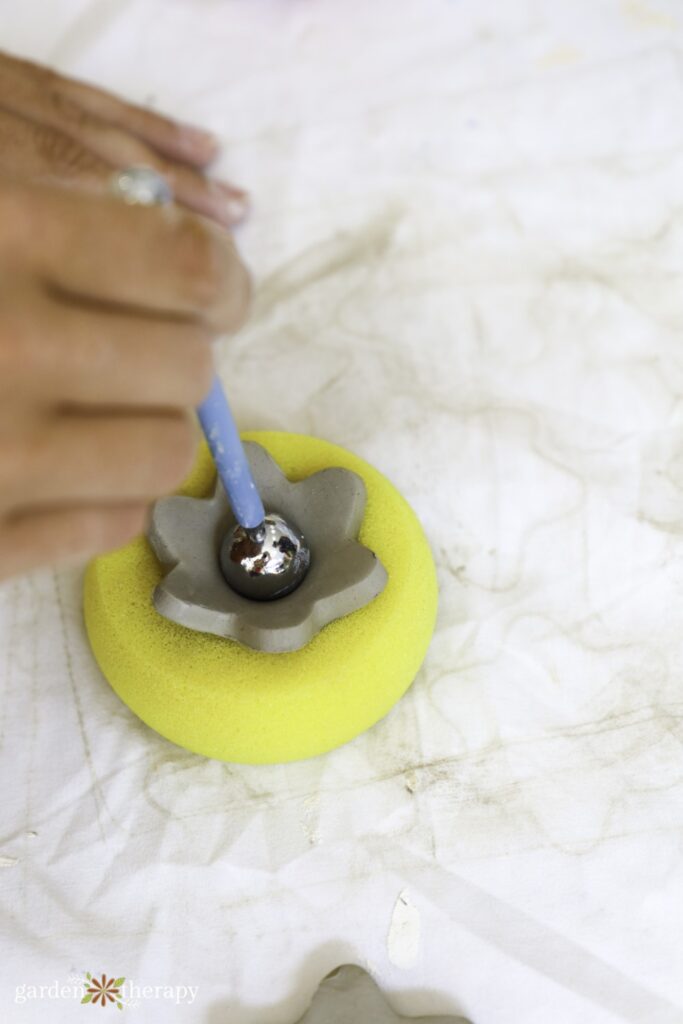
Lay the flower on a pottery sponge and then use a large ball stylus tool to gently push the flower against the sponge into a cup shape.
To make the center of the flower, roll a small ball of clay. To attach it to the flower, score both the back of the ball and the center of the flower, and gently flatten it.
Scoring is another essential clay technique to attach two pieces of clay. To score, you’ll use a small pointed/sharp stylus to make a series of lines across the back of the clay in cross directions. You’ll repeat this process on the other piece of clay you’re attaching. Next, you’ll add “slip,” which is either water or really wet clay, and this acts as glue.
Next, you’ll blend the edge of the attachment with a moist paintbrush or a blending tool. For more details on scoring, watch this quick tutorial.
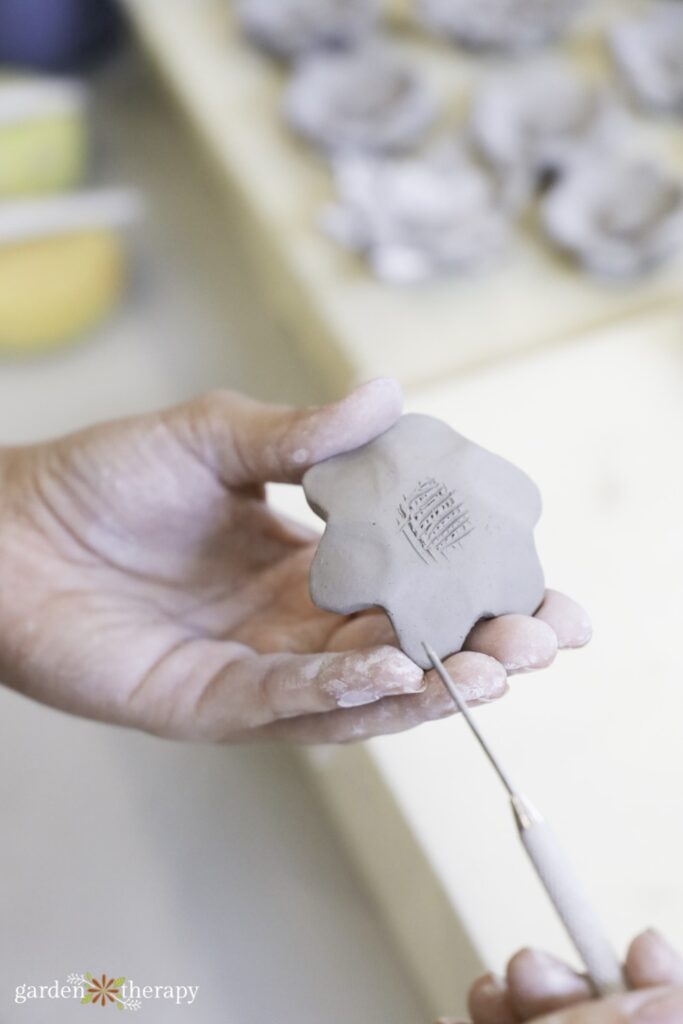
It’s also important that the center of the flower is textured so that the bees have something to grip onto while they take a drink. Use a tool to lightly press small holes into the center of the flower or to scratch it up ever so slightly.
Smooth out the inside of the petals and then use a needle stylus tool to make detailed lines on the petal of the flower.
For some of our flowers, we left the top of the flower just like that. But you can add a secondary row of petals using a slightly larger cookie cutter and the sponge to shape the second layer into a cup, and the scoring technique to attach the two layers.
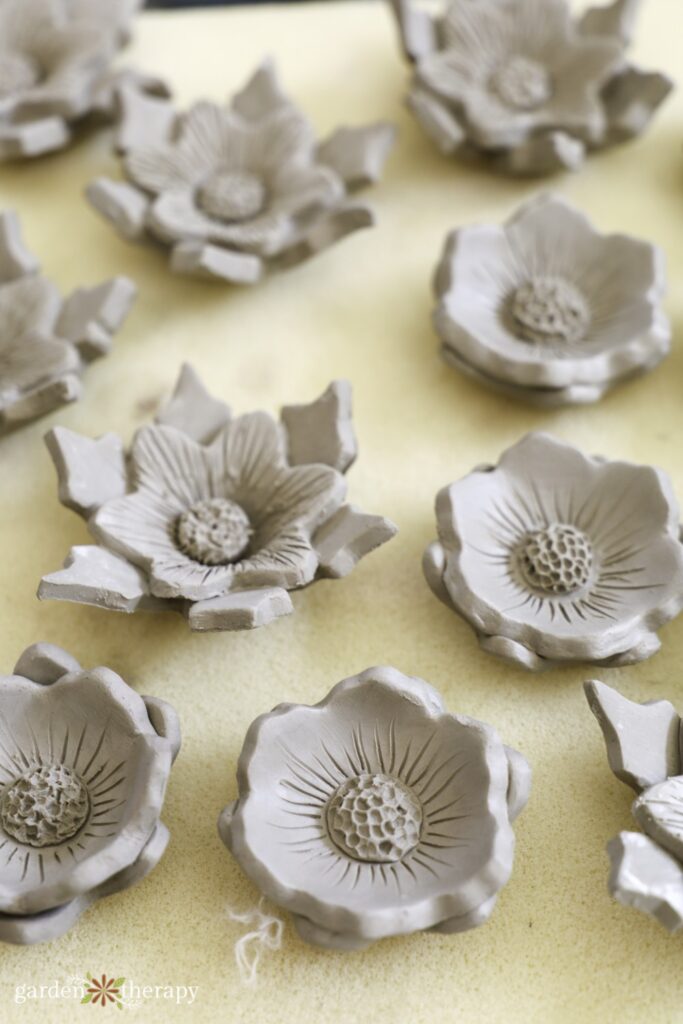
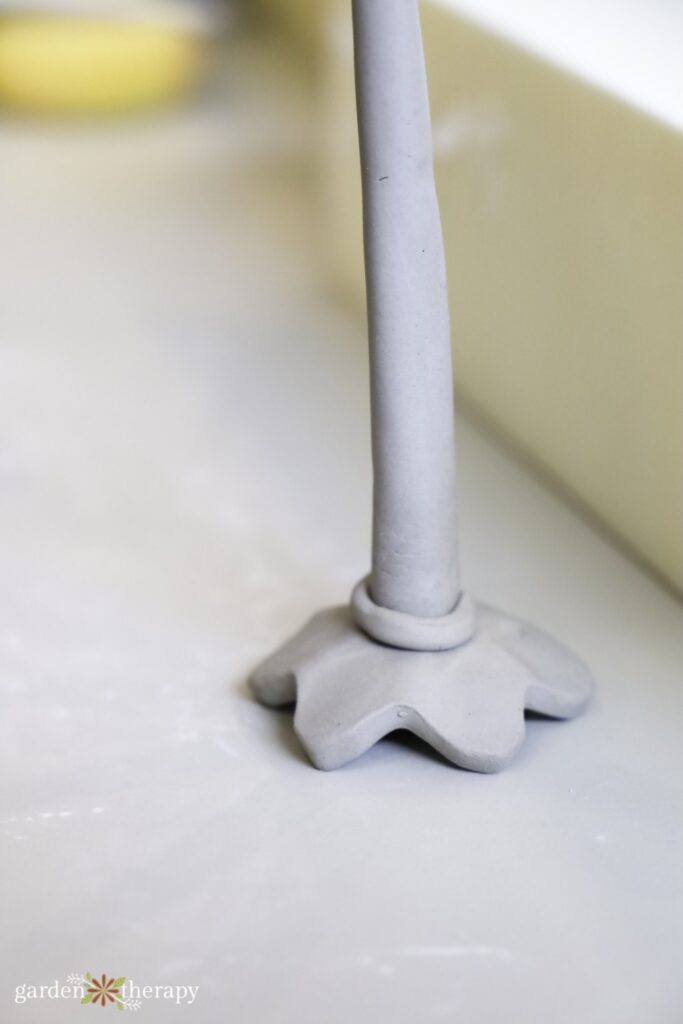
For the base of the bee cup, you’re going to roll a long cone shape. If you’ve already made one, it’s helpful to measure it against a finished cup to get the height right. For the first one, start off long and cut as you go until you get a height that feels right.
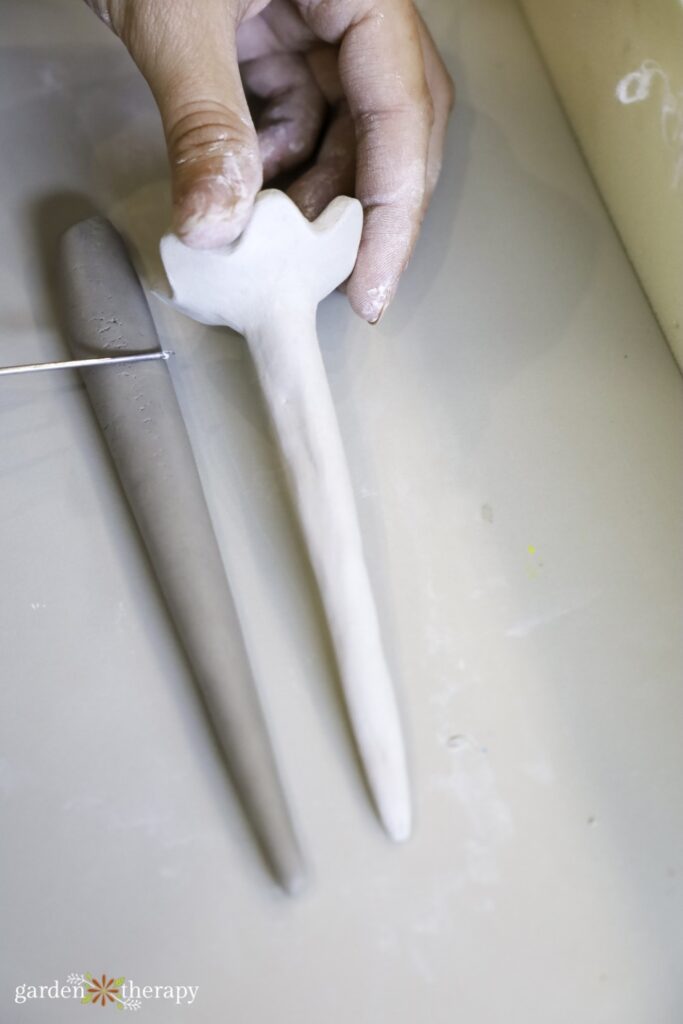
Next, you’ll score and slip the top of the cone and the bottom of the flower to attach the two pieces.
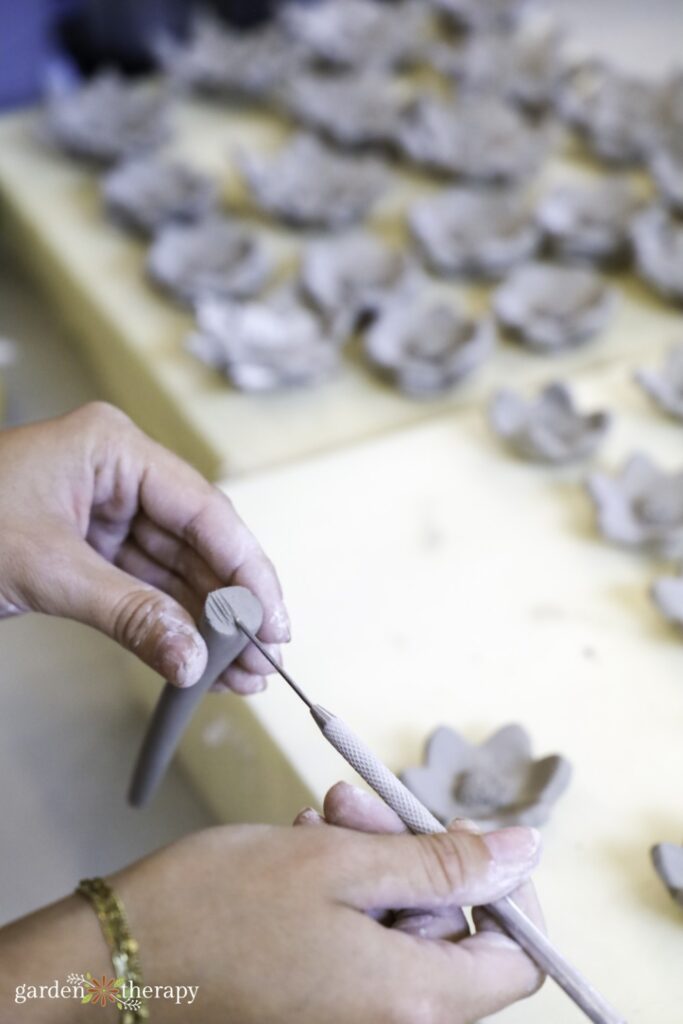
For extra strength, you’ll also roll out a little rope of clay and wrap it around the attachment, using score and slip technique as well. Use your tools to blend it all together so it looks like the flower blends right into the cone.
Drying, Firing, and Glazing
Now, it’s onto drying. The bee cup will have to dry out completely before you can fire it in the kiln. Your local pottery studio will know when it is best to place it in the kiln.
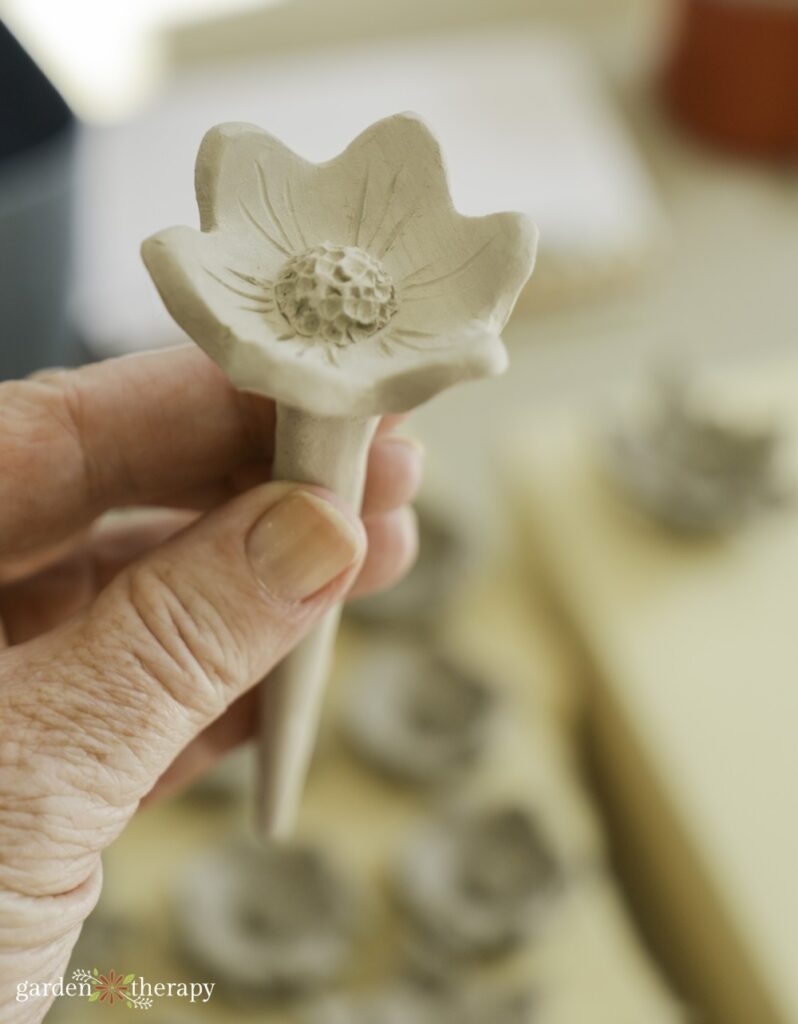
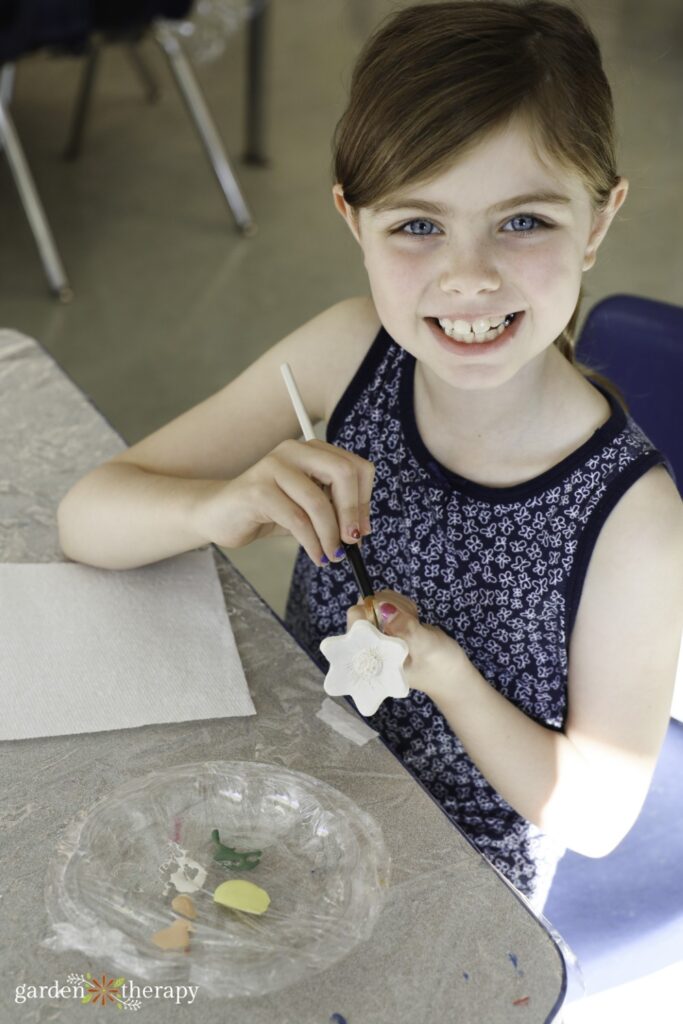
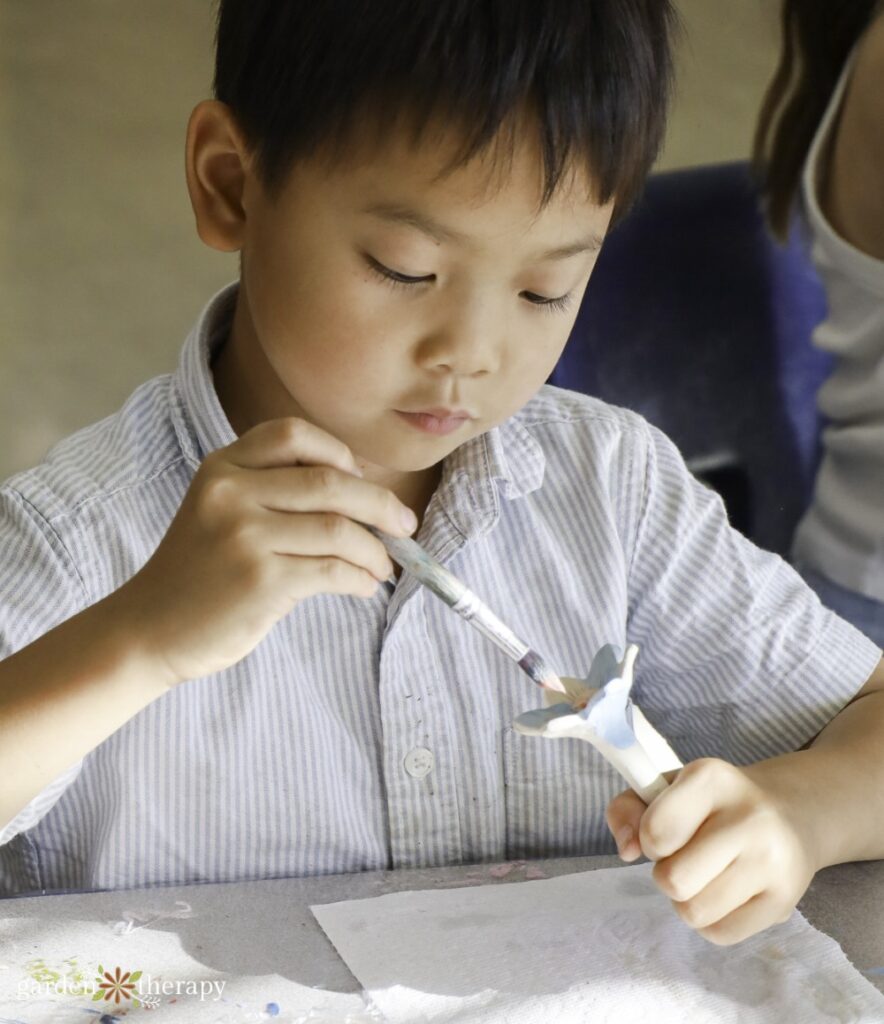
After being in the kiln, you can glaze it and let your artistry shine through. The kids had the best time decorating these bee cups and putting their own personality into their art. Once the glazed cups are fired, they are completely water-safe and ready for the outdoors.
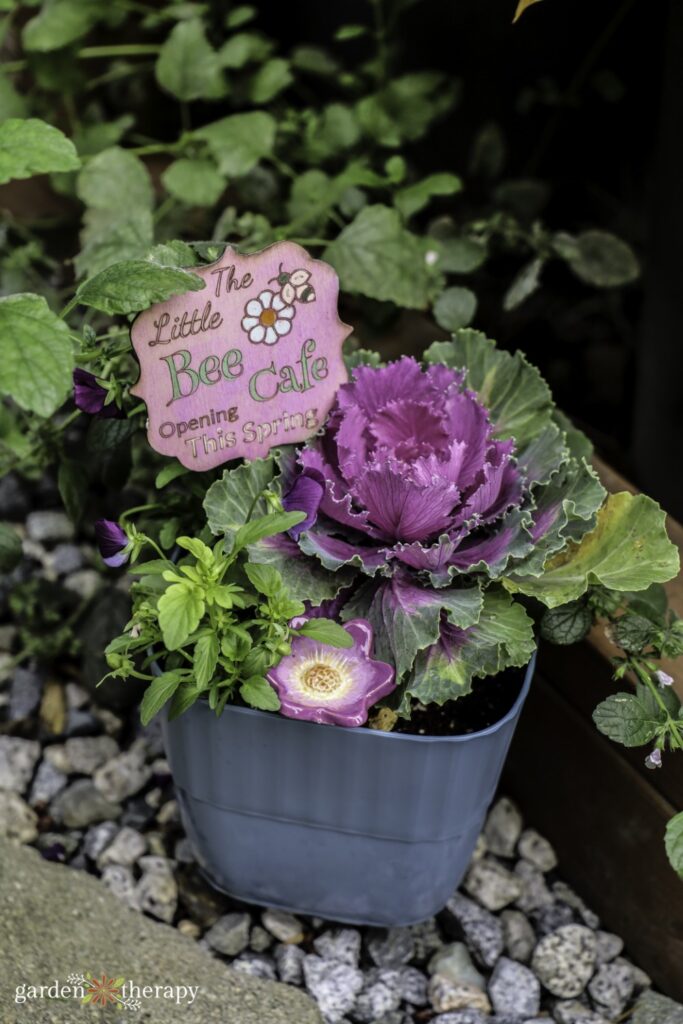
A big thank you to the team at Paper Crow Creative for sharing your beautiful bee cup design with me and the world! These bee cups are a wonderful way to add some art into your garden while supporting pollinators. Pair them with a bee breakfast planter, and you’ll have an even more welcoming space for your garden’s smallest visitors.
More Ways to Help the Bees
- Bee a Good Garden Host: Make a Bee Bath
- Plants and Tips to Create a Bee-Friendly Garden
- Identify The Types of Bees Visiting Your Garden
- Grow a Blooming Wildlife Border to Support Pollinators
- Make a Bee Breakfast Pot: A Spring Feast for Early Pollinators

A city girl who learned to garden and it changed everything. Author, artist, Master Gardener. Better living through plants.