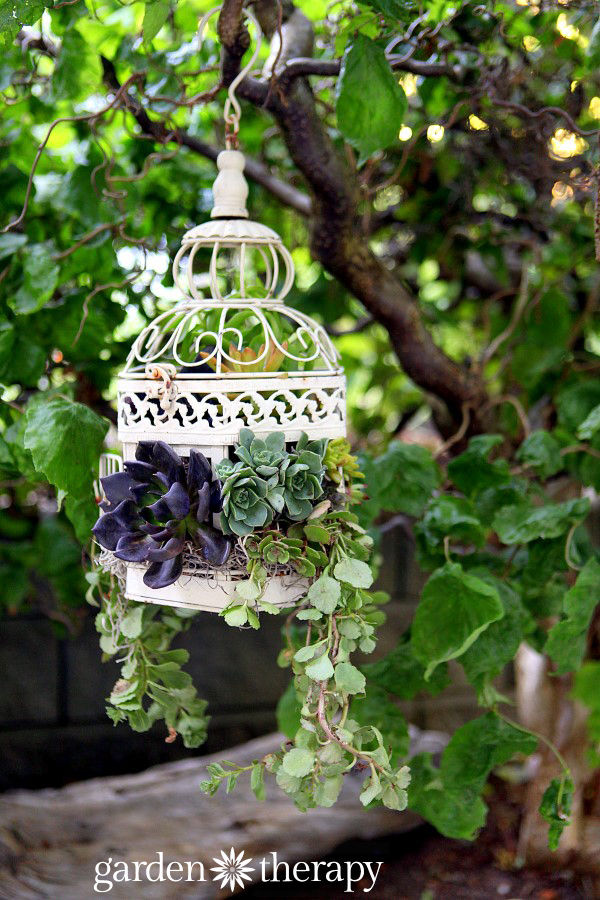
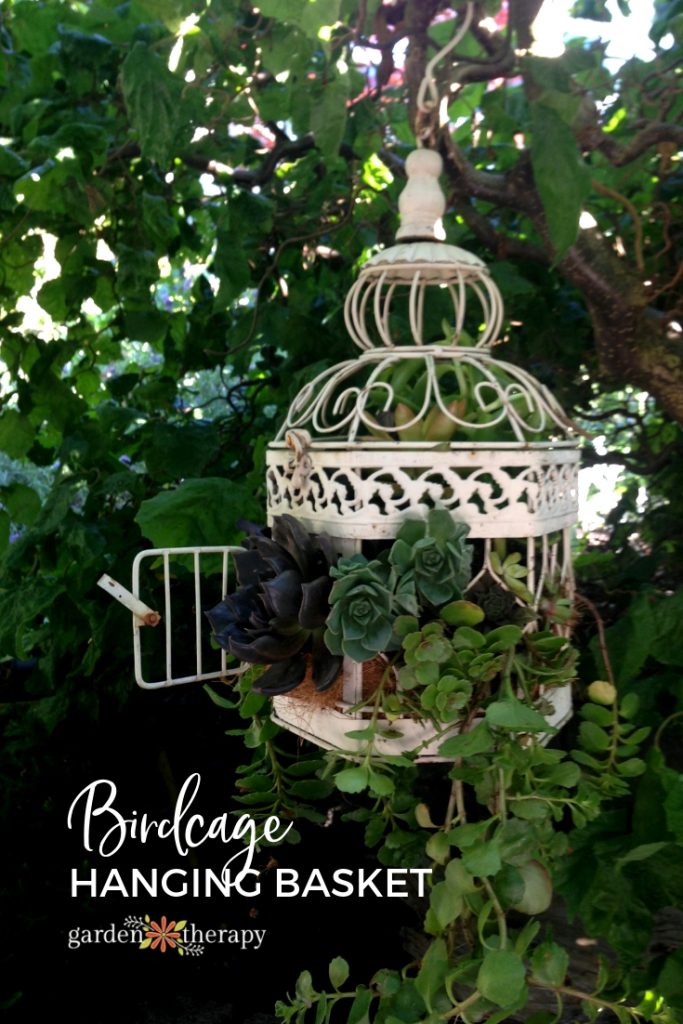
Turn a birdcage into a hanging basket planter with a few simple modifications and the addition of gorgeous plants. Succulents are perfect for a project like this because they are drought-tolerant and have so much variety in their shapes, sizes, and growing habits.
Materials
- Birdcage
- Coconut coir hanging basket liner
- Cactus and succulent soil
- Various succulents
Make It!
First, look for a birdcage that opens from the top so that you have easy access to the inside of the cage. Some birdcages that simply have a small door on the front are beautiful and decorative, but not functional for turning into a hanging planter.
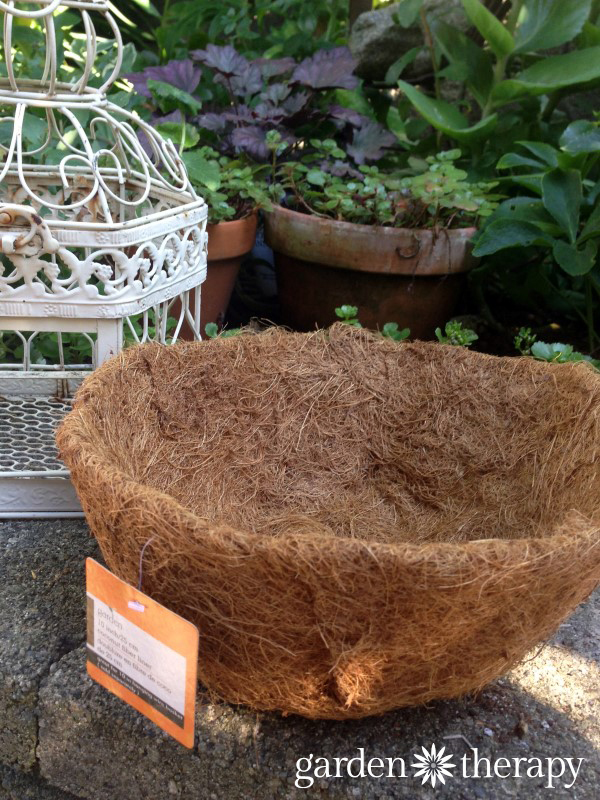
The base of the planter will be a coconut coir hanging basket liner. These come in many different sizes, so look for one that fits the inside of your birdcage. If it is a bit large, then you can use scissors to trim it so it creates a solid nest on the inside of the cage.
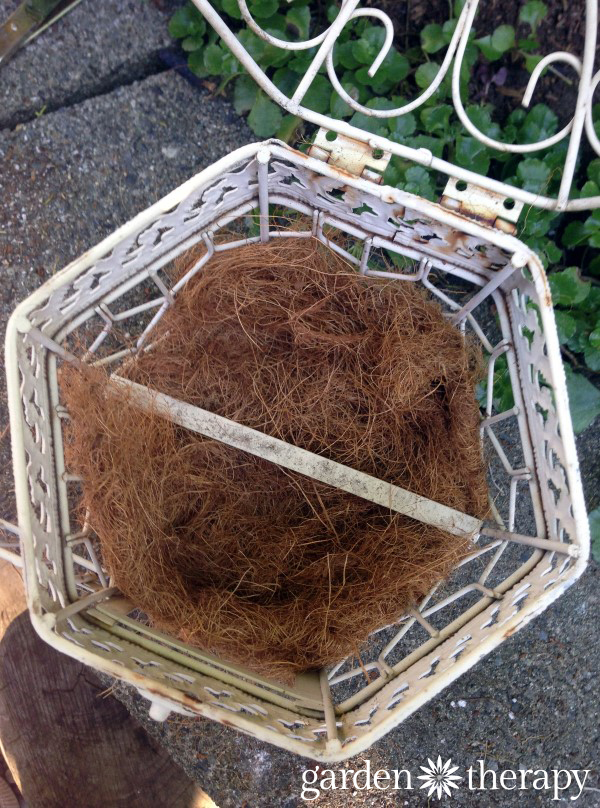
Once you have your nest of coconut coir, fill it with a layer of cactus and succulent soil, a soil blend specially formulated to ensure that it has the right drainage and properties for growing cacti and succulents.

Now is the time to get creative! Just like any container design, you want to look for plants that will follow the rules of “thriller, filler, and spiller.”
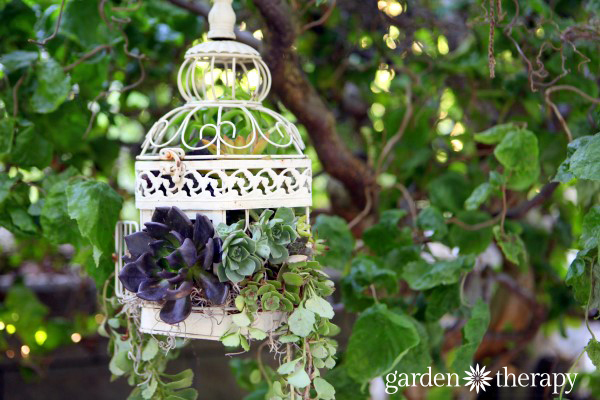
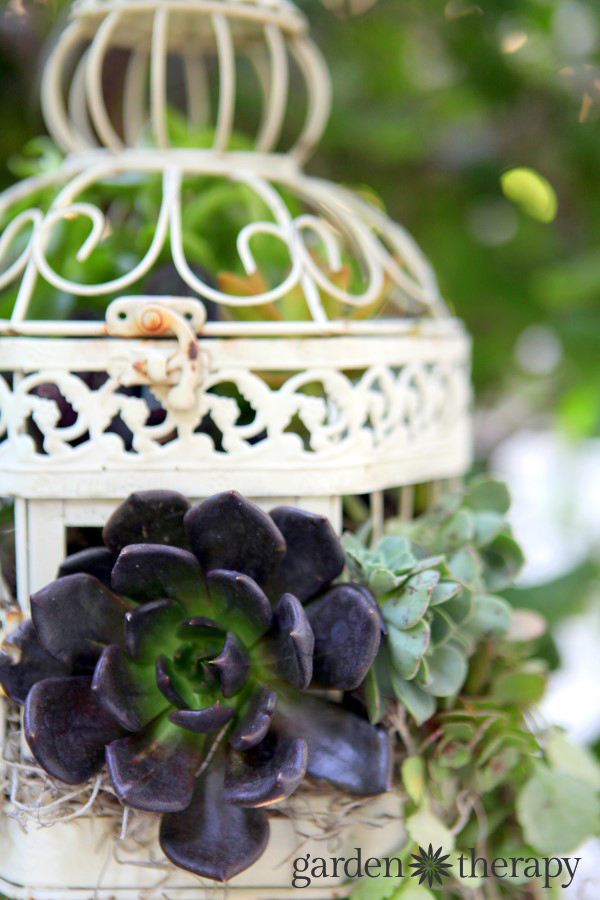
The thrillers are the beautiful Echeveria “Black Prince”* and Aeonium “Pinwheel”* and “Zwartkop”* that pop out of the door and sides of the birdcage. The filler plant is Crassula “Campfire”* that I set inside the basket. The spiller is Sedum spurium “Elizabeth” planted in the bottom of the cage draping down over the sides. This variety will turn a brilliant red when the weather gets colder. I added a few more decorative succulents in the center for additional color: Sedum “Coppertone”* added a bright pop of orange. I also added Sedum “Frosty Morn” and Echeveria “Painted Echeveria”* to fill in the space and hold the roots of the other succulents in place.
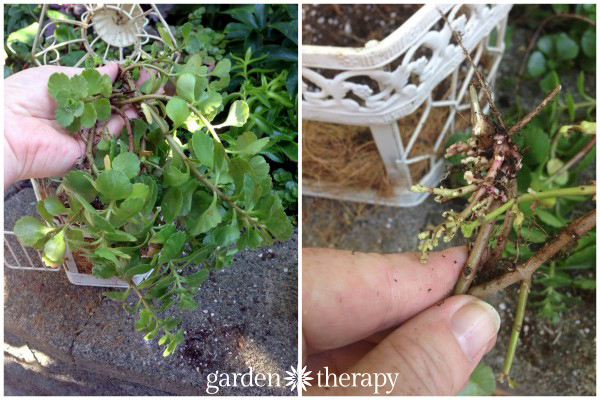
To make the planter, start by tucking the draping sedum roots in the soil and pulling the foliage through the cage’s holes. Next, add the filler in the center of the planter and place a bit more soil around it. Plant the decorative thriller succulents through the door and the gaps in the sides of the birdcage. It’s a bit tricky to add them in, but you can use floral pins to hold them in place until they settle in.
When your design is completed, give it a thorough watering to ensure that the roots adapt to their new home. After it is established, wait for the soil to become mostly dry, then water thoroughly by soaking the bottom of the birdcage into a few inches of water and allowing it to sit for one hour to absorb. Remove from the water and let drain for 30 minutes before hanging back up so that it doesn’t become too heavy for the branch it is suspended from.

As with hanging baskets, a birdcage planter will tend to dry out quickly, especially in hot summer months. Luckily, succulents are drought-tolerant and can handle a bit of that. For more tips on how to care for succulents, please see this post: The Essential Guide to Growing Happy + Healthy Succulents.
More Fun Planting Projects to Try
- A Thrifted Straw Bag Planter for Summer
- Set a Place in the Garden for a Succulent Chair Planter
- Pretty Up the Party with Birdcage Hanging Basket Planters
- How to Make an Upcycled Suitcase Planter with Gas Pipe Legs
- DIY Floating Planter for Water Gardens and Ponds
A city girl who learned to garden and it changed everything. Author, artist, Master Gardener. Better living through plants.


This would look great with strawberries planted in it also. Like this idea.
I love that idea! I must do that next spring!! heck, I’m going to plant one up now so they grow in fully in the spring. Thanks for the idea.
Hi Stephanie … I have a birdcage exactly in this colour hanging from an arbor in my garden .. but I don’t know if the top and sides are movable so I have to check that out .. as soon as I saw these on the net I knew I wanted to do it .. but having it laid out in these steps makes it so much easier, so thank you VERY much for this post !
They are so pretty I think I need to have more than one ! LOL
Joy : )
Every weekend i used to pay a quick visit this web site,
as i wish for enjoyment, for the reason that this this web site
conations truly good funny stuff too.
This idea is gorgeous Steph! I was at my local nursery last weekend, looking at succulents and I kept thinking about this project. I wanted to come home and re-read it before making succulent purchases, but now I can’t wait to try it!
I included this project in a roundup of some of my favorite DIY and craft projects from people attending SNAP! I’d love for you to take a peek. You can find it here:
http://hellocreativefamily.com/27-diy-projects-from-creative-snap-bloggers/
Best Wishes,
Crystal
Gasp! I love everything about your planter! My succulents grew like crazy this year and I need to put them in new places! I help run the “Talk DIY to Me” link party and we will be featuring DIY planters from this week’s link up! You should add this one to the party! http://mydiyenvy.com/outdoor-decor-ideas/
Thanks, Jes!