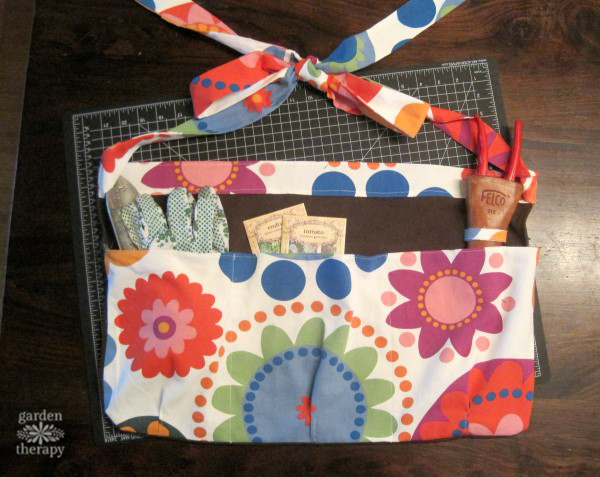
It is helpful to be able to be equipped with several items at once when you are gardening, as you may want to use pruners, seed packets, hand tools, and other supplies in quick succession. This cheery and functional garden apron keeps your tools and other small gardening necessities at your fingertips and adds a bright pop of color to your gardening outfit.
There’s no reason why you couldn’t make it in a plain neutral color if you’d prefer, but I personally like to have a burst of color to distract from the dirt that’s inevitably all over me when I am working in the garden.
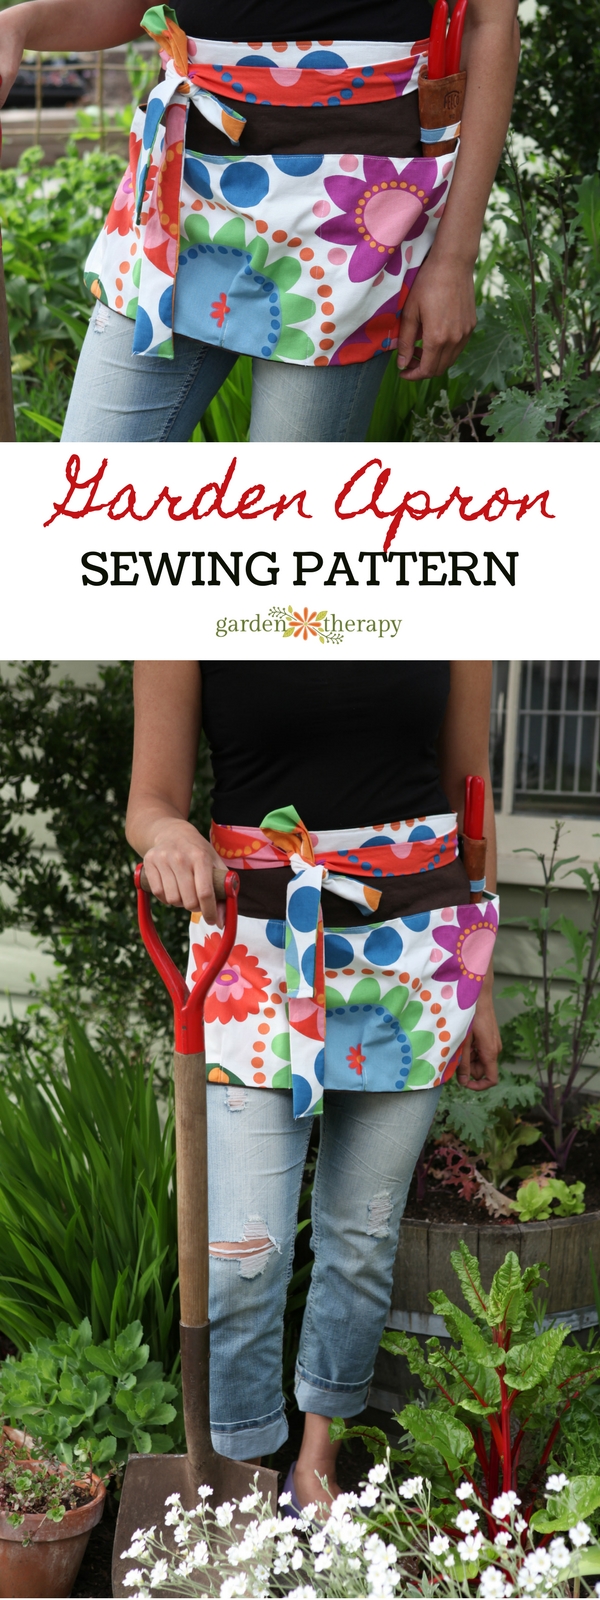
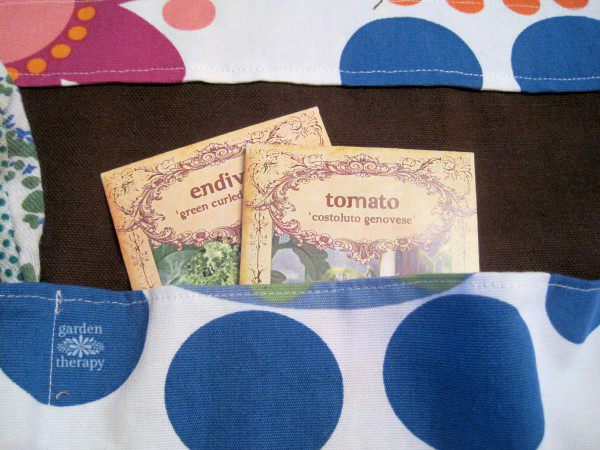
This apron has large, deep pockets so you can fill them with seed packets, plant labels, and various tools. It is nice and wide so that you can stuff the side pockets with all sorts of things and still bend over to dig without getting stabbed in the belly by a weeding fork (!).
I also made a loop to hold my pruners off to the side so I can draw them quickly when encountering a sudden showdown with unruly branches. I like my waist ties to be extra long so that they tie in the front with lots of room to make a pretty bow, but you can alter the length to your preference.
Here’s how to make your own.
Materials:
Sturdy-weight fabric: plain for apron back, pattern for pockets, waistband, and sash, cut as follows:
- 1 – 20” x 14″ plain color fabric for apron back
- 1 – 23” x 10” patterned fabric for apron pockets
- 1 – 20” x 4” patterned fabric for waistband
- 2 – 42” x 4” patterned fabric for long, wraparound sashes
Make it!
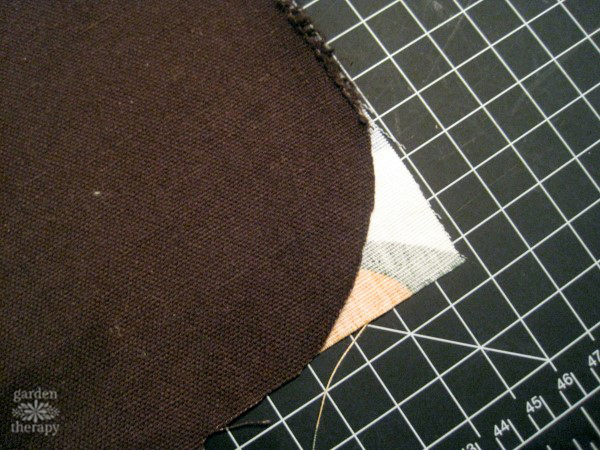
1. Cut all fabric to the dimensions listed to make a ladies’ large apron. Adjust size up or down to fit. Hem the two short sides of the back fabric (the top and bottom won’t matter) and hem the top edge of the pocket. Using a glass, cut a rounded corner on the bottom corners of both the back fabric and the pocket fabric.
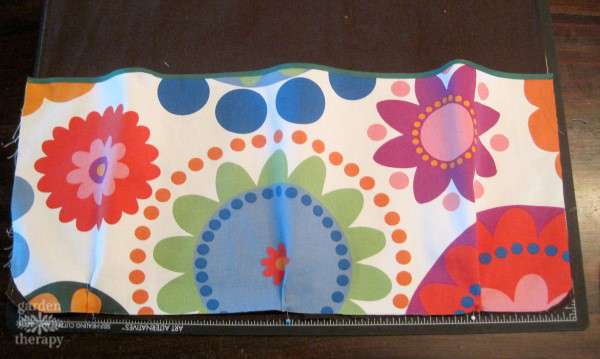
2. Lay the larger pocket cut of fabric onto the plain back fabric and pin 3 pleats along the bottom edge so that the pocket fabric is now the same width as the back. Sew pleats with a double stitch about 1 ½” up from the bottom. Do not sew the patterned fabric onto the plain back fabric yet, just sew the pleats into the patterned fabric.
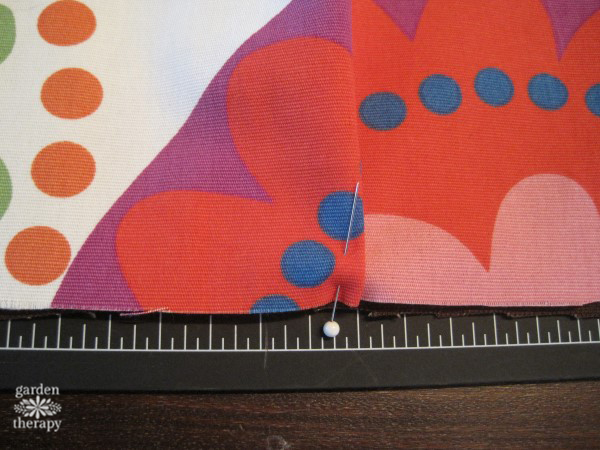 3. Place the back fabric with hem facing upward, and then lay the pocket fabric facing downward on top. Pin and sew along the side and bottom edges.
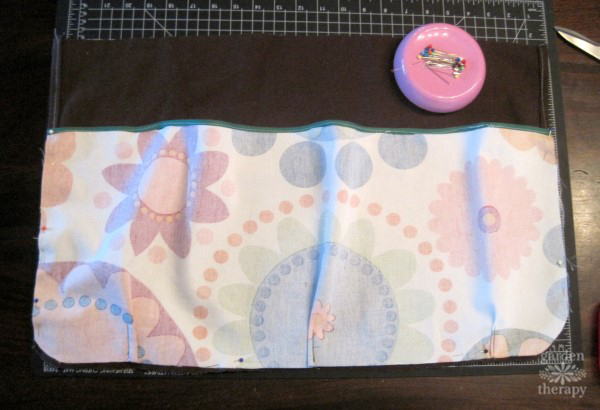
Turn right-side out and make a decorative stitch along the sides and bottom of the apron. Sew two straight lines to create the pocket dividers.
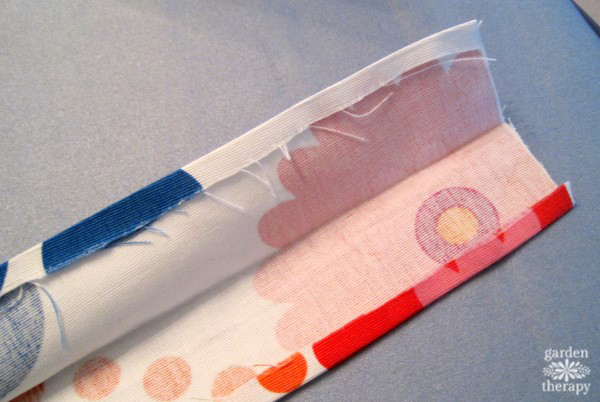
 4. To make the sashes, fold the fabric strips in half lengthwise and inside out. Sew the two long ends together, making a long tube. Turn tube right-side out with a chopstick and some patience. Fold the ends of the sashes inward and stitch to finish the ends.
5. Sew each sash to the top sides of the back fabric. Iron the waistband in half, and then fold over each end by ¼”, ironing them down too. Fold waistband over the top edge of the back fabric and covering the two sides where the sashes are attached. Sew along the bottom and sides to secure and along the top edge for continuity.
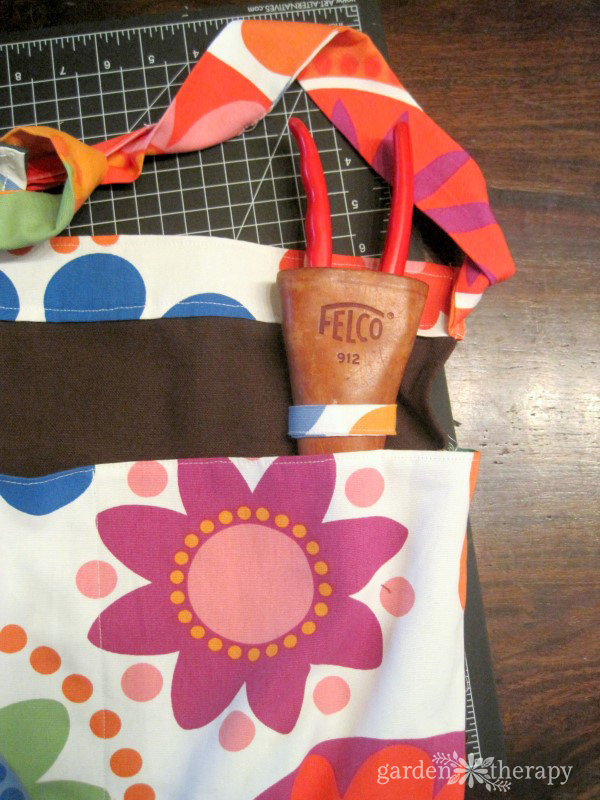
6. Make a loop to hold pruners or other tools by folding a 2” x 5”-long cut of fabric lengthwise and folding the edges in. Sew top, bottom and sides to secure the “ribbon.” Attach to apron back by sewing the right end to the apron back, then sewing the same end 1” to the right. Loop the ribbon around to the other side, sew the left end near the right end, and then again sew 1” to the left of the third line.
Thanks for visiting the weekend project!
When you’re not toting your smaller garden tools around in this apron, keep them in this DIY Garden Tool Storage Bin.
A city girl who learned to garden and it changed everything. Author, artist, Master Gardener. Better living through plants.


Comments