If you are caring for an orchid, you already know that these pretty plants can be a little temperamental. Keep it happy with this simple DIY orchid humidity tray. It’s simple to make and really works!
Do you have a temperamental orchid? If so, your environment may be the culprit! You may not notice it, but your home has a number of different microclimates in it. As you move from room to room, the light, temperature, and humidity can change drastically.
Not only that, but these variables can also jump up and down all day long. Creating the right conditions is the first step to having beautiful houseplants, including orchids. My favourite trick for keeping orchids happy is this DIY orchid humidity tray.
It’s funny: orchids are probably one of the most difficult houseplants to take care of, and yet they are probably one of the most popular houseplants to have. You would think the two wouldn’t go together, but they are always available at grocery stores and garden centers. They are a beautiful bloom that just about everyone is attracted to, so they often get picked up.
However, once an orchid is done blooming for someone, that usually marks the end of the houseplant. People are prone to overwatering orchids, and even those who keep them alive can’t get an orchid to bloom again. So, how do we keep them alive and beautiful?
Let’s get into it.
- The Trick to Orchid Care
- How to Make a Humidity Tray
- Materials
- Make it!
- FAQ About Humidity Trays
- More Houseplant Tips to Know
The Trick to Orchid Care
Watering orchids is a skill. Since they are prone to overwatering, the trick is to know when and how much to water your orchid. In nature, they do not grow in soil but by hanging on to the bark of trees. This makes their root system a little different than the average plant. Instead, they absorb water in the humid air.
Now think of tropical plants that originated in the jungle or rainforest, where moisture hangs in the air. Those plants just love a humid space in your home. Kitchens and bathrooms can be a good space, as the steam from washing and cooking will fill the air they breathe. In most other rooms, especially in colder months when they are heated, the air is dry.
You are still going to want to water your orchid (approximately once a week), but a humidity tray will help provide moisture to your orchid without having it sit in water and potentially get root rot. Orchids like continued airflow, but if the air is dry, it will, in turn, dry out the plant.
Misting orchids and tropical houseplants can certainly help, but it needs to be done much more regularly than I can remember to do it.
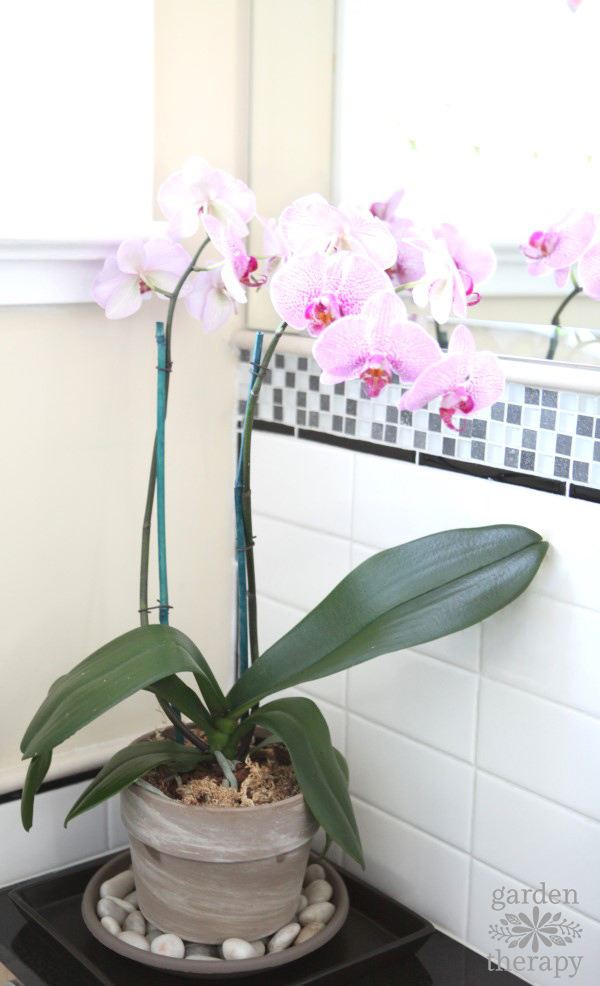
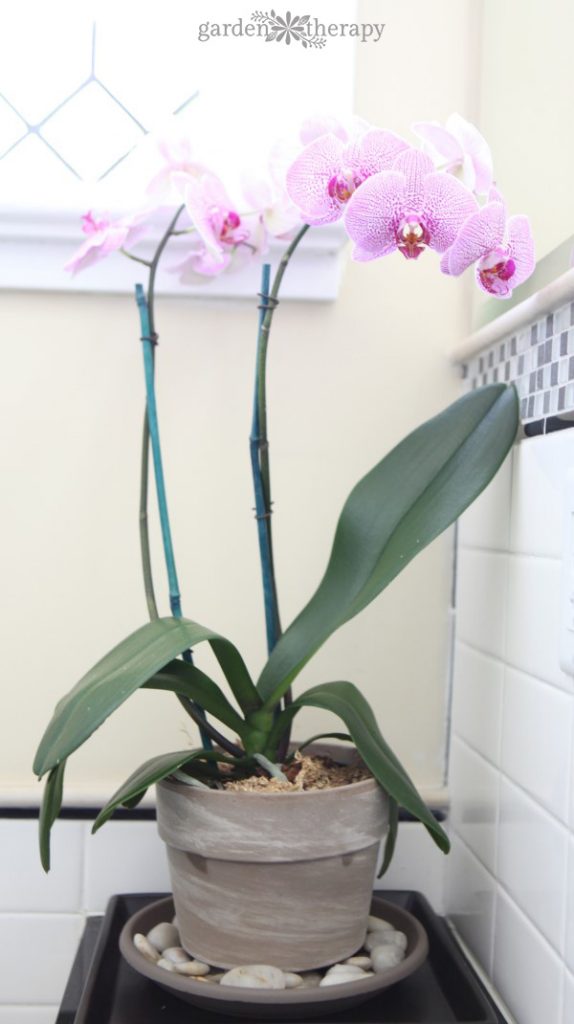
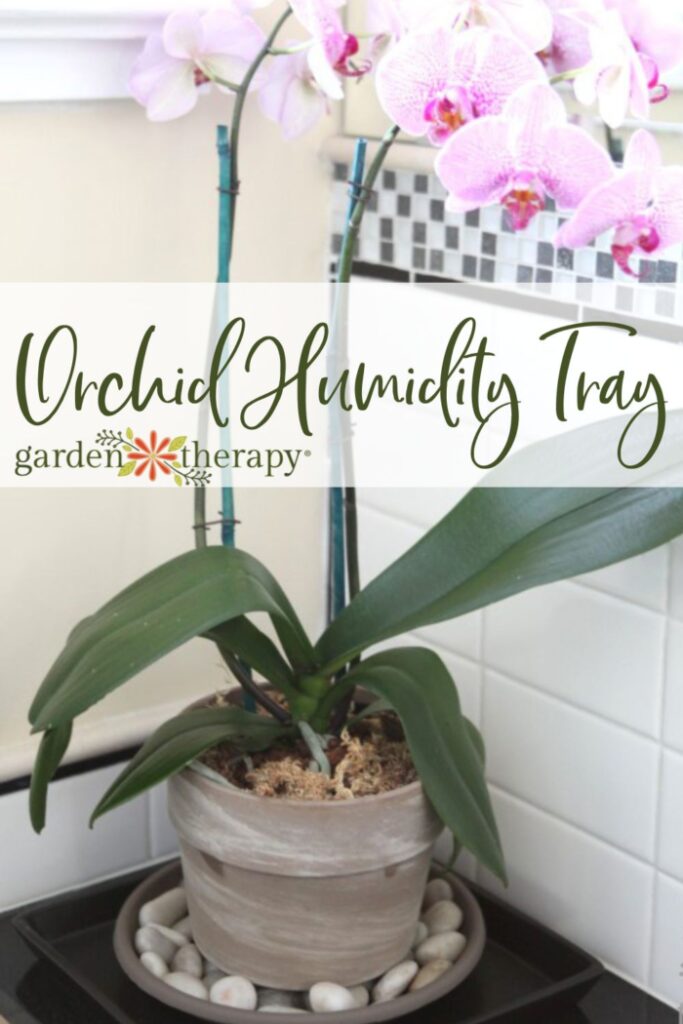
Orchid trays are the perfect balancing act between providing moisture and not overwatering. It works by collecting water in a base while keeping the plant and roots suspended above it. As the water evaporates, the orchid benefits from the humidity. This DIY orchid humidity tray takes seconds to put together and even less time to maintain. Plus, it looks pretty, which is always a bonus in my books.
How to Make a Humidity Tray
This DIY orchid humidity tray will help the stunning blooms last longer and keep your plants much happier. And it can be used for a whole host of humidity-loving plants as well.
Materials
- Orchid pot
- Drip tray that is at least 1″ larger than the base of the plant pot
- Cork trivet (optional)
- Hot glue gun and glue (optional)
- Decorative stones
Make it!
This is not a difficult project to assemble, but the key is finding the right materials. Hopefully, you have your orchid in an orchid pot. If not, transplant it into a pot with large holes that promote air circulation.
As much as orchids like humidity, they do like to keep their roots dry. Many orchids have a plastic orchid pot inside of a decorative ceramic pot. Be sure that the decorative pot has drainage holes to prevent the roots from sitting in any standing water.
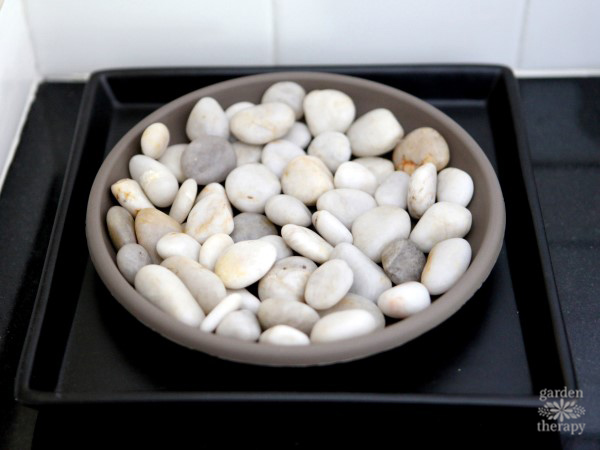
Choose a drip tray to go below the orchid pot that is at least an inch larger than the base of the plant. A deep tray that is larger than the base will allow for more water and, therefore, more humidity. If you are setting the pot on a wood table or other surface susceptible to water damage, I recommend gluing a round cork trivet to the underside of the tray.
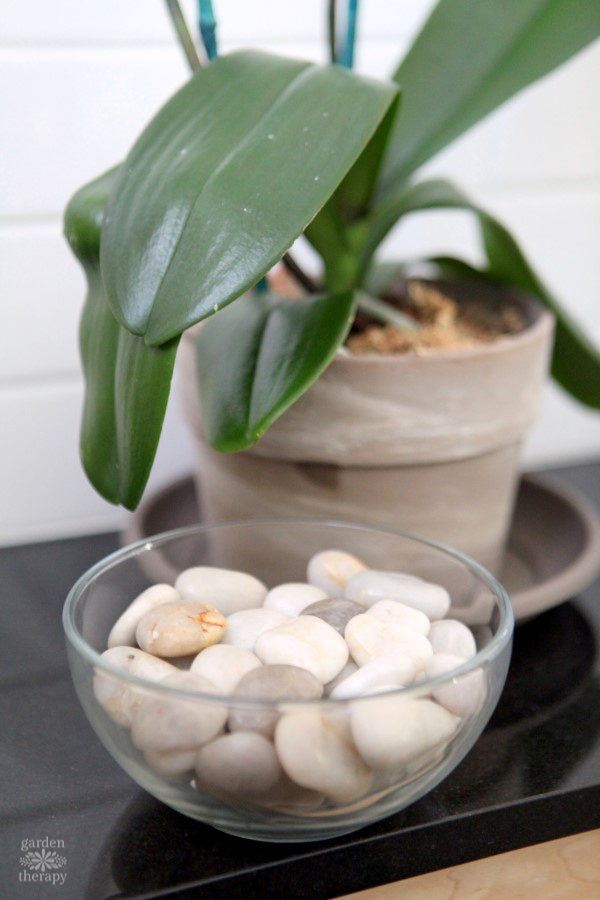
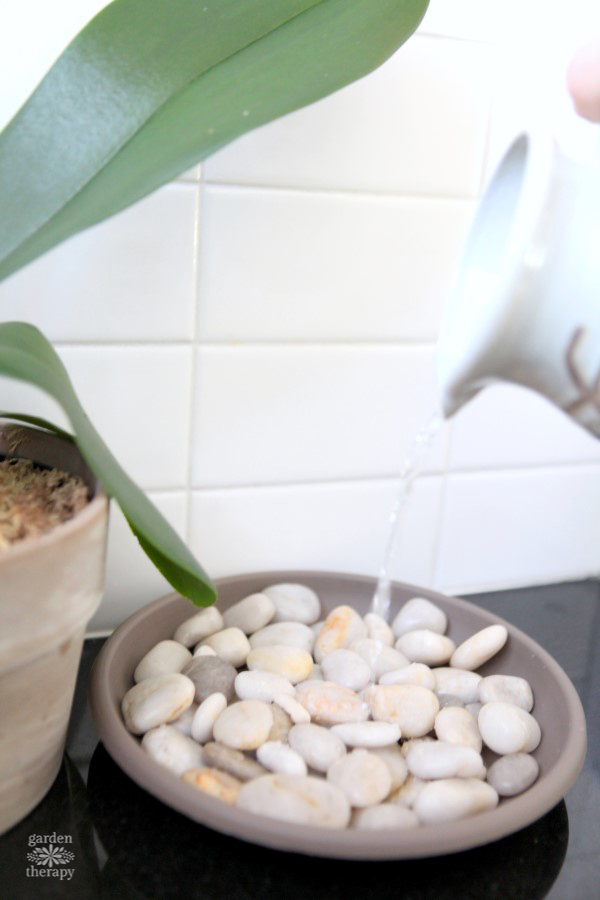
Fill the tray with decorative stones, pebbles, or glass stones. The material you choose is up to you, but larger stones (a half inch to an inch in size) will make the tray easier to clean and store more water.
Finally, monitor the water levels and top up as they evaporate. Wash the tray and stones every month to keep them clean.
Give this humidity tray a try and see if you notice a change in your orchids. In addition to watering and humidity, there is a lot more that goes into a successful orchid, such as using the right potting medium, lighting conditions, and fertilizer. You may be interested in my orchid care guide to learn more about this beautiful houseplant!
FAQ About Humidity Trays
When watering, I still water from the top and let the tray below hold the runoff water.
The plant will absorb the extra humidity through its leaves in a process called foliar acceptance. If you want, you can place the tray somewhere else by the plant, as it doesn’t need to be directly underneath. I just find this the most convenient place to put the humidity tray.
It’s always possible that too much of a good thing can be bad. That being said, this tray won’t provide ‘too much’ humidity and is always a safe bet to use.
More Houseplant Tips to Know
- Orchid Care – How to Grow + Propagate Orchids
- Make a Simple Organic Fertilizer for Healthy Indoor Plants
- The Most Beautiful Flowering Houseplants
- What’s Up With a Bouquet? Flower Meaning and Symbolism
- The Everything Guide to Watering Houseplants
How to Make a Humidity Tray
Equipment
Supplies
- 1 Orchid pot
- 1 Drip tray that is at least 1″ larger than the base of the plant pot
- 1 Cork trivet optional
- Decorative stones at least .5"
Instructions
- If you plan on keeping this humidity tray on a wooden surface, start by hot-gluing a cork trivet to the bottom of the drip tray.
- Then, fill the tray with decorative stones, pebbles, or even glass stones. Opt for larger stones to keep the tray easier to clean and use.
- Add water to the tray, and set your orchid on top.
- Keep an eye on the water levels, and refill as needed. Make sure to clean the tray and stones at least monthly.
A city girl who learned to garden and it changed everything. Author, artist, Master Gardener. Better living through plants.


Hi Stephanie, Thanks for your blog post. I really think you have WAY too many ads inserted everywhere. I understand you want to make a few bucks, but it’s extreme and really annoying to read.
Hi Missy, Thanks for your feedback! I have a ton of books and more that you can purchase through the shop that contain all sorts of ideas and projects with no ads. But to produce the rest of the content for free, then ads pay the bills. As you can imagine, the costs and time to produce over 1,000 projects here for everyone to access for free is quite the undertaking. Don’t get me wrong, I love doing it but with how ads are going I may not be able to continue to run the site the same way. The alternative would be to charge a membership fee. Is that something you would prefer?
Thank you so much for your information. It’s so easy to understand. When I first bought my orchid I read someone else’s info that said cut off anything that looked dead. So my orchid doesn’t have much on it. It has to grow the stem for the bulbs to grow on. It does have a leaf looking something that has grown on top. And roots are very few. I guess you can see you are talking to clueless. But I’m eager to learn. My orchid is still alive and I talk nicely to it as I do all my plants. Thank you so very much for your time.
Do you use the humidity tray in addition to watering from the top? Or as an alternative to watering from the top?
I water from the top and let the tray below hold the runoff.
Hi,
Can the humidity tray be placed next to the orchid or should it be mandatorily placed under the orchid pot ?
Hi, yes, that is fine as well.
Should I have a humid tray for orchids that stay outside like Epidendrum?
Thank you
Hi Marta, it’s not necessary outdoors with natural humidity.