A terracotta wind chime is not just a visually pleasing decoration to have in your garden but also a musical tool that fills the air with delightful sounds. This simple DIY wind chime requires just a few materials but creates a large impact in the garden.
Not only is it beautiful to look at, but terracotta gives off a beautiful and distinctive sound. I’m a big fan of terracotta, and I use it in many ways in the garden. It’s just so versatile! Put that quality to use by making a beautiful-looking (and sounding) DIY wind chime.
Here’s how to make a wind chime using terracotta pots!
- History of Terracotta Clay Pots
- Why I Love Using Terracotta in the Garden
- How to Make Wind Chimes From Terracotta
- Materials
- Directions
- Frequently Asked Questions About DIY Wind Chimes
- More Garden Craft Projects
History of Terracotta Clay Pots
The name terracotta comes from the Latin word for “baked earth,” which is exactly what terracotta is: fired clay.
Terracotta has been in use for thousands of years, with figures in Greece dating back as far as 3,000 BC. Often used for utilitarian purposes, terracotta was a common material for rooftops, bricks, and sarcophagi.
Terracotta pots also date back to ancient times, as ancient Romans and Egyptians purposefully planted plants in pots. Fast forward several thousand years, and gardeners worldwide still love using terracotta pots for their earthen look.
Why I Love Using Terracotta in the Garden
Flower pots made from terracotta are a garden icon due to their versatility, durability, and affordability. They come from the earth and act as a more solid soil for plants.
The pots are porous and will break apart when it freezes. However, if you use them in the spring through fall and store them for the winter, they will last many years.
The porous clay allows for air and moisture to readily flow through the pots, making them a good choice for plants that like good drainage and dislike sitting in water. On the other hand, that same porosity can mean that plants dry out a little faster in terracotta, which means that it’s not the best fit for growing all plants.
Herbs, succulents, and many annuals do extremely well in terracotta.
How to Make Wind Chimes From Terracotta
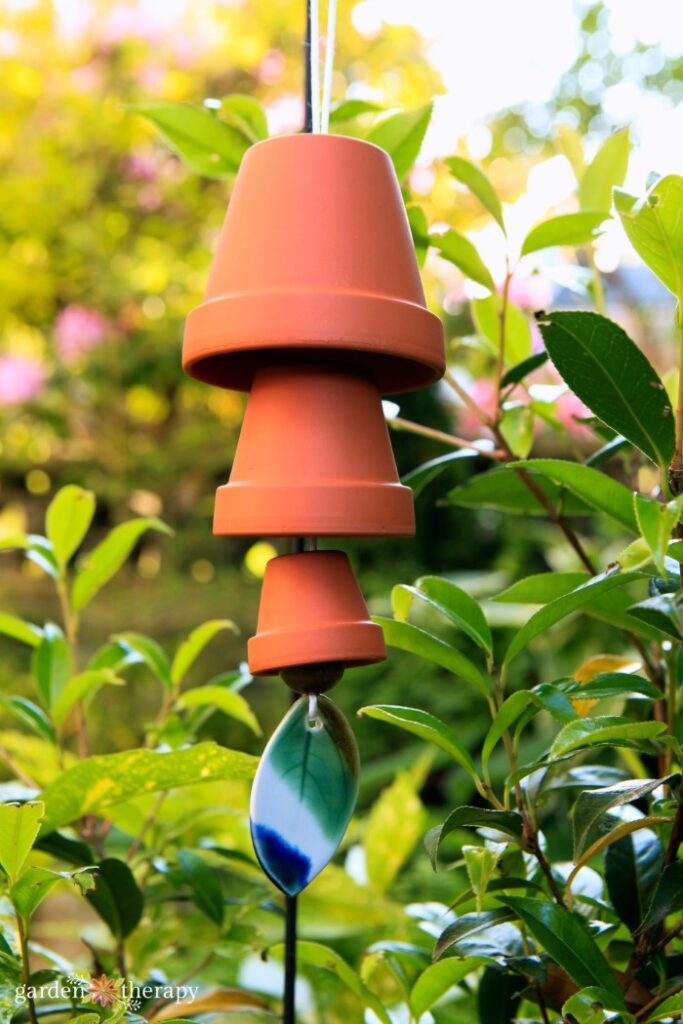
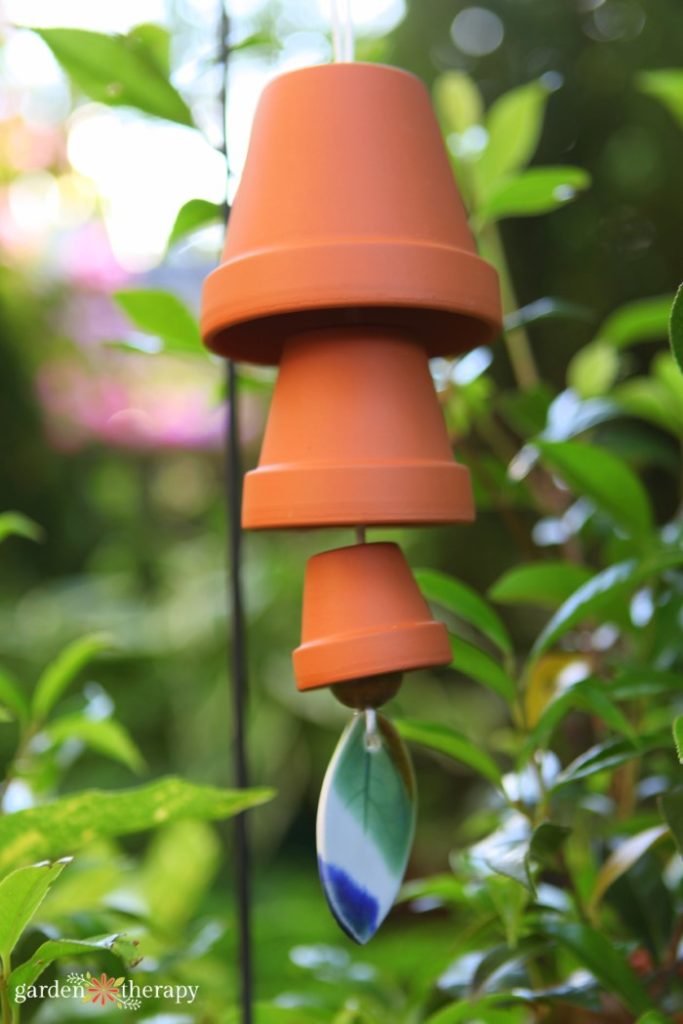
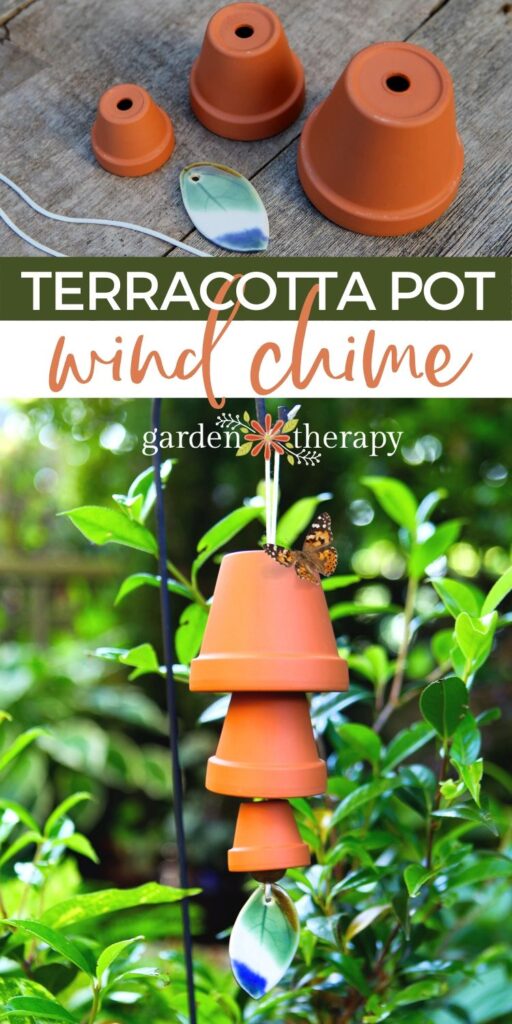
Even though this DIY wind chime is made from a few clay pots, its sound is surprisingly musical, complementing the beauty surrounding it in the garden space.
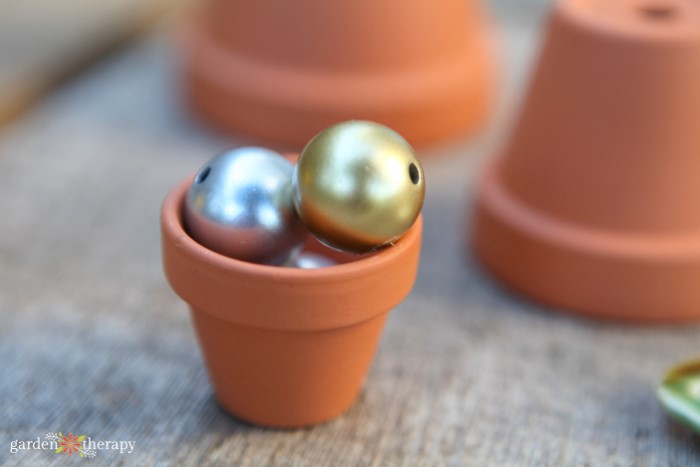
Different-sized terracotta pots allow each pot to make a different chime when knocked together. Using beads inside the pots creates weight so that each pot will tap against the other, creating a cacophony of sound alongside the buzzing bees and chirping birds.
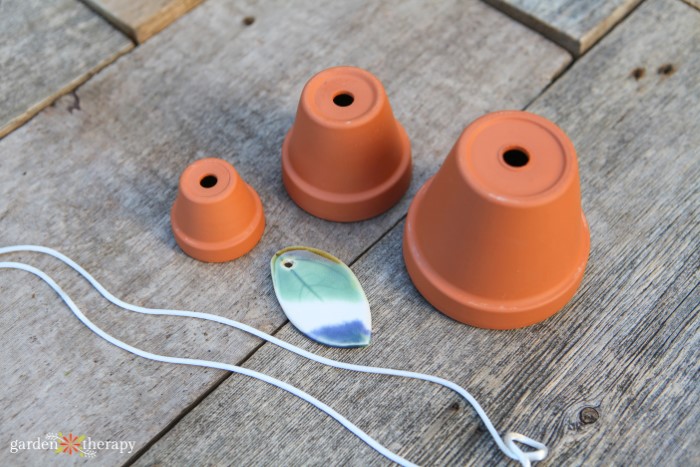
Materials
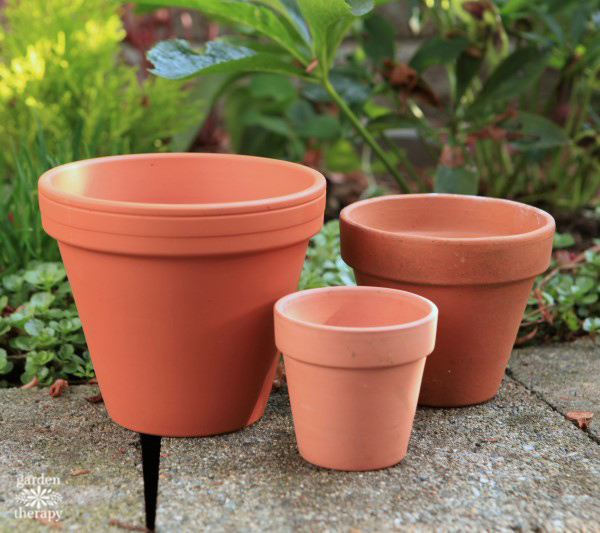
- 3 to 5 different sized terracotta pots
- Strong outdoor cord (such as paracord)
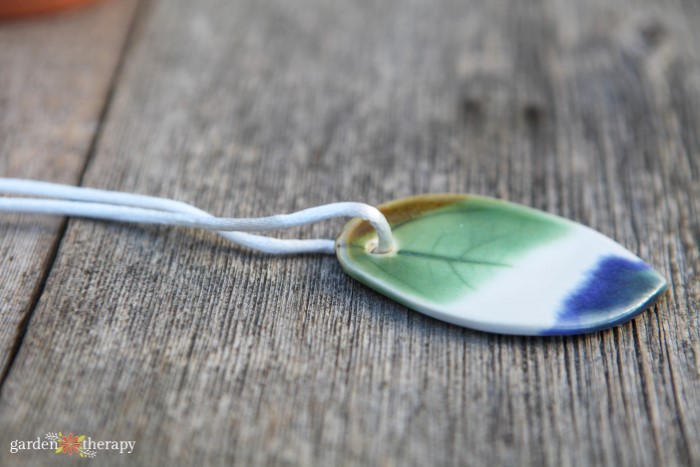
- Clay charm or other decorative, weighted item
- Tape
- Large beads
Directions
Go to your local craft or garden store and look for terracotta pots the vary in size. I was able to find three pots with the exact same shape in sizes that had a small variation in diameter and height.
Choose a strong cord that can be used in an outdoor setting. Look for a synthetic cord for outdoor projects because it is the strongest and longest-lasting in most cases.
Begin assembling the wind chime by cutting the length of the cord that will complement the length of the wind chime when it is completed. For this project, my cord was cut to 36 inches long. This allowed me to have a lot of extra cord at the end that was easy to trim off at the end.
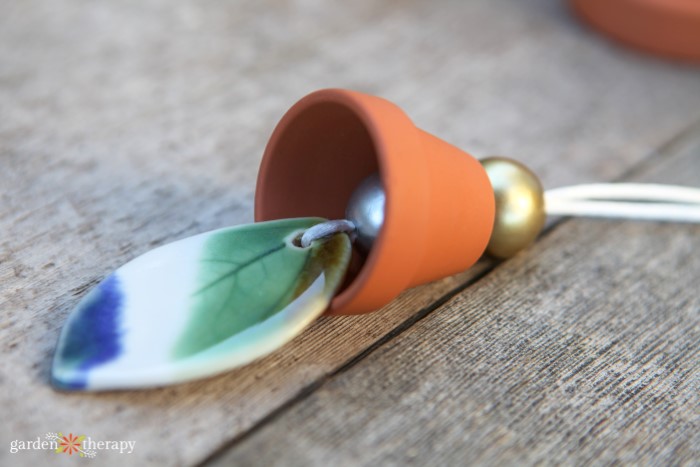
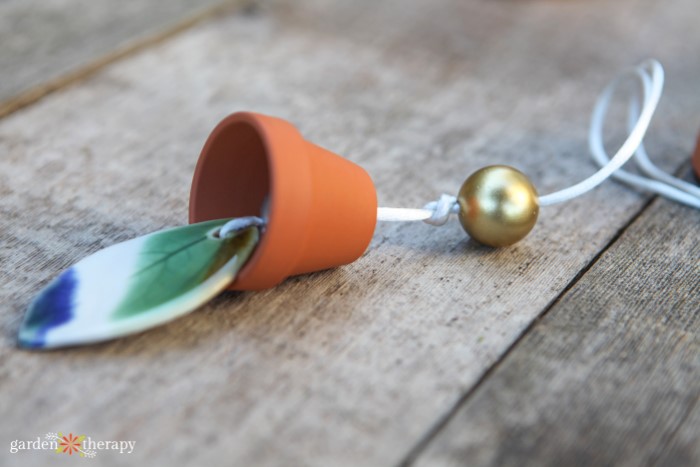
Thread the cord through the charm (in this case, the clay necklace pendant) and slide it into the middle of the cord. Collect both ends together and then add both ends of the cord through a large bead told the charm in place.
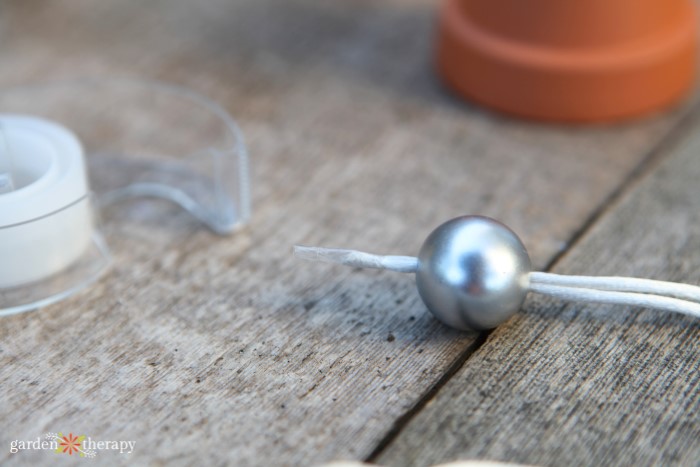
Wrap a piece of tape around the ends of the cord to make them easier to thread through the bead if necessary. Tie a knot just above the wooden bead loosely, and measure where the bottom terracotta pot will sit.
Put both ends of the cord through the hole in the bottom of the smallest terracotta pot and hold up the cord to see how it hangs. If you’re happy with the height and sound when you wiggle it a little bit then you can continue onto the next step.
If you need to adjust it further, untie the knot and readjust until you’re happy with the placement.
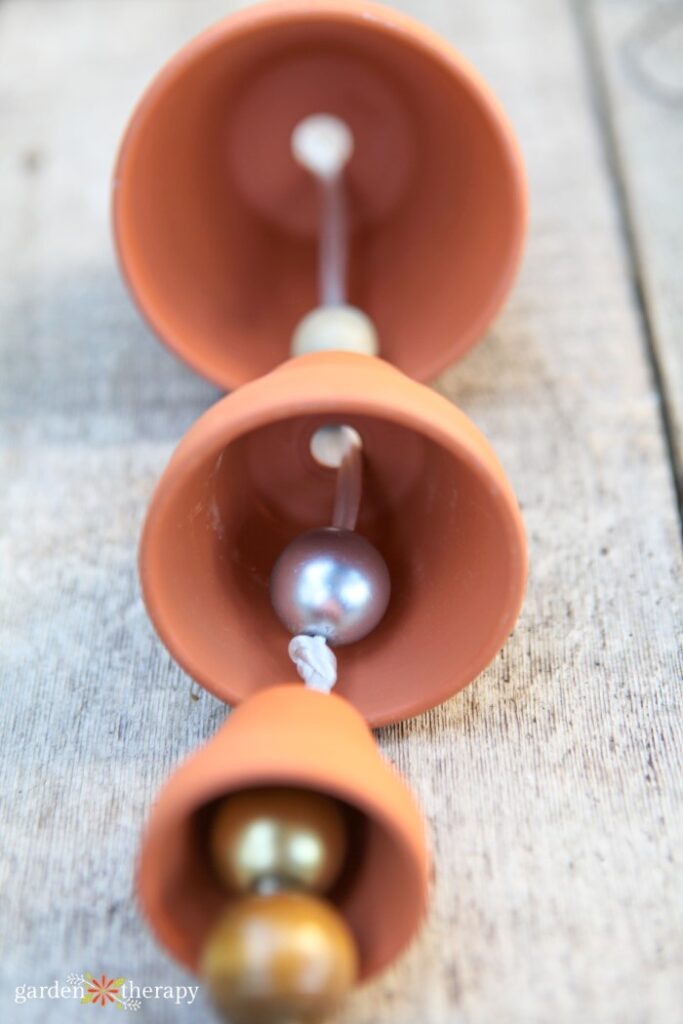
Thread both ends of the cord through another wooden bead and tie a knot where you want the top of the second-largest terracotta pot to sit.
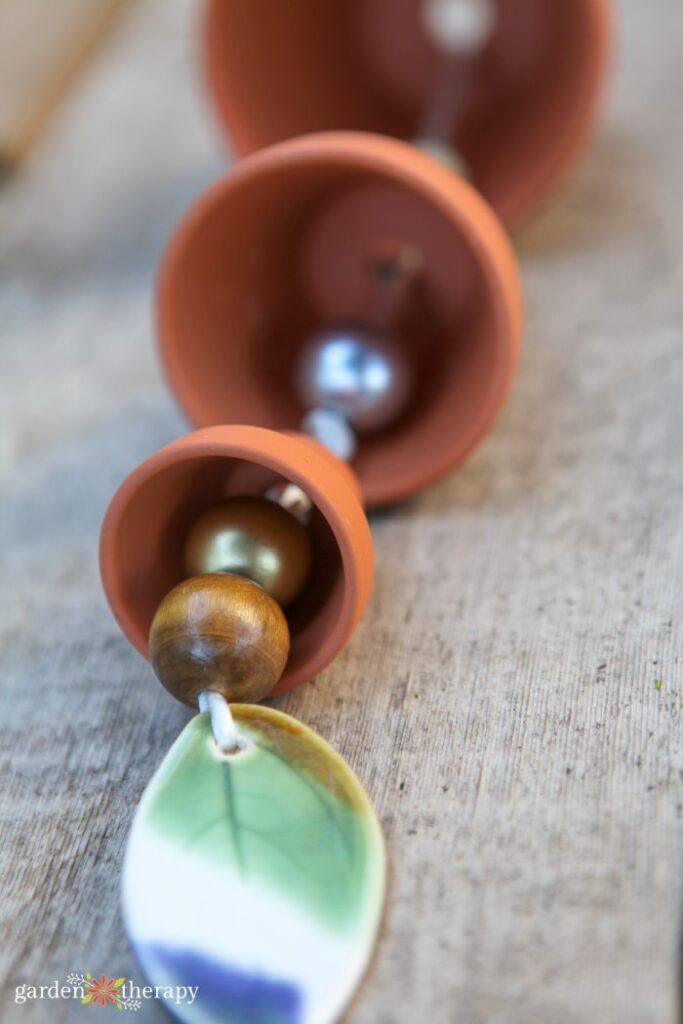
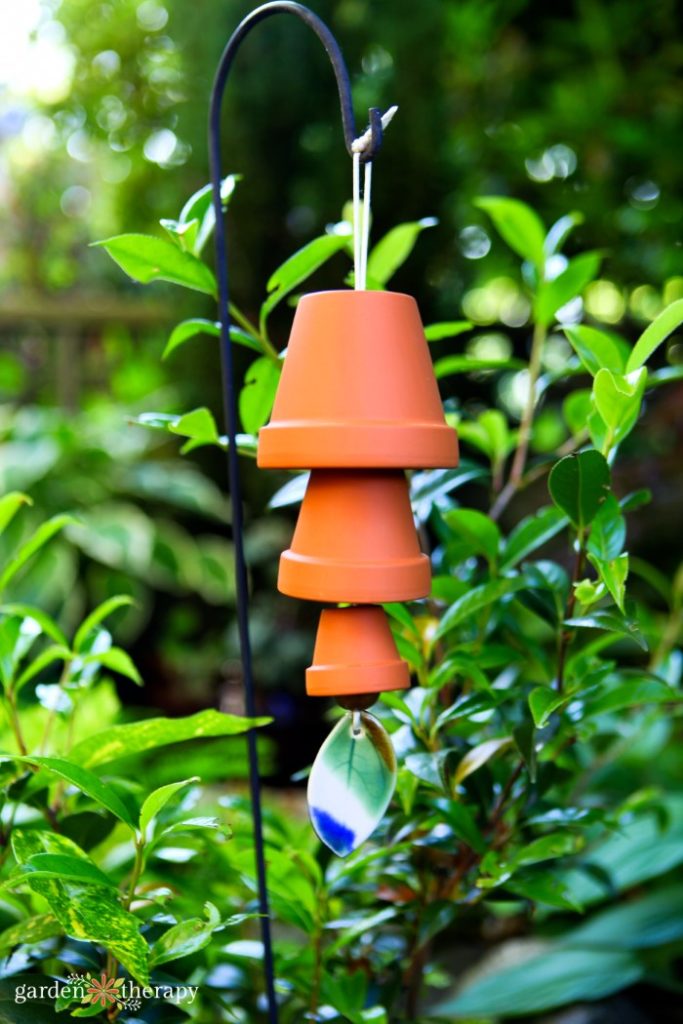
Continue adding clay pots and beads and tying knots until you have reached the top of your wind chime. Finish off by tying a knot to create a loop at the top of the two pieces of the cord where you would like to hang the wind chime. Trim off the ends of the cord.
Hang your terracotta wind chime on a shepherd’s hook or from a tree. Then wait for a nice breeze to come along and start the music.
That’s it! I hope you love watching and listening to your new beautiful clay wind chimes!
Frequently Asked Questions About DIY Wind Chimes
You want a strong outdoor cord that will hold up through the rain and wind as the wind chime sways. I used a white paracord for my DIY wind chime, but you can also use other outdoor cords like 3-ply jute.
It depends on the types of beads you use to fill your windchime. Clay and wooden beads will have a soft clinking noise. The placement of beads will also determine how they sound. When making your wind chime, wiggle the pot as you go to ensure you’re happy with the sound before placing the next bead.
In ancient times in China, wind chimes were believed to drive away evil spirits while attracting kind spirits. Now, wind chimes are hung to enjoy their soothing sounds, sometimes in memory of a lost loved one, and sometimes, simply for the joy of listening to their beautiful tones.
Just as terracotta has been in use since ancient times, so have wind chimes. However, wind chimes were first created in Asia as early as 1100 BC.
Absolutely! This terracotta wind chime is very easy to do for beginners. You can certainly make more intricate ones, like this beaded wind chime, but having something beautiful and musical can be as easy as this terracotta pot design.
More Garden Craft Projects
- Beautiful Beaded Wind Chime
- Make Resin Coasters With Pressed Garden Flowers
- Natural Branch Coasters: How to Cut, Sand, and Seal Wood Slices
- Stunning Clay Leaf Dishes That Are Easy to DIY

DIY Wind Chimes With Terracotta Pots
Equipment
- Tape
Supplies
- 3-5 Terracotta pots
- Strong outdoor cord
- Clay charm or other decorative, weighted item
- Large beads
Instructions
- Go to your local craft or garden store and look for terracotta pots the vary in size.
- Choose a strong cord that can be used in an outdoor setting.
- Begin assembling the wind chime by cutting the length of cord that will complement the length of the wind chime when it is completed.
- Thread the cord through the charm, slide it to the middle of the cord, and collect both ends together.
- Add both ends of the cord through a large bead told the charm in place.
- Wrap a piece of tape around the ends of the cord to make them easier to thread through the bead if necessary.
- Tie a knot just above the wooden bead, loosely, and measure where the bottom terracotta pot will sit.
- Put both ends of the cord through the hole in the bottom or the smallest terracotta pot and hold up the cord to see how it hangs.
- Thread both ends of the cord through another wooden bead and tie a knot where you want the top of the second largest terracotta pot to sit.
- Continue adding clay pots and beads and tying knots until you have reached the top of your wind chime.
- Finish off by tying a knot to create a loop at the top of the two pieces of cord where you would like to hang the wind chime. Trim off the ends of the cord.
- Hang your terra cotta wind chime on a shepherd’s hook or from a tree and wait for a nice breeze to come along and start the music.
A city girl who learned to garden and it changed everything. Author, artist, Master Gardener. Better living through plants.


Awesome summer DIY project, Stephanie! Could I use your picture for some of my posts?
Thanks