If you have an urban garden, this small garden composting method will blow your mind! By creating an underground worm plunger, you can both compost your scraps and create soil-feeding worm castings with little to no effort. That, plus this brilliant small garden composting system keeps your compost away from backyard rodents which can really spoil the fun of composting!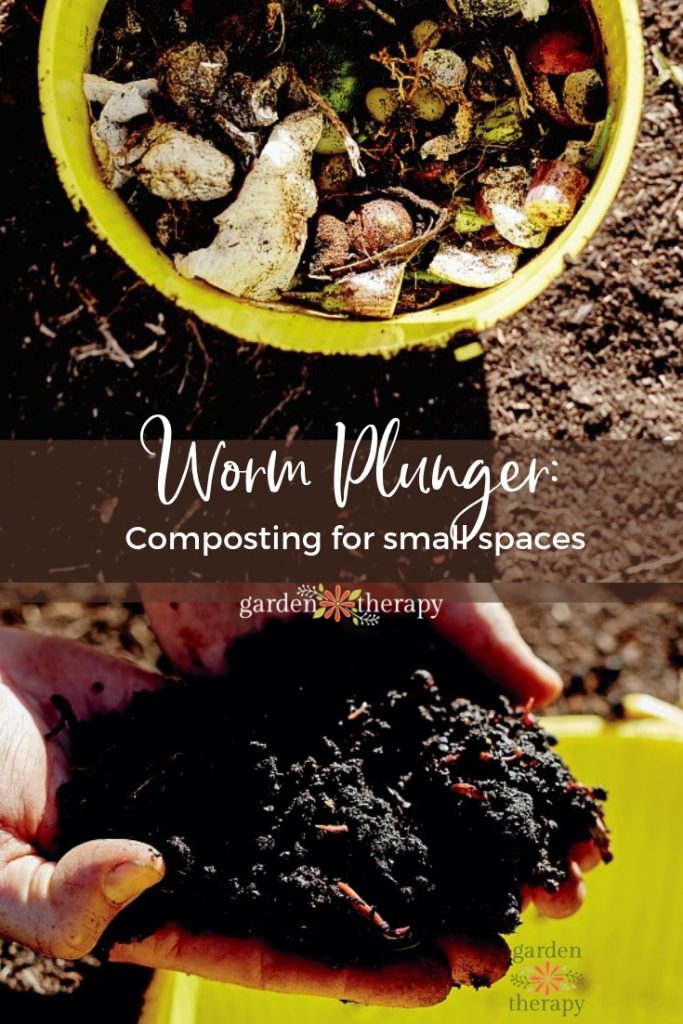
This project comes to us from Mat Pember and Dillon Seitchik-Reardon, the authors of THE LITTLE VEGGIE PATCH CO. DIY GARDEN PROJECTS which you can see here.
Worm Plunger: Build it and They Will Come
Conventional worm farms and composting bins are plagued by a few problems. For one, they can be unsightly, hulking objects that take up valuable garden real estate. Another issue is that pests easily infiltrate them. A lot of compost bins are open at the bottom, which means that any motivated rat with a little initiative need only to dig a couple of centimeters to reach a sumptuous vegetarian buffet.
Such nefarious activity was, in fact, a cultural highlight in a previous sharehouse. There, my housemates and I used to gather around the kitchen window every evening and watch a pair of rat bachelors fight it out for nightly control of the compost bin. Oh, how I miss Scabs and Snaggletooth…
Rather than building rat colosseums, we prefer to build worm apartments, and so the idea for the worm plunger was born. A worm plunger is nothing more than a plastic bin or bucket buried underground, which, so I’ve heard, is where worms like to live. We drill holes in the walls of the plunger to facilitate movement and it has a cap, which can be removed to add compost.
While this small garden composting system is not as large as a conventional worm farm, it has the benefit of being both discreet and difficult to infiltrate. The added benefit of being underground is that temperatures are normalized so worms will be at their most productive. Once it’s full, you can either remove and spread the worm castings around your patch or simply slide the bucket out of the ground and move the infrastructure to another part of the garden.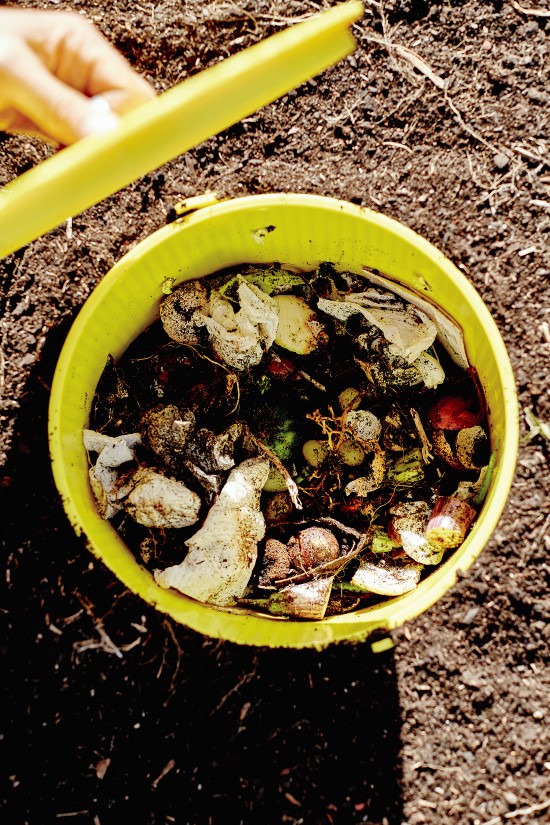
Materials
- Plastic rubbish bin or bucket with lid
- Handsaw
- Drill set
- 2 x 15 mm (½”) screws
- Bracket
- Shovel
- Compost or potting mix
- Tiger worms
- Vegetable food scraps
Make it!
Start by finding a suitable place in your patch to colonize. The worms will drastically improve the soil quality in the area so try a particularly unproductive spot in need of reinvigoration. This unit can be thought of as an overflow when your compost bin is full – or the primary unit if you are particularly strapped for space, or if rats are a genuine concern.

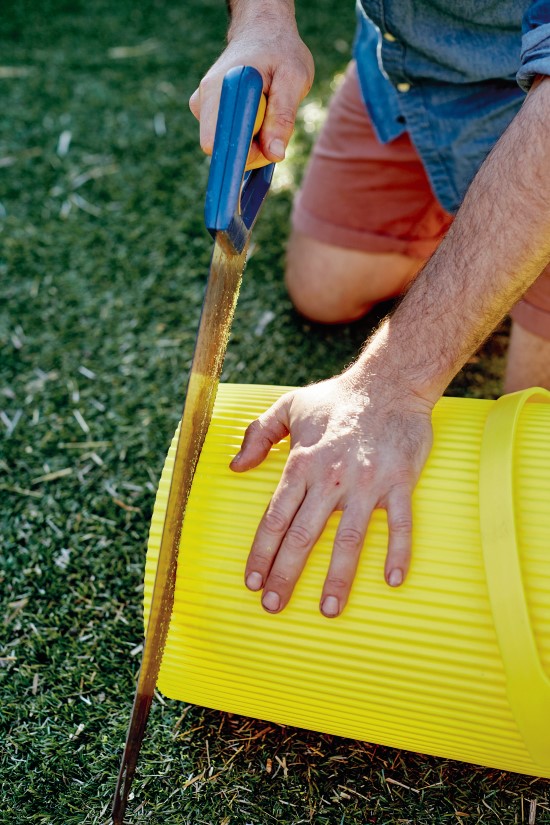
Any old bin or bucket will do, provided it has a lid. We found this plastic bucket at the shop and it looks like it was purpose-built for our cause. Start by sawing off the bottom.
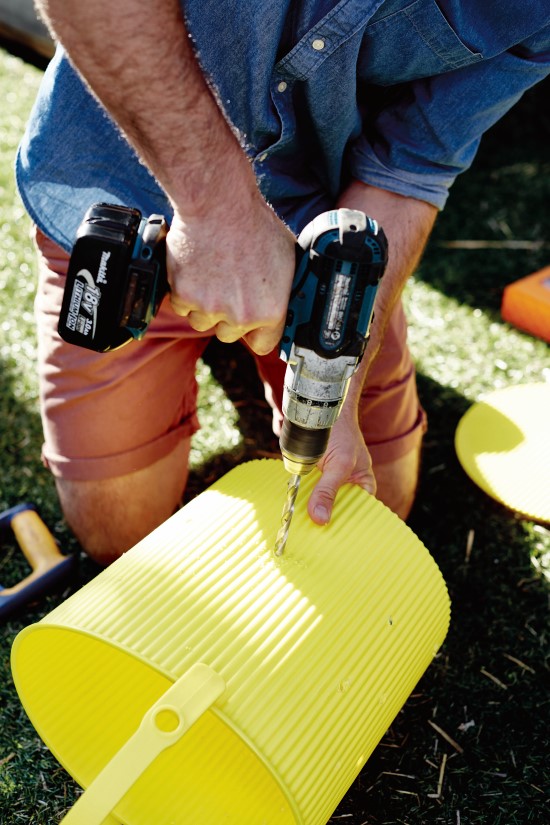
Drill plenty of holes into the sides of the bucket. These will be entryways for the occupants of this underground city. Studies of urban transportation systems have shown that improving service is the only way to increase usage of public transport, so ensure there are enough holes so no worm has to queue for too long.
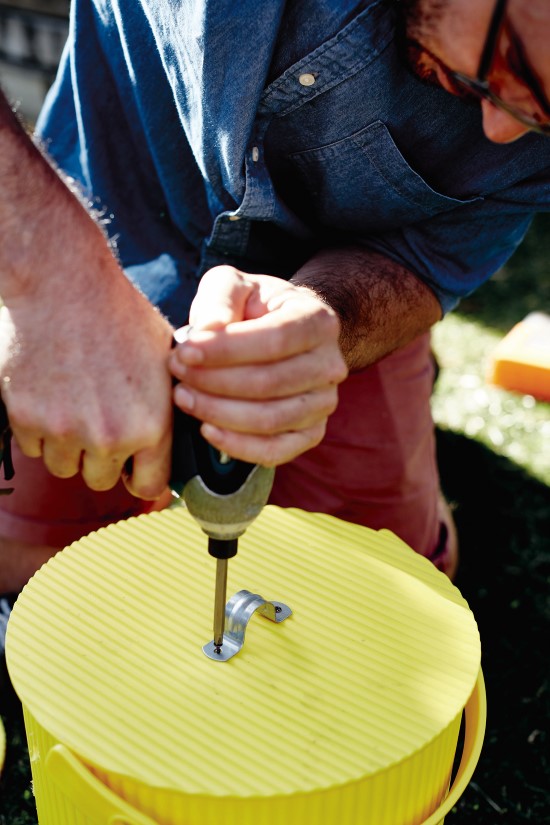
Screw a bracket to the lid to make a simple handle.
Dig a hole just deep enough that the lid will sit flush with ground level. Place the bucket in the hole and backfill the area around it. There will inevitably be leftover soil, so find a home for it elsewhere in the garden.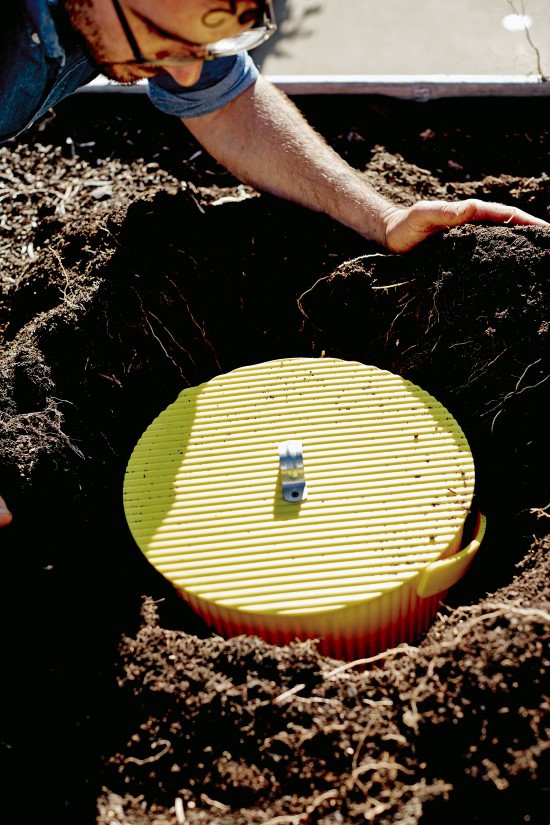
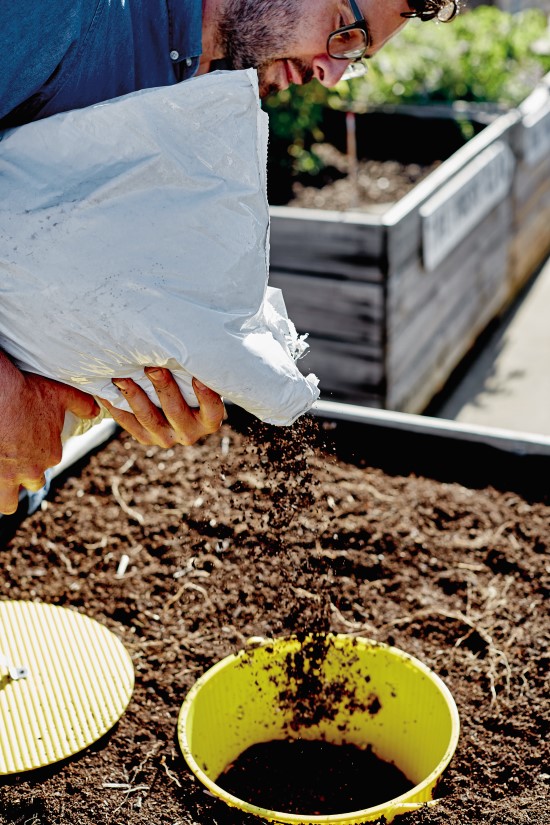
Transfer a small amount of existing compost into the bottom of the new system. If you don’t have any existing compost, a few handfuls of potting mix will do. Until they build up some good soil, the worms will need a comfortable place to retreat into when they are not eating your kitchen waste.
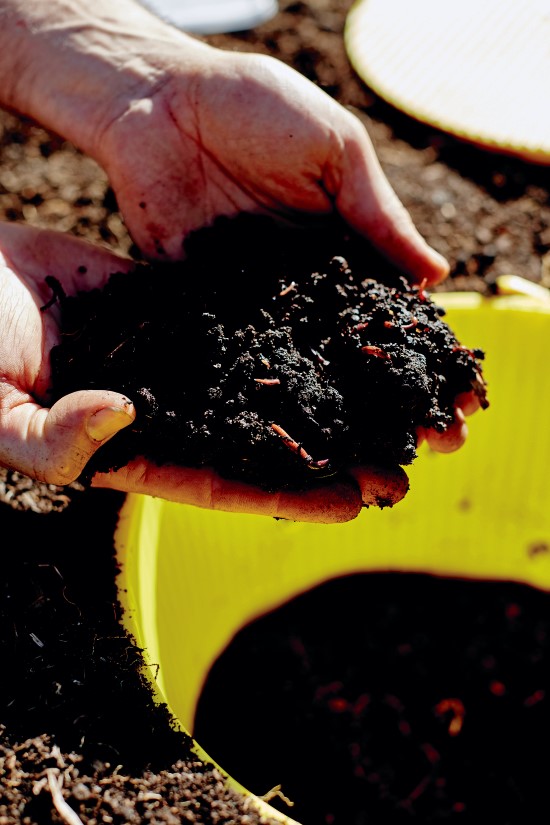
Add in the tiger worms. They are solitary, sensitive creatures but, as the name suggests, these stripey fellas are also ferocious eaters.
Once the worms are in place, it is time to begin your small garden composting operation in earnest. Almost all vegetarian food scraps can go into the plunger except for citrus peels and avocados, and not too much onion and garlic.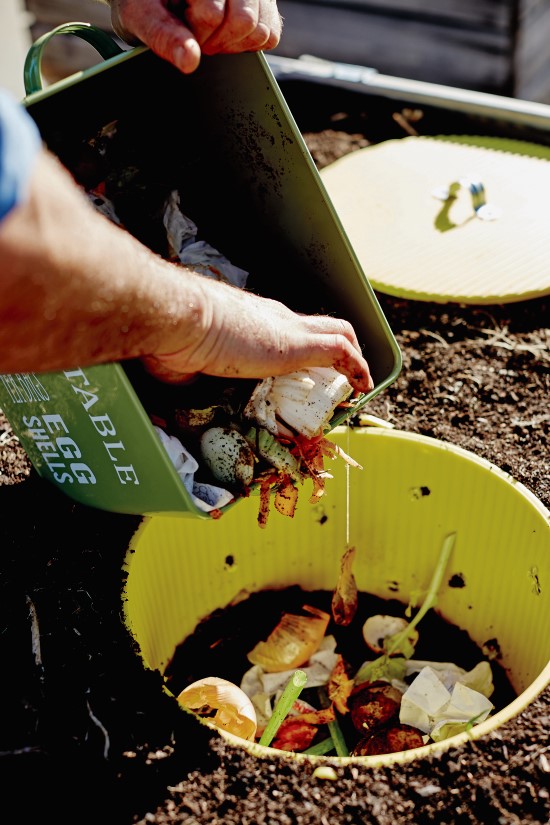
Bon Appetit!

For more smart DIY garden projects the whole family will love, grab a copy of the THE LITTLE VEGGIE PATCH CO. DIY GARDEN PROJECTS by Mat Pember and Dillon Seitchik-Reardon. It’s full of ideas for all types of gardening projects for gardeners of all ages. The reader can build ingenious box containers, garden sheds, and harvest edible green walls crafted out of inexpensive or upcycled materials. Chapters include garden basics, darling projects to do with kids, inventive options for vertical gardening, using recycled materials, seed-saving, composting, and more.
Related Posts:
- How to Do a Soil pH Test at Home
- 5 Reasons to Use a Compost Tumbler
- Give Your Plants Their Best Start with These Soil Recipes
- A Compost Recipe to Demystify Composting
- Soil Food for Greener Gardens: Find the Best Amendments in Your Own Backyard


I do somethinig similar in my garden, except I dont remove the bottom of the bucket. When the bucket is looking full I place another empty bucket on top filled with some tasty morsels. The worms migrate up leaving plain rich worm castings in the bottom bucket.
Good plan! And Tasty morsels – haha!
I like this post thanks
You are welcome!
Another great idea.
thanks!
Nice tutorial. I am going to do this ASAP. I’m a little confused about the worms. Is it necessary to purchase worms? There are plenty of worms in my garden now. Can’t I just put a few into the composted? Won’t they multiply since they will be well fed? The worms that are already living in my garden just appeared. I didn’t buy them.
I think if you have worms then that should be fine. They will multiply rapidly.
Red worms like tiger worms are better at processing vegatative material. Regular earth worms are not as productive and the compost rots before they can eat it. If you can’t get red worms limit the amount of compost put into the system.
I built something similar some years back when I lived in Kentucky (USA) using a mostly buried metal trashcan. It was great at keeping the critters out and the smell down. The only issue I had was that after a heavy rain our clay soil didn’t allow the water to soak in so the bottom of the contents would stay soggy for a few days. The worms loved it and I was able to get a lot of great compost out of it.
great! thanks for sharing!