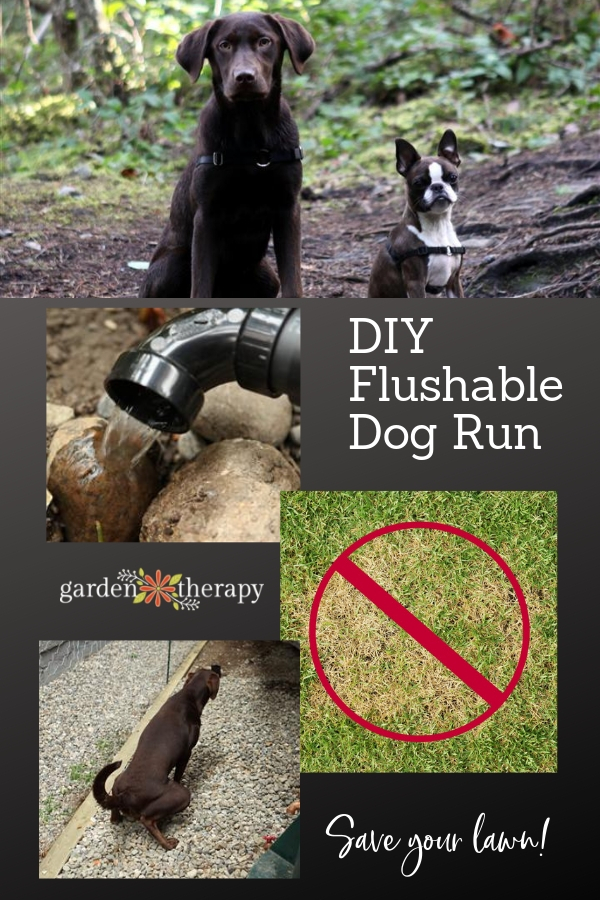
How to build a Doggy John, or a flushable dog run for our Weekend Project. This clever dog run has made our yard even more pet friendly, while keeping the lawn green and healthy. You can make your own flushable doggy john easily. Your dogs and your lawn will thank you!
If you want to protect your lawn from doggie business so it stays pretty and usable, it is incredibly easy to teach the mutts to use a dog run. With some training consistency, lots of liver treats, and your dog’s desire to keep you happy, you can say goodbye to dog poop for ever (on you lawn at least).
The Culprits

First let me introduce the team of terrors that inspired this project, Lou and Meatball. Can you guess which is which? Lou is the food-crazy English Lab and Meatball is the freakishly small Boston Terrier.
The Problem

Additionally, Lou and Meatball where not pleased with the odor themselves and soon refused to continue peeing at the location. I tried to flush the area with water. That provided relief for a couple of days but the water soon dried up and the ammonium was left behind, and so was the putrid stink!
The Solution
I realized I had to find a way to flush the urine out of the area, so I decided to make the little stinkers their very own flushable toilet. Luckily at that location there is a rain barrel with an overflow spout that pipes into the drain tile and off the property. Basically what I did was remove the soil, dig a trench, covered the area in thick plastic, installed a perforated pipe that tied into the exterior plumbing, covered it all up with gravel, and voila! I call it the Doggy John. Lou and Meatball use the area as trained and I flush it once every few weeks with a hose. The plastic keeps the urine from penetrating the soil and ensures that all of the water is directed to the perforated pipe so that it may be flushed away. The rest of the post shows you how to build your very own Doggy John.
Materials List

1. 4” Perforated Big-O drain pipe – about 15 feet.
2. 4” Coupler – used to join two pieces of Big-O drain pipe together
3. Filter cloth – used to wrap the Big-O pipe to help keep dirt out of the drain
4. 4” to 1 ½” Reducer – used to connect Big-O into 1 ½” plumbing pipe
5. 1 ½” T-Connector – used to tie in the Big-O into the existing plumbing
6. 1 ½” Coupler – used to join two pieces of 1 ½” plumbing pipe together
7. 1 ½” PVC plumbing pipe
8. PVC pipe cement – used to glue plumbing pipes together
9. Heavy duty plastic sheet – used to cover ground (Note: picture shows 2mm plastic. In hind-sight go with a thicker 6mm plastic sheet
10. Clean gravel – used to cover entire Doggy John
11. Level – used to ensure that all Big-O and piping is slopping towards the drain tile so gravity feeds the water away.
12. Shovel – for digging the trench
13. Gloves – you are going to want a good pair
14. Tape measure – measuring is involved
15. Duct-tape – used to tape the filter cloth to the Big-O
16. Hack saw – used to cut the Big-O and PVC pipes
17. Knife – for cutting tape, plastic sheet and filter cloth
18. Rake – to smooth things out
19. Tool belt – so you can carry your tools
20. Meatball – not required for this part of the project
Step 1 – Tie into existing plumbing
The first step is to tie into the existing plumbing. Obviously my plumbing will be different from yours. Remember that all of your piping should be graded so that it flows the water away from the area. The grade should be at least 1/2” slope for every 4 feet of pipe.

Using the hack saw, cut the existing PVC pipe at both sides of the 90 degree elbow. File any rough edges on the existing pipe to ensure they are square.

Glue in the 1 ½” T-connector so that the two-pipes are reconnected and the top of the tee is pointing to where you Big-O drain will be laid. Note: When gluing, ensure that you apply glue to the female end of the T-connector (the part where the pipe fits into). Also make certain that you don’t over glue and have it pool. Work quickly as the glue sets fast.

Glue in the 4” to 1 ½” Reducer to the 1 ½” T-connector.

Step 2 – Dig out your trench
Now comes the fun part. Grab your shovel and dig out a trench! Starting from the 4” to 1 ½” Reducer you will want to dig a trench that is about 12” wide and as long as the Doggy John area (mine is about 15 feet). Normally when digging drainage pipes you dig down about 16”; however, in this case you only have to dig as deep as the bottom part of the 4” to 1 ½” Reducer opening. If you dig much deeper than that then water will have to fill the bottom of the trench before it is able to flow out the pipe. Remember to use the level and ensure that your trench continues to drain away from the area at a rate of at least ½” for every four feet of length.

You can pile the soil at the side of your trench. You will want to use your rake to gently grade the surrounding ground so that it slopes into the trench. This ensures that when you flush the Doggy John with the hose the water flows to the trench and down the Big-O.
Step 3 – Lay down plastic

Once your trench is dug and the surrounding ground is graded towards the trench, lay down your heavy duty 6mm plastic sheet. If a single sheet doesn’t fit then you can overlap another sheet. Just remember that when overlapping the top sheet should be the one higher up the grade (like roof shingles).
Use some duct tape to hold down your plastic sheet. You should also leave it long and wide; you will trim it at the end.
Step 4 – Install your Big-O in the trench

Cover the pipe with filter (landscaping) fabric. Use duct tape to hold the fabric in place. The fabric will prevent soil from clogging the holes on the pipe while still allowing water to drain through and into the pipe. Without the fabric, dirt could enter the pipe through the holes and prevent drainage.

Shovel a thin layer of clean gravel into the trench on top of the plastic sheet. Lay the Big-O pipe on top of the gravel and connect with the 4” to 1 ½” Reducer. Use the 4” Coupler if you need to connect two pieces of Big-O together. Tip: If the Big-O pipe won’t lay flat you can temporarily hold it in place with some bricks or rocks.
At the top of the Big-O pipe (the opposite side of where it ties into the plumbing) you can connect a flexible 4” elbow that sticks up above grade. This can be used as a cleanout if necessary in the future.

Step 5 – Test drainage
Now test to see how well things drain. Make sure to do this BEFORE covering the Big-O pipe with gravel. Grab a hose and spray it over your pipe and plastic. Hopefully you will notice the water run down the plastic sheet towards the trench and down the Big-O pipe. This image below shows the water flowing out the pipe that will eventually be connected into the underground drain tile. SUCCESS!

Step 6 – Cover it all up with gravel
Fill in the rest of the trench with more clean gravel and make sure that the Big-O pipe is fully covered. Smooth out the plastic sheet that covers the rest of the Doggy John area and lay at least a 3” thick layer of gravel to cover the area. If you have a male pooch you will want to put a peeing post in the area (something he can lift his leg on).

Clean up the poop regularly and give the area a good flush once every two or three weeks and your puppies will be able to enjoy their odor-free Doggy John for many years to come.

More Pet-Friendly Projects:
- Safe Gardening with Cats and Dogs: Common Garden Plants Poisonous to Pets
- All-Natural Dog Deodorant Spray
- Herbal Anti-Flea Shampoo Recipe
- The Homemade Dog Cookies that Make Dogs Go Squirrely
A city girl who learned to garden and it changed everything. Author, artist, Master Gardener. Better living through plants.


Many of the newer artificial turfs now have drains holes in them that make it more attractive and easier on pets with allergies (which can also be caused by whatever chemicals you have used on your lawns). Combined with a drainage systems underneath and you should only need to hose it weekly. Gravel can smell just as bad as lawns, be hard to clean, and can be hard on dog’s paws. For those that don’t want to build a separate place but are worried about burn spots on their lawns, if you give your dogs a Tablespoon or two (depending on size of dog) of tomato juice in their daily food, it will change the PH of their urine, reduce the ammonia smell and won’t burn the grass anymore.
Hi C, as an organic gardener, I do everything I can to stay away from products like artificial turf and other unnecessary plastics that don’t decompose and don’t improve the soil. Even though a grass lawn is more work to maintain, it can host a variety of wonderful plants like clover (food for bees) and grasses that have nitrogen rich clippings for the compost pile and soil. I can’t imagine that the gravel would smell worse than artificial lawn used for the same purpose. As you can see from this post, there is drainage built under the gravel and it works like a charm. We have been using this system for 6 years now and with hosing it really is fresh like a daisy! Also, I believe tomatoes are toxic to dogs so it may be worth talking to your vet before giving them anything that is not approved as dog food.
I never said your drainage systems didn’t work. I just suggested other solutions based on some of the comments given. And you might want to do your research first before posting a comment on toxins for dogs (or anything else). I know for a fact that tomatoes are safe for dogs. There are lots of web links discussing the use of tomato juice to prevent lawn burns from dog urine, from other organic gardeners. Your credibility as an organic blogger drops a great deal when you post a negative comment to one of your readers when you haven’t even bothered to researched the facts first.
I wasn’t being negative, I only suggested you talk to your vet first. I talked to my vet and she recommends against tomatoes for dogs. Yours may have different idea. Take care.
Our vet told us years ago that only the leaves are bad for dogs. I’ve always had dogs that steal cherry tomatoes off the vine and I assume it was squirrels eating them until the dog was caught in the act of teaching his sister to steal tomatoes.
She just suggested to check with your vet, because tomatoes “might” be toxic. She is not claiming to be a vet, she just enjoys organic gardening. If you don’t enjoy her post, or is a person that just enjoys being negative then just don’t read it. Didn’t your mother teach you, if you can’t say anything nice don’t say anything at all.
Thank you Stephanie for the suggestion. Would have never thought of it. I am sure 30 seconds on gravel will not harm a pets paws, and most pet owners, like me, walks their fur babies everyday and they experience all kinds of surfaces. Mine does; gravel, dirt, roots, black top (in summer, has to be worse), mud, water, salt water and sand. I do know artificial turf will hold the smell quickly and forever. Then to clean it to get it clean and oder free you need to use chemicals, soap, PH etc. I had it on my covered porch, and a new puppy, was scared of rain so before I could get her off porch she would pee, which I had to scrub two times a week, eventually just removing it because no matter what I did a hint of odor would be there once the sun came out and it got hot.
I am planning to build something like this soon. When this is flushed, where does it collect? Will flushing it dilute enough to not relocate the smell to another area? What does your “final” result drain into when flushed? We live in the city so hooking up to the existing sewer is not an option.
I was wondering the same, it sounds like a great idea I have a new home and a handsome Boxer called Reggie who could use it :-)
This is a wonderful idea but I would love to see a video of it. Still pictures are hard for me to really get the idea set. You should market this!
We are now on our third pup, and all of them have been trained to use the side of the house when nature calls, and our lawn looks great. As for smell, I have never noticed any urin smells, but the area is on a slop so maybe it drains on it own. The one problem I have found is there droppings stick to the gravel, the mention of artificial turf might be great idea fix for that problem, along with your drain and gravel under it might work quite nice.
Thank you for your awesome post. Pictures speak a thousand words.