Making a fresh wreath has quickly become one of my absolute favourite holiday traditions. Using greenery in your garden and neighbourhood, you can create a beautiful and local wreath to decorate your front door with. Here’s how to make a Christmas wreath for your home.

Every year we like to hang a different Christmas wreath on our front door during the holidays. We’ve amassed a collection of wreaths to match the holiday season trends of red berries, Christmas ornaments, peacock feathers, and square-shaped boxwood, but my favourites are most certainly natural, fresh wreaths.
A fresh wreath makes for an individual work of art that smells as good as it looks. Florists and garden centers are wonderful places to find one to suit any style, but if you are feeling adventurous, a homemade wreath made with garden clippings or purchased greens can be most gratifying.
Given the current popularity of lateral space gardening, supplies are available for all sorts of wreath plantings. Evergreen, succulent, moss, and flower wreaths are beautiful micro gardens that will suit almost any style or climate. Care will vary depending on what type of planting you decide on, but many will last for months, if not years, with a couple of weekly squirts of a spray bottle.
Let’s dive into how to make a Christmas wreath, shall we?
- Watch the Wreath Making Video!
- How to Make a Christmas Wreath
- Materials
- Make It!
- FAQ About Making a Christmas Wreath
- More Ideas for Christmas Decor

Watch the Wreath Making Video!
Follow along with me as I make one of my fresh wreaths from scratch.
How to Make a Christmas Wreath
My go-to style is wild and local. I forage for all kinds of greenery beyond the traditional holly and pine (though I like those too!) and incorporate lots of colour in my wreath. The best part about learning how to make a Christmas wreath is that you can truly design it in your own style.
Materials
- Evergreen foliage
- Grapevine wreath
- Pruners
- Gloves
- Twine
- Berries, twigs, pinecones, ribbons (optional)
- Floral wire
Make It!
Step 1: Gather a variety of foliage, berries, twigs, pinecones, ribbons, and anything else you want to add to your wreath. Some of the evergreen cuttings that work very well are holly, cedar, cotoneaster, pine, pieris, boxwood, laurel, camellia, fir, cypress, and magnolia.
I like to contrast needles with broad leaves and vary the colour, but a wreath made entirely of one type of foliage can be incredibly dramatic. Also, think about tucking in herbs like rosemary, sage, and lavender into the foliage to add another delightful aroma.
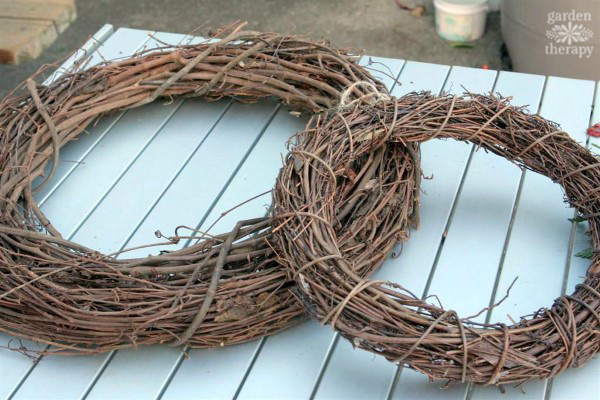
Step 2: Using a grapevine wreath as your base (you can buy one or make your own), start by choosing a firm branch with a stem that is thick enough that it will not bend easily. Add other cuttings of different foliage on top and gather the bunch in your hand. Snip off any long stems.
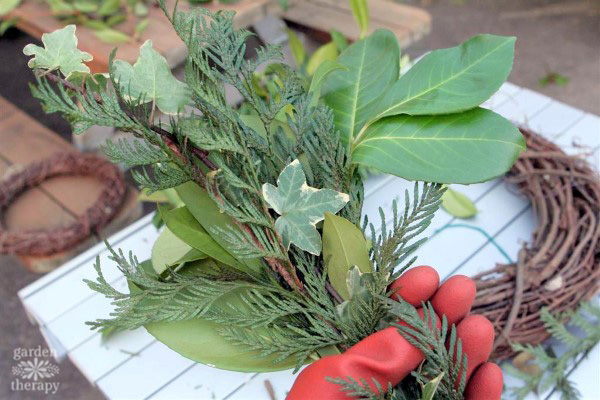
Step 3: Using the twine, wrap around the bunch and the grapevine wreath together a few times until secured. For the first bunch, tie a knot in the twine to hold it in place, but do not cut the end of the twine.
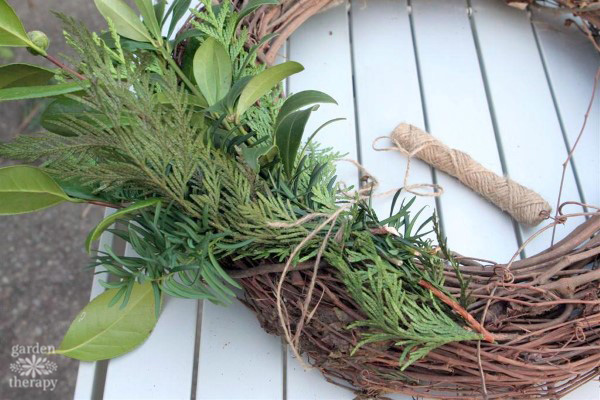
Step 4: Gather a second bunch of foliage. Lay this bunch, overlapping the twine of the first, securing the first bunch to the wreath. Wrap twine around the base of the new bunch a few times and set it down.
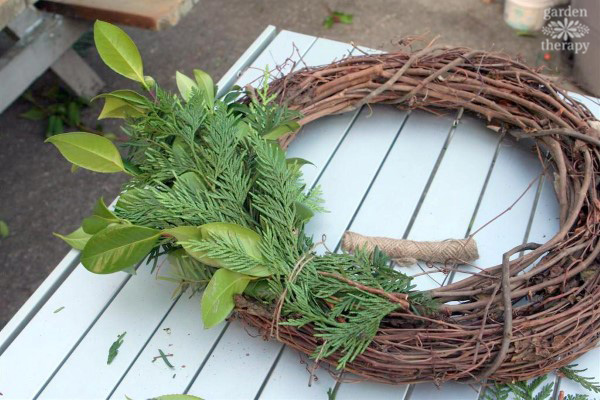
Continue adding foliage to the wreath by overlapping the previous bunch and securing it with twine until there are no more gaps to fill.
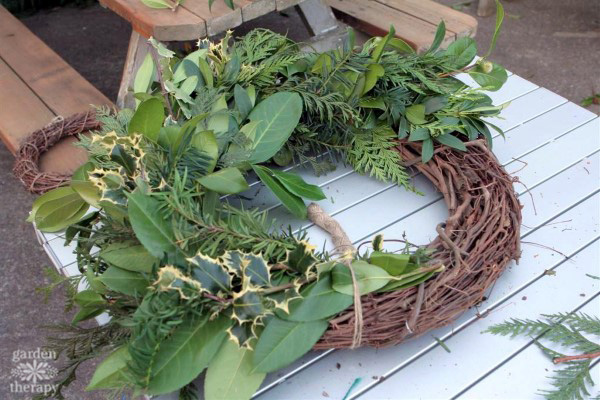
Step 5: Secure the final bunch by gently lifting the foliage from the first bunch and tucking the stems underneath it. Secure with twine and tie off the final bunch with a few knots.
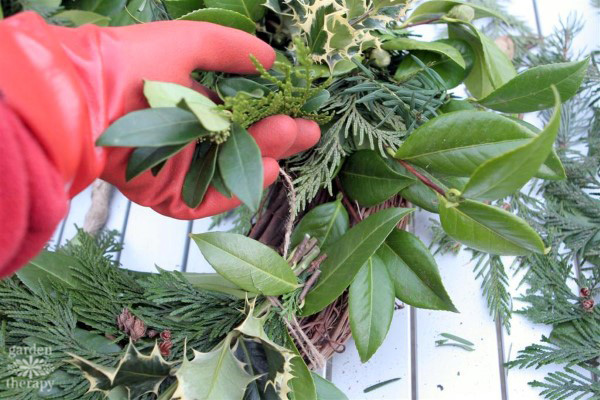
Step 6: Now, take a last look at the wreath. You can tuck in a few more greens to even out the design or add a few embellishments such as pinecones (using florist wire to attach them), berries, ribbons, or even ornaments. Feel free to prune unruly parts as well.

Step 7: Hang and enjoy!

FAQ About Making a Christmas Wreath
I make my wreath in November, and it lasts until March. I live in Vancouver, so it’s pretty rainy and moist outside to keep the wreath hydrated.
I don’t do anything extra for my wreath, but if you live in a warm and dry climate, you can try misting your wreath daily with water. Before making your wreath, let your clippings sit in water for a few hours to get hydrated before you trim them.
There are also spray preservatives you can use to help keep your wreath hydrated.
It will dry out more quickly indoors with the heat, but you can certainly keep it indoors.
Yew is toxic and can lose its needles really fast. It’s one of the few I recommend skipping in this post.
I like twine (it’s compostable!), but wire should also work fine. Use whatever you have on hand.
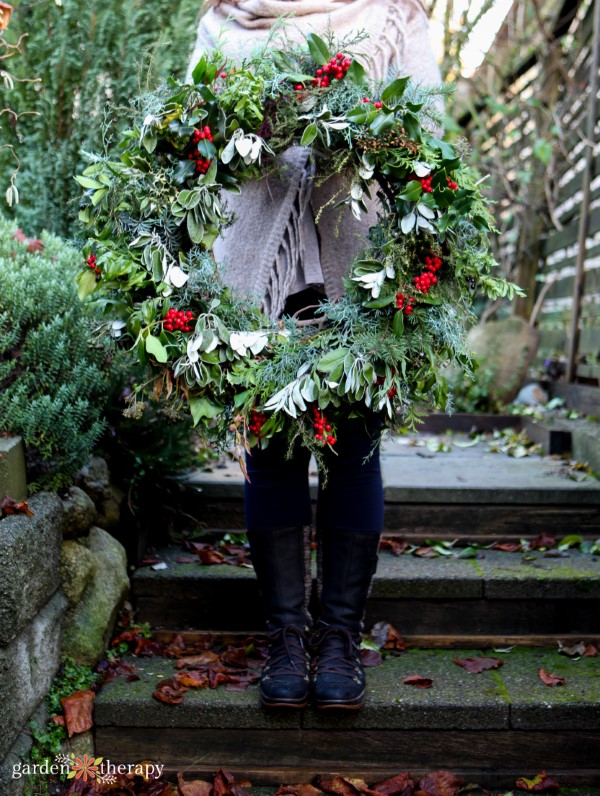
The final word on making a perfect wreath: just have fun with it. Experimenting with different foliage will allow the wreath to become traditional or modern, contained or wild, themed or every day.
A special thanks to the wonderful neighbourhood gals who provided all the foliage, wine, and treats that go along with the annual wreath-making afternoon.
More Ideas for Christmas Decor
- 14 Christmas Wreath Ideas to Make This Year
- Rustic Chic: Crafting a Cedar Garland for Your Festive Home
- Experience Nature: Make a Fresh Foraged Wreath
- Simple Rustic Christmas Décor Ideas to Brighten Your Space
How to Make a Christmas Wreath
Supplies
- Evergreen foliage
- Grapevine wreath
- Pruners
- Gloves
- Twine
- Berries, twigs, pinecones, and ribbons (optional)
- Floral wire
Instructions
- Gather all of your clippings and separate them into groups. Holly, cedar, pine, fir, cypress, laurel, magnolia, boxwood, camellia, and pieris are all good options.
- Choose a firm branch with a thick stem for the base, and add a couple more different foliage on top. Snip any long stems.
- Wrap around the base of the bundle a couple of times with the twine before securing it to the grapevine wreath and wrapping the twine around the wreath. Tie a knot to hold it in place. Do not cut the twine.
- Repeat the last step, overlapping bundles all the way around the wreath.
- Secure the final bunch by gently lifting the first bunch and tucking the stems underneath it. Secure it with the twine and tie it before cutting it.
- Hang the wreath and prune any unruly parts. Add decorations if you want or leave it as is.
Video


Gorgeous wreaths!!!!!!
Hello blogger, i must say you have very interesting articles here.
Your website can go viral. You need initial traffic only.
How to get it? Search for: Mertiso’s tips go viral
I was just wondering what to do with the wonderfully scented fresh cuttings from our new Christmas tree when I saw this article, perfect timing! Now I am super motivated to make my very first real fresh Christmas wreath! Thanks for the great instructions!
I make many wreaths and am stumped many of the tops in the wreaths flop over. So they no longer are flat suggestions?? No one wants a floppy wreath the bunches are secured nothing falls to the ground just flop over
Meghan, try following the steps in this tutorial to build strong bunches with a woody stemmed branch at the back and softer stems in front and secure them as shown. I have never had flopping using this method. Good luck!