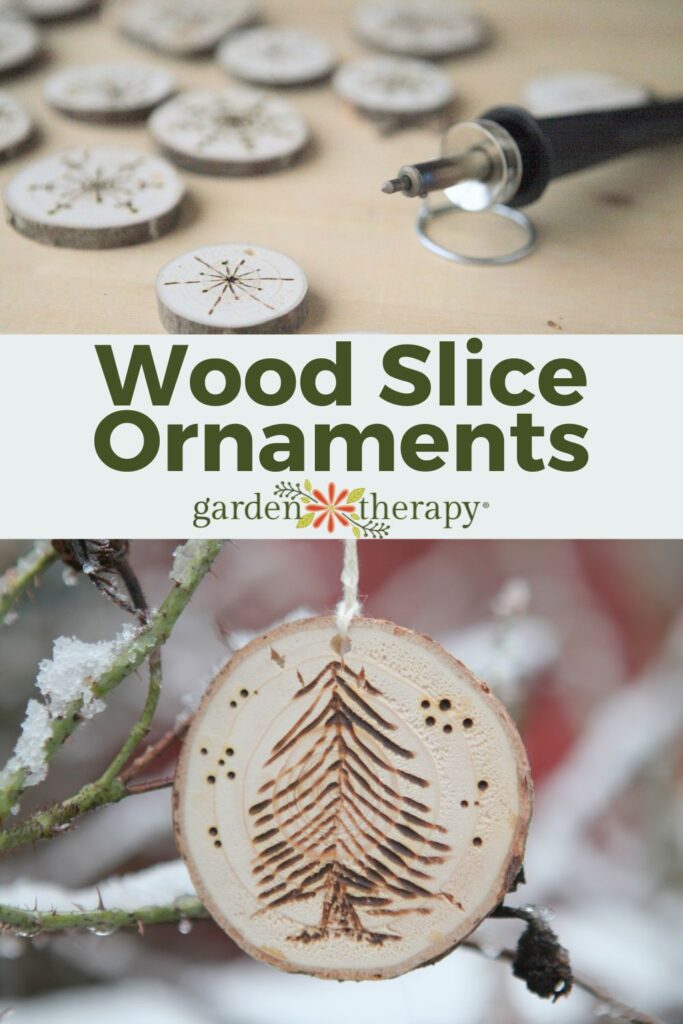
Preserve the beauty of your Christmas tree or turn branches into artwork with these wooden ornaments made of wood slices. Using pyrography (wood burning), you can create stunning, cute, or fun designs to decorate your tree this year. Follow along for creation tips and tricks!
In my family, the Christmas tree is always one of the most special parts of the holiday. Every year, the kiddo and I head out together to pick out a Christmas tree and spend time together crafting ornaments and decorating the tree. No tree is ever the same as the last!
It’s tough to say goodbye to my tree at the end of the season, and I’m always looking for ways to recycle my Christmas tree into some of my crafting. After making wood slice coasters, I thought I would do a different take on it by making wood burned ornaments instead!
Pyrography is such a fun and unique hobby to get into. Using a special handheld tool, you can directly decorate wood and other materials using burn marks. The effect is a gorgeous and natural-looking Christmas ornament.
If you want to try your hand at making your own wood slice ornaments, then keep reading for all my tips and instructions.
This post will cover…
- Preserving the Christmas Tree
- DIY Wooden Ornaments
- Materials
- Where to Get Wood Slices
- Dry Wood Slices
- Cut and Sand
- Design
- How to Seal Wooden Ornaments
- Frequently Asked Questions About Making Wood Ornaments
- More Christmas Crafts to Try
This project comes from Garden Made, my crafting book full of seasonal projects inspired by the garden. It has plenty of projects to keep you busy year-round to help beautify your home and garden and to give as meaningful gifts. If you want more crafty, down-to-earth projects, check it out!
Preserving the Christmas Tree
I’ll always be on team real Christmas tree. It’s one of my favourite traditions to take part in, heading to the Christmas tree lot to pick out a tree and then heading home to decorate it.
As I grew older and fell in love with gardening, I just had to experience the rom-com-esque Christmas tree pilgrimage where you cut your own tree. Off to a tree farm in gum boots we went, sipping cider out of a paper cup and listening to carols played over a loudspeaker.
“Grab a saw and head out to the trees,” they told us. We settled on a superb tree with the fullness, colour, and needle retention that appealed most and hauled the thing up onto the car’s roof. The drive home was a sight: in every direction, trees were zipping down highways atop sedans packed with families. I imagined all the people who would sip some eggnog later that day as they set up Christmas.
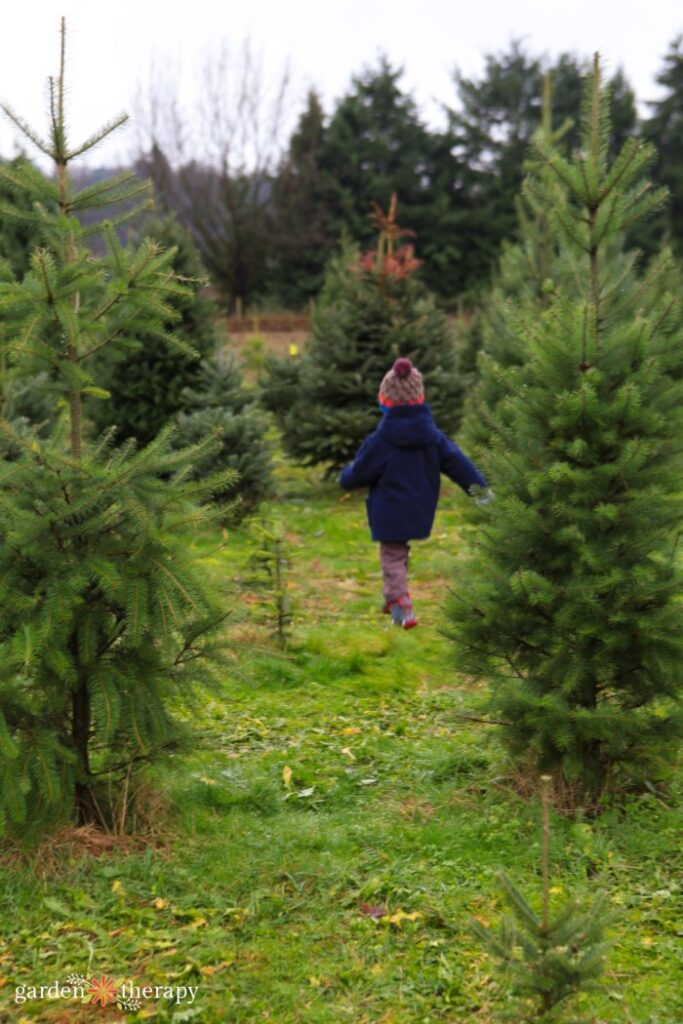
Our tree that year was full of new memories and offered a fresh evergreen scent that greeted me each time I passed by. The experience of choosing the tree out in the chilly air with pink noses and woolly mittens warmed me each time I added another present below.
When the time came to box up the ornaments and say goodbye to our tree, I had trouble letting go. The needles had fallen, and the branches were dry, but the trunk was just the right size for creating wood burned ornaments.
Rather than toss my tree in the compost, I decided to turn the trunk into some ornaments that would have plenty of sentimental value. Here’s how I made these wood ornaments with pyrography designs.
DIY Wooden Ornaments
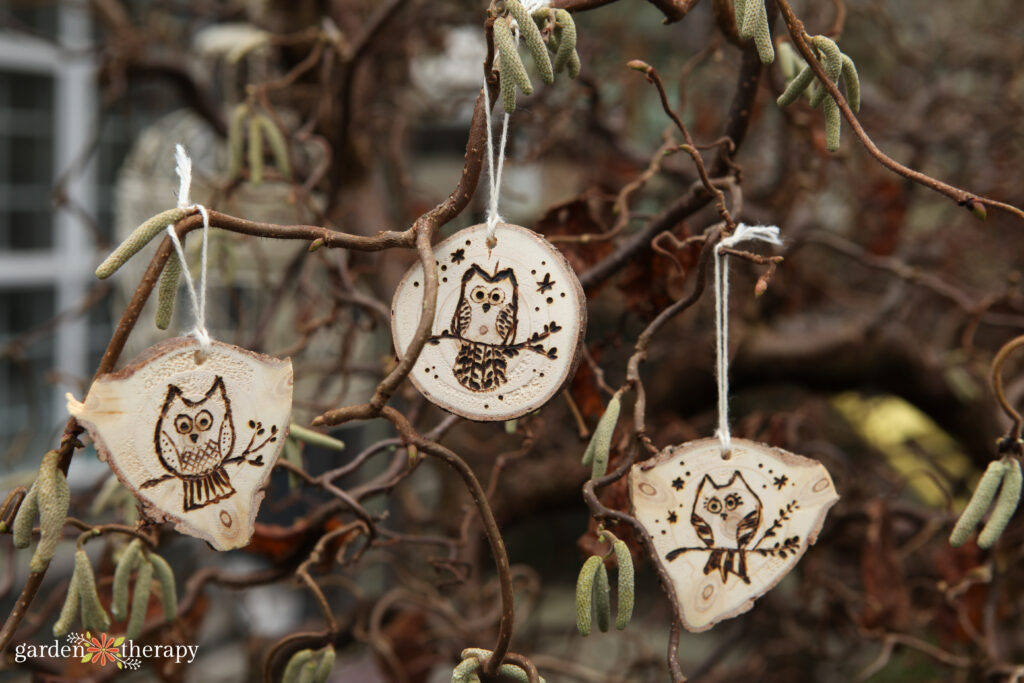
I love that I can carry on the trees of Christmas past to the next year with these wood burned Christmas ornaments. They’re special sentimentally but also look amazing on the tree. I always opt for natural decorations, and I love how rustic and personal these ones are!
Materials
- Large branch or small tree trunk (see note)
- Table saw or handsaw
- Sand paper in both coarse (60 grit) and fine (150 grit)
- Drill
- Wood burning pen set
- String or ribbon to hang ornaments

Where to Get Wood Slices
For my wood ornaments, I made my own wood slices by cutting the trunk of an old Christmas tree.
If you don’t put up a fresh tree in your home but still want to make this project, there are plenty of ways to get the wood. You could visit a tree farm and ask for off-cuts of large branches or too-long tree trunks.
After the holidays, you can walk down residential streets looking for discarded trees ready for recycling. Or find out where trees are composted in your area and collect them there.
If all else fails, you can go to a local garden center or tree lot after Christmas and ask for one they didn’t sell.
Besides sourcing local wood slices, you can also find pre-cut ones from most craft stores to make wooden ornaments. I found some online on Amazon, Michaels, and Hobby Lobby.
Dry Wood Slices
Once you have your tree or branch for this project, snip all the branches off as close to the trunk as possible. Let the trunk dry completely in a warm, dry place to avoid wood splitting. Cut the trunk into a few sections for faster drying.
Drying takes time. In some instances, months! Sawing them ahead of time is the best way to speed up the practice. Store them inside the house where it is warm to make them dry faster. Some cuts may crack during the process, so account for this when determining how many slices to cut.
Cut and Sand
Using a table saw or handsaw, cut the wood into quarter or half-inch thick disks.
Sand each slice of wood by hand with coarse-grit sandpaper first, then smooth the surface with a finer grit. Leave the bark alone if your tree still has it! I like the addition of the natural edge.
Drill holes through the top of each ornament so you can loop string or ribbon through.
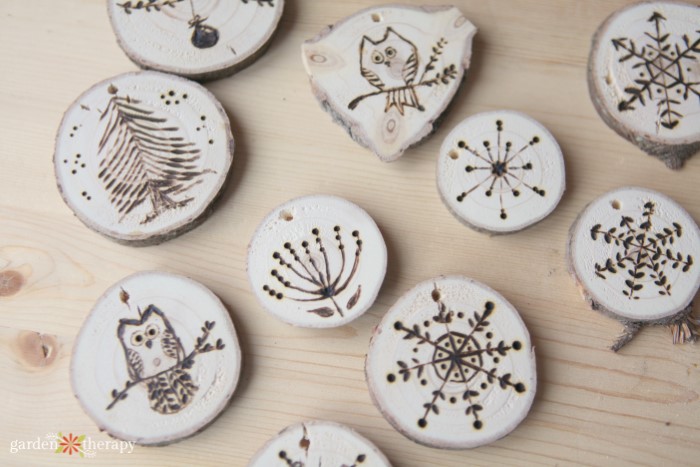
Design
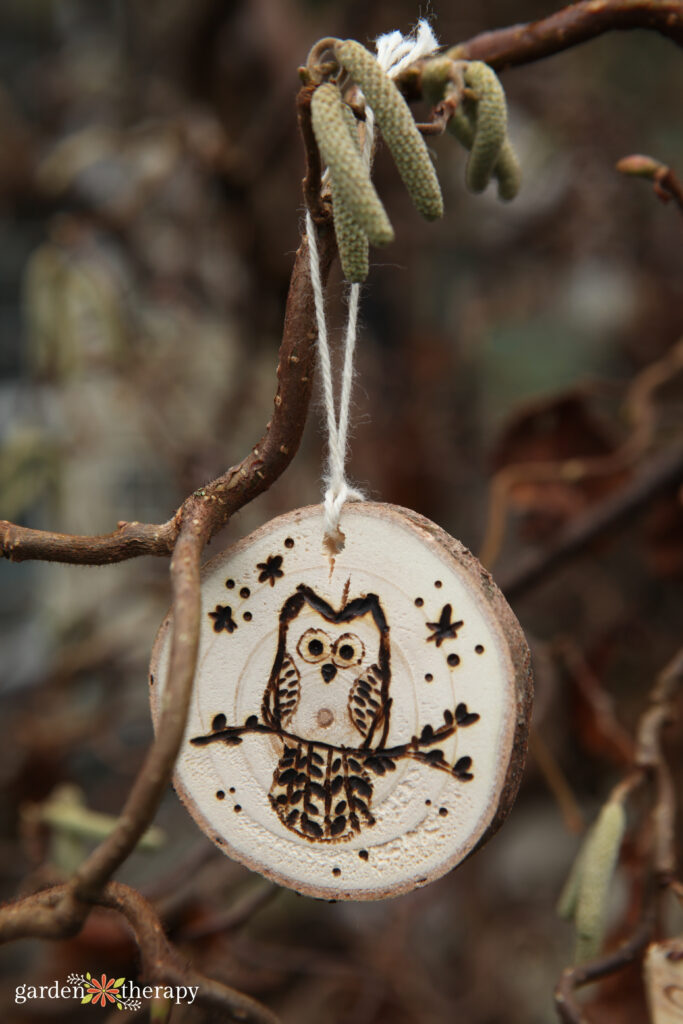
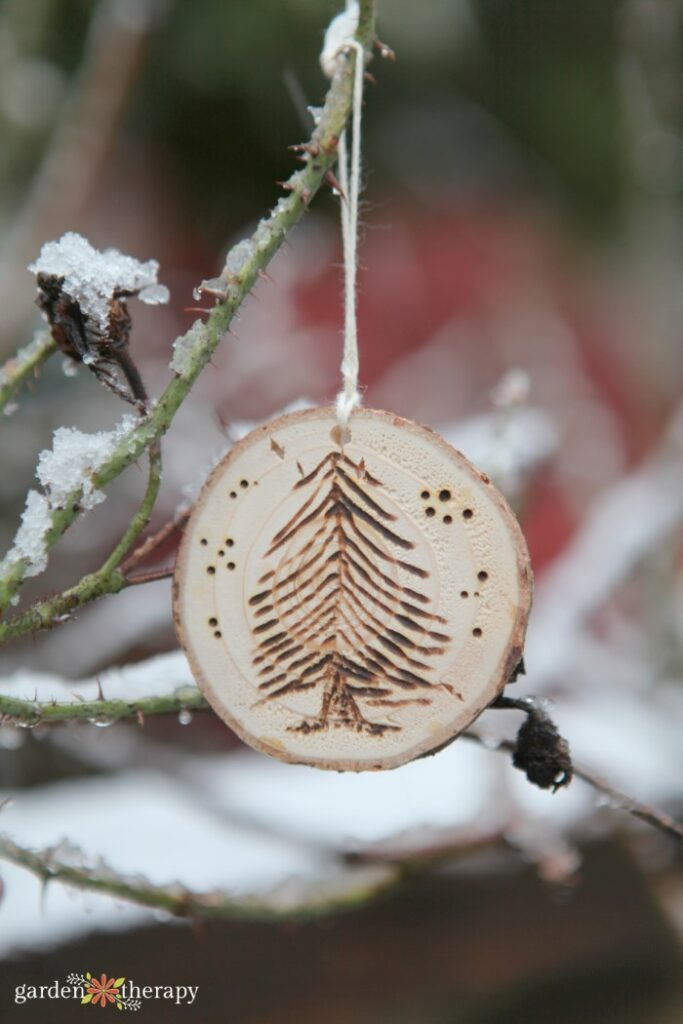
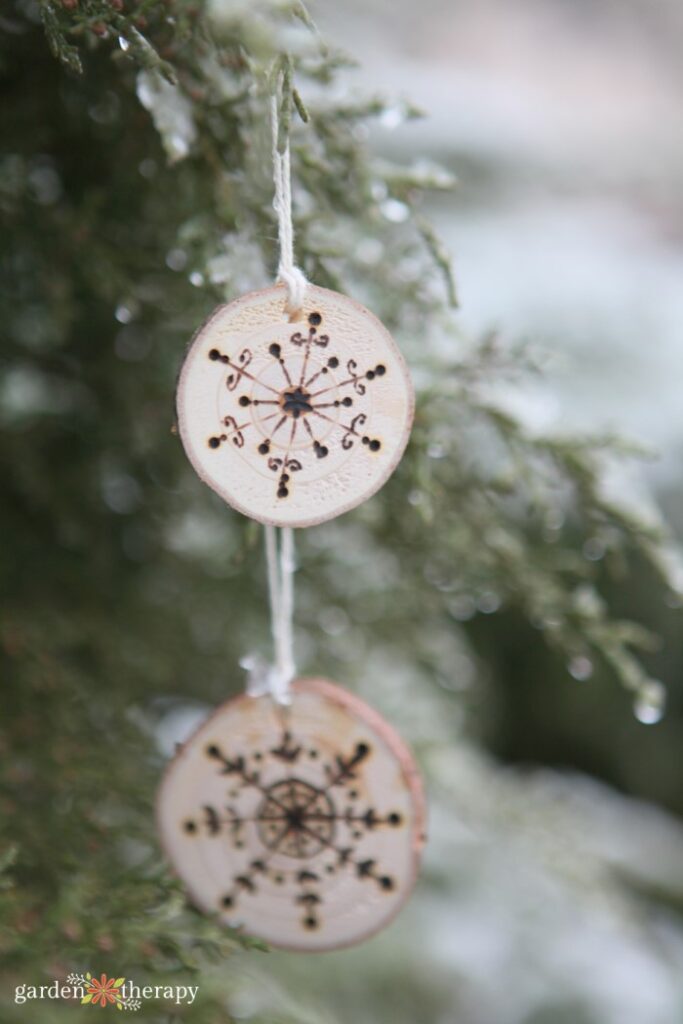
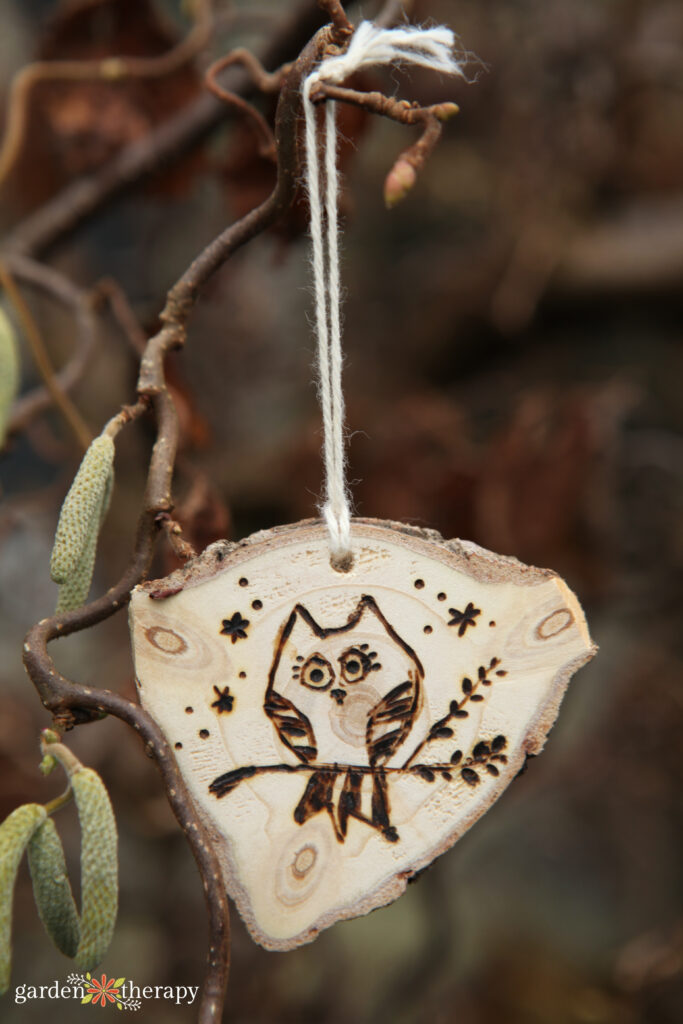
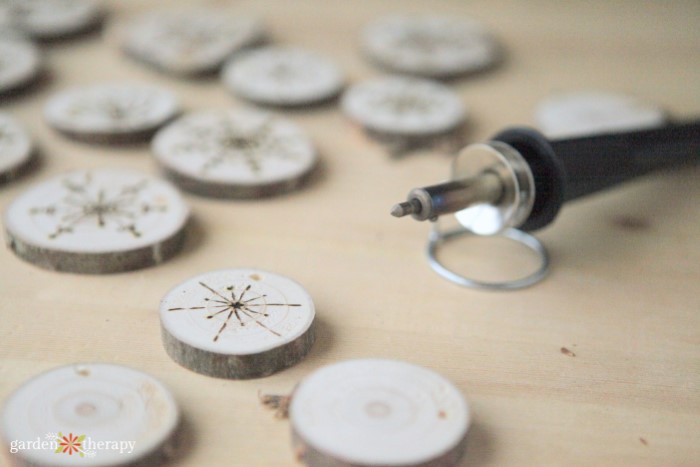
Decorate your wood slice ornaments with paint, fabric, wood stain, or decoupage. I chose to celebrate the natural look in this project by using a wood-burning pen set.
To use the wood-burning tool, follow the manufacturer’s instructions and practice on some pieces you are not overtly attached to. Be sure to try out the different pen tips!
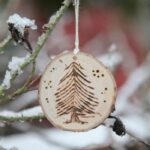
Once you have the hang of it, you can draw your designs in pencil and trace with the burning pen, or just let some free-form shapes flow from your fingers. Snowflakes and stars are simple and festive, but try anything meaningful to you. Instruments, animals, initials, and words are all good choices, but there is nothing to say you can’t draw monster trucks or cupcakes if that’s what you’re into.
You can also paint your wooden ornaments using acrylic craft paint. I’d recommend using a primer beforehand and sealing it with a clear varnish to prevent the paint from chipping or yellowing. More on sealing below!
For decoupage, I would recommend using Modge Podge and a foam sponge. You can print family photos, take magazine clippings, fun scrapbooking paper, and more to make a beautiful collage.
How to Seal Wooden Ornaments
You can cover the wood ornaments with a sealer if you want a glossy finish or want to protect the design. This can also help prevent cracking.
You want to seal ornaments after you’ve finished your design, not before. For wood sealants, both spar urethane and polyurethane are popular choices.
Spar urethane is typically used outdoors since it can withstand harsh elements. It expands and contracts with the movement of the wood during temperature and humidity changes. If you’re hanging your ornaments outside, spar urethane is your best option. Note that although it’s clear, it usually has a slightly yellowish tint.
The other option is to use polyurethane, which is most popular for indoor projects. It’s typically heat and moisture-resistant. It dries clear but can darken or yellow over time.
Apply the sealant with a natural bristle brush over wax paper. Most of these sealants are oil-based, so they can take a while to dry. Follow all instructions on the sealant’s label.
Frequently Asked Questions About Making Wood Ornaments
Absolutely! I recommend using a primer beforehand to prevent the wood from absorbing any paint and design. Normal acrylic craft paint works best. Once you’re done, you’ll want to seal it with a clear varnish.
Drying is usually what people mess up the most while making wood slice ornaments. Drying is a very slow process, one that can take months. I recommend cutting the tree into your slices right away for these ornaments. This will help the slices dry much quicker.
Then, store the slices inside. You want somewhere warm and with limited moisture. Wait until the slices are fully dry before decorating.
Note that some slices may crack over their drying time. Make sure to cut a few extra slices to account for the potentially cracked slices.
You need to dry the wood before you make the ornaments. Otherwise, you may experience some cracking later on.
Some wood is just more likely to crack than others. One of the best products to help with this is pentacryl wood stabilizer. After cutting your slices, you soak the wood with pentacryl. This will help to displace the moisture in the wood and accelerate drying time. It’s almost guaranteed to prevent splitting later on!
That covers all my tips for making your own wooden ornaments. It’s a great project to do once the Christmas season ends, and you’re looking to recycle your tree. You’ll love hanging them the following year!
If you have any questions about how to do this project, leave them in the comments below, and I’ll get back to you as soon as I’m able.
More Christmas Crafts to Try
- DIY Stamped Fabric Crafts for Christmas
- The Best Homemade Christmas Gifts
- 20 Crafty Christmas Tree Recycling Projects
- Evergreen Christmas Wreath
DIY Wood Slice Ornaments
Equipment
- Table saw or handsaw
- Drill
- Wood burning pen set
Supplies
- Large branch or small tree trunk
- Sandpaper in both coarse (60 grit) and fine (150 grit)
- String or ribbon to hang ornaments
Instructions
- Let the tree trunk or branch you'll use for this project dry completely to prevent splintering. To speed up the process, cut it into a few smaller sections. This may take months, but if you bring them inside to dry where it's warmer, it can dry faster.
- When the wood is dry, use the table saw or handsaw to cut the wood into disks that are 1/4 – 1/2 inch thick.
- Sand each disk with the coarse sandpaper first, then the fine.
- Drill a hole through each – this is where the string will go.
- Decorate your wood slice. I chose to use a wood burning pen on mine to create a design, but you can use paint or whatever else you like.
- Add a coat of sealer to protect your ornament for years to come.
A city girl who learned to garden and it changed everything. Author, artist, Master Gardener. Better living through plants.