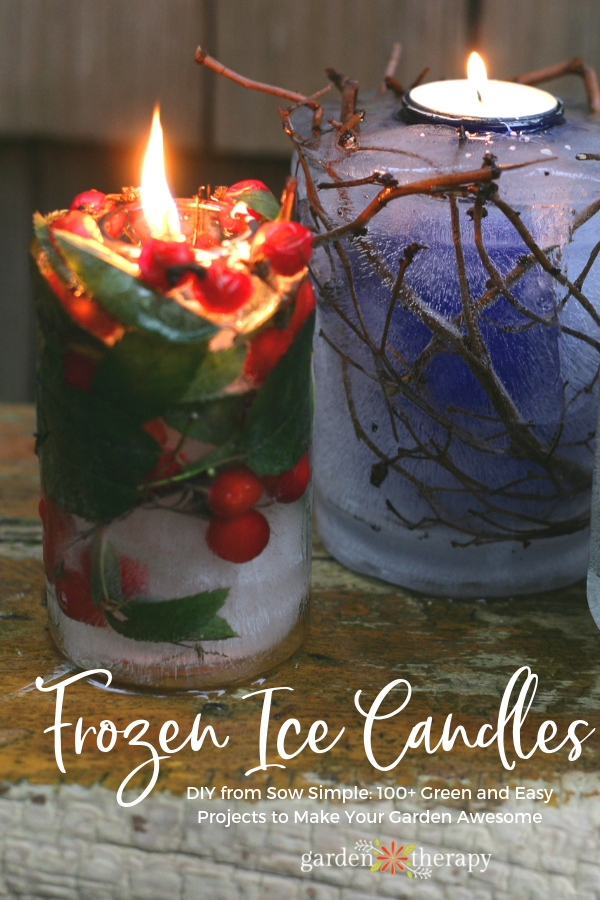
Make these cool garden-inspired luminaries to light the way to your next wintertime party. Frozen ice lanterns are made from an ice sculpture candle holder with room to place a container candle or tea light inside. This DIY ice lantern takes just minutes to set up, and then you pop them in the freezer to set. They turn out so lovely and are guaranteed to set a warm glow on a chilly holiday evening.
When decorating for the holidays, I always turn to naturally inspired crafts. Why use glitter, ribbon, and plastic when nature has so much beauty you can forage for free?
These ice candles are right up my alley! I love how simple they are to make, yet look so wonderful outside on the deck or on the stairs leading up to your home. If you’re planning a holiday party, these are a must-craft.
I also love that they last as long as the cold weather does. Depending on how you make them, they don’t need to be overtly holiday themed. You can keep them all winter long for garden-inspired outdoor decor.
This post will cover…
- Crafting in Winter for Garden Therapy
- The Right Climate for Ice Lanterns
- How to Make Frozen Ice Lanterns
- Materials
- Make it!
- Frequently Asked Questions About Making Ice Lanterns
- More Winter Wonderland Projects from the Garden
Crafting in Winter for Garden Therapy
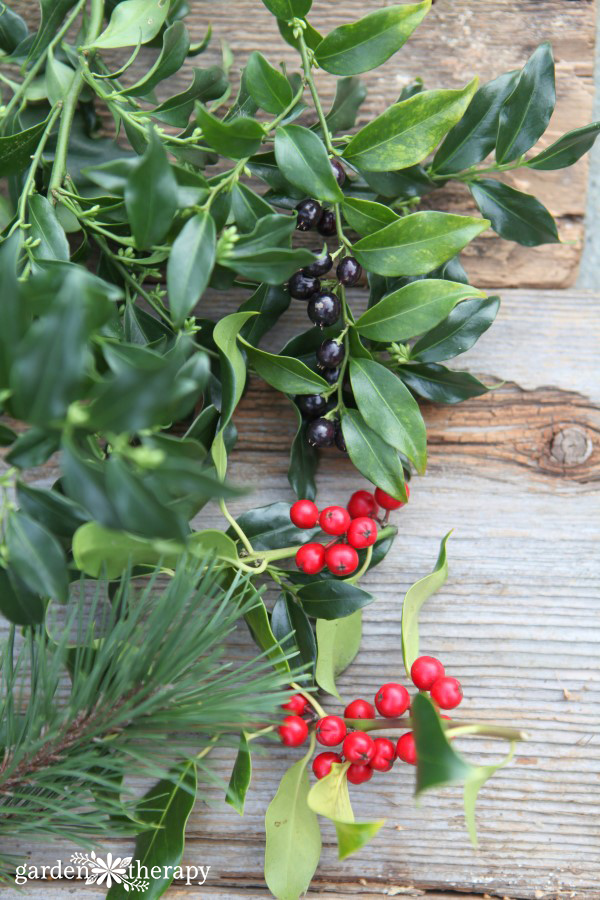
If, like me, you think decorating for the holidays is a great way to get some needed garden therapy in the winter, this project will warm your heart. Just walking around your garden, you will surely find beautiful branches, berries, and leaves that can make the winter more cheery.
Here is a great list of the best garden greenery for holiday decorating (and which ones to avoid) to get your project started on the right foot.
Although, as you are preserving the greens (and reds and purples) in frozen ice, then you can really choose whatever appeals most to you. The tips in that other article for properly cutting the greens and some ideas of what plants to use might be helpful!
Here are just a few other ideas of what to include in your ice lantern:
- Small pine cones
- Acorns
- Small twigs
- Bark (birch would look exceptionally good)
- Cranberries (or other berries. Beautyberry would look stunning!)
- Pine, cedar, fir, and other evergreen branches
- Rosemary (or other herbs)
- Star anise (whole, for their shape)
- Fresh leaves (what’s in your backyard?)
- Fresh or dried flowers
- Seed pods
- Rosehips
- Dried fruit slices
The Right Climate for Ice Lanterns
If you live in a cold climate that allows these candles to last for a few days or more, lucky you! This project is exclusively for those of us who get temperatures dipping below freezing for long enough that these beauties can decorate our walkways and steps.
If you are not in the right climate for these ice lanterns, head down to the end of this post, as there are plenty more decorating ideas that aren’t frozen!
Also keep in mind that, yes, these will melt. They can create a mess when they do so, as all the garden greenery will be left behind. They may also create a pool of water that may freeze again in certain conditions, so keep this is mind for safety reasons.
How to Make Frozen Ice Lanterns
The instructions and photos for this project come from John Gillespie & Christina Symons, authors of Sow Simple: 100+ Green and Easy Projects to Make Your Garden Awesome (courtesy of Harbour Publishing). Today, they’re sharing the steps to make these DIY frozen ice lanterns, a simple project that will gleefully help to decorate your home and garden this winter.
Materials
- A pair of containers, one large and one small, sized to fit the height of your candle holder and the width and height of your candle. We used a 2-quart (2-litre) plastic milk carton, a large yogurt container and a plastic condiment bottle. Also, keep in mind this container will have to fit in your freezer, so only if you have enough room for it.
- Gorgeous garden greenery, rosehips, berries, and seed heads

Make it!
- Fill the larger container with about 1 in. (2.5 cm) of water. Place the container in the deep freeze on a flat surface and allow the base to freeze solid.
- Remove from the freezer and place the smaller container (a candle holder is ideal) inside the larger one, resting it on the ice base.
- Tuck greenery, rosehips, and small winter branches into the crevice between the containers and then fill this space with water right to the top. Place a heavy object inside the smaller container to prevent it from floating up.
- Then, carefully return the containers to the freezer for at least 24 hours until the water freezes solid.
- To release the ice candle holder, remove the set from the freezer and allow it to thaw slightly at room temperature. Or run the containers under warm water until the ice releases.
- Set outside, insert a candle, light it, and enjoy.
Frequently Asked Questions About Making Ice Lanterns
This project takes about 1-2 days to complete but only a few minutes to make. You need time to freeze the base at the very beginning, which can take a few hours. Then, you complete the candle and let it fully freeze for 24 hours before setting it outside to use.
If you plan on making these ice candles as décor for an event or party, make them a day in advance to get the best ice lanterns possible.
This depends completely on the weather! These candles are designed for outdoor use only, as they will melt if brought inside. They are suited for temperatures below freezing (0°C/32°F). Your ice candles will remain as long as the temperature remains below freezing!
Lighting the candles inside will also slowly melt your ice candle. If you’re concerned about melting your ice candle after repeated use, use electric tea lights.
You can technically make an ice candle any size you want! With a 5-gallon bucket, I wouldn’t recommend filling up the container all the way, as that would make a pretty big candle. Instead, fill it halfway or as tall as you think would match your vision.
You also have to keep in mind that unless you live in freezing temperature already, the container has to fit in your freezer as well.
I would also suggest making the ice candle a “three wick” one. You would add three smaller containers at step two rather than one, or make sure the inner container is one large one. This way, you have three candles to light inside one big container for a bright, winter-themed candle.

From home-crafted concrete troughs stuffed with succulents alongside dry-stack stone walls to simple ideas for playhouses, gazebos, and backyard benches, Sow Simple will keep readers busy through all seasons.
More Winter Wonderland Projects from the Garden
- This Year Make an Evergreen Christmas Wreath (from Scratch)
- It’s Beginning to Smell a Lot Like Christmas Simmering Spices
- A Small Tree With a Big Message: DIY Grinch Tree
- Gather Around this DIY Christmas Candle Wreath
- Light Up the Holidays with These Creative Candle Projects
- A Wonderful Winter Window Box Planter (That You Can Make Even If You Don’t Have a Window Box!)

How to Make Ice Lanters
Equipment
- 2 Containers one large and one small, sized to fit the height of your candle holder and the width and height of your candle.
Supplies
- Garden greenery choose your favorite varieties of greenery as well as rosehips, berries, and seed heads
Instructions
- Fill the larger container with about 1" of water. Place it on a flat surface within the freezer and allow to freeze completely.
- Remove the larger container from the freezer, and place the smaller container (the candle holder) on the base of the frozen one.
- In the space between the smaller and larger container, tuck in the greenery and berries. Then, fill the space with water to the top.
- Place a heavy object on top of the small container to prevent it from moving or floating around. Then place the entire thing in the freezer upright.
- Let freeze for at least 24 hours or until solid. Remove the ice candle container from the freezer and let it thaw slightly. Then add a candle and place outside.


With the same idea, I used to do this for a pretty ice in a punch bowl. Use edible flowers & berries. ????????????
OOH! That’s a great idea!