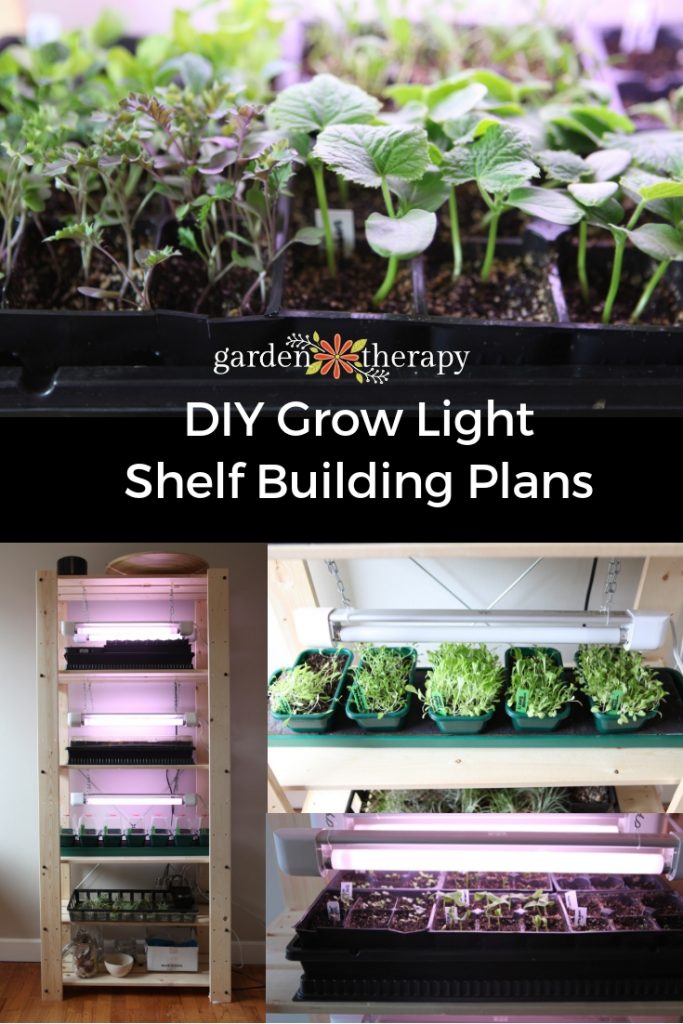
Grow lights don’t have to be an expensive, fancy thing you splurge on as a gardener. You can really up your gardening game by making your own inexpensive DIY grow light shelf set-up. I’ll take you step-by-step into how I made my plant shelf with grow lights.
Grow lights are one of the most useful tools for gardeners who grow lots of vegetables or who are starting a garden from scratch. You can jumpstart the gardening season by starting the seedlings indoors and using grow lights to help give them a boost when the sunlight is still returning to us.
If you’re starting seeds this year, your seeds will have been planted in homemade starters or store bought containers and germinated. Those baby plants may not be ready to hit the harsh outdoors yet, but they need enough light to grow.
This DIY plant shelf with grow lights will help you fashion your very own indoor grow op by using an inexpensive Ikea shelving unit and some utility lighting.
This post will cover…
- Store-Bought Mini Greenhouses
- Designing a Plant Shelf With Grow Lights
- How to Avoid Leggy Seedlings Under Grow Lights
- DIY Plant Shelf With Grow Lights
- Materials
- Make It!
- Other Grow Light Shelf Options
- Frequently Asked Questions About Grow Light Shelves
- More About Seed Starting
")
Store-Bought Mini Greenhouses
In past years I have used a 4-tier wire shelf which allows me to grow eight trays of seedlings into large plants. I can continuously move the shelves to make more room for taller plants. It comes with a greenhouse cover that makes the perfect transition to the outdoors to harden off seedlings.
I use this 4-tier wire shelf as an outdoor greenhouse when potting the seedlings into larger pots. I decided to make something a little neater for the starts as the shelf was in a prominent place in my office.
It’s quite easy to make your own grow light shelf set-up at a fraction of the price.
Plus, I needed more room indoors for my air plants, terrariums, and all my other plant babies. Window space is a hot commodity! I’ve seen many inexpensive shelving units from Ikea get used for a few projects by fabulously stylish gardeners, and I gave it a try myself.
")
Designing a Plant Shelf With Grow Lights
Carrie from Read Between the Limes’s $29.99 IKEA Seed Starting Rack inspired this project. Her shelf has fewer lights and adorable seed and soil supply labels. Make sure you check out Carrie’s blog for the instructions on how she set up her shelf and lots of great ideas on gardening with kids.
The original shelf used for this project, the IKEA GORM, is no longer available. However, many of IKEA’s other shelving units would work. Alternatively, look online on Facebook Marketplace or in groups to see second-hand shelves you can turn into your grow light shelf.
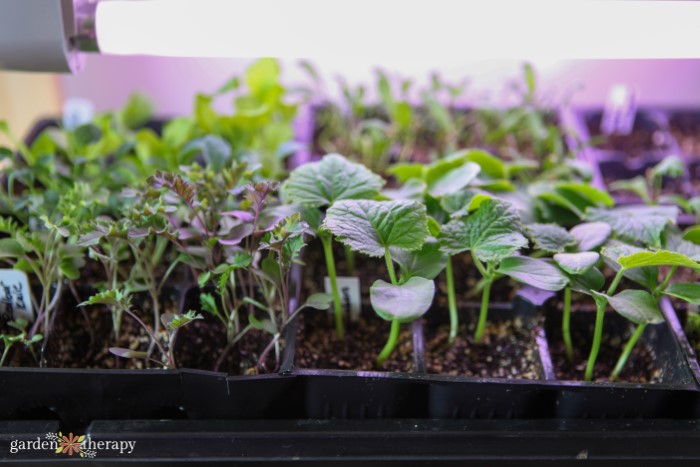
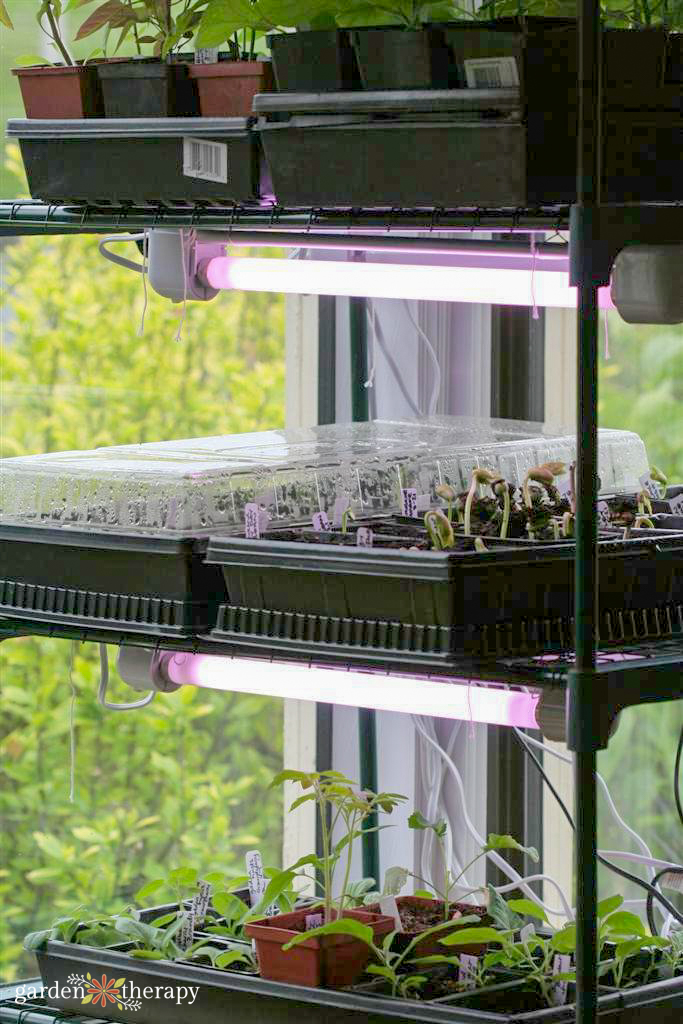
I added to Carrie’s setup by using six lights on the top three shelves, which was the perfect amount of light to prevent the seedlings from becoming too leggy. Each tray will have two lights shining directly on it.
All the lights are on chains and have hooks, so I can adjust the light position as the plants grow.
For the seedlings, I also included a heat mat underneath. There, I rest the new seedlings on the heat mat with a plastic cover to keep the heat in. The lights remain OFF until I see signs of germination, then I turn the lights on.
")
How to Avoid Leggy Seedlings Under Grow Lights
Tall, spindly (aka leggy) seedlings do not give your plants a great start.
It’s not the end of the world, but it indicates that the plants are not getting enough light which is stressful for them. Growing tall and skinny can cause the plants to flop over and break or be damaged.
The best remedy for leggyness is to provide enough light and the right kind of light. For most home growers wanting to start a few seedlings, standard fluorescent utility lights work just fine.
If you can find inexpensive lights specifically made for growing plants, they may have a high colour temperature that more closely mimics the sun (and they are pink!). These can be very expensive, and for the price, the results are not that much different than standard fluorescent bulbs, so save your bucks and buy a “daylight” bulb instead.
Grow lights should be placed just above the plants. This is why you want your grow light shelf to have adjustable lights. As the plants grow, you slowly raise the light. When the grow light reaches the top, the plants should be planted or potted outside.
")
If you have leggy plants, re-pot them in deeper pots with the soil line all the way up to the seed leaves (the first leaves that appeared when they sprouted). All that extra stem can be tucked under the soil for protection, and the leaves will have a fresh start.
")
DIY Plant Shelf With Grow Lights
If you want to mimic my grow light shelf set-up, here’s exactly how to do it. It truly isn’t a difficult project, and for the size of it, is much cheaper than anything else you could buy.
Materials
- 1 shelving unit (such as IKEA’s IVAR or an adjustable garage shelf)
- 6 utility lights with full spectrum or grow lights where available
- 12 screw-in hooks
- 12 x 7” lengths of chain
- Wire or twine
- Power bar
- Christmas light timer (optional)
")
Make It!
1. Assemble the shelving unit as per instructions. Space top 3 shelves 15” apart; these will be your growing shelves. Space the remaining 2 shelves as you desire from the bottom; these will be supply shelves.
2. Screw 2 hooks to the underside on both the front and back board, spaced 2” in from the width of the lights.
3. Tie wire or string around the light and affix the end of a length of chain to each side. Simply hang the other end of the wires on the hooks at about 1” above the seedlings. Continue to raise the lights as the seedlings grow.
4. I plug all the lights into a power bar to easily turn them on or off the whole thing with one switch. You can also use an affordable Christmas light timer to turn the light on automatically. Start by giving your seedlings 8 hours of light daily and slowly increasing to 12 hours. This mimics the increase in light the plants get as the seasons change and the days get longer.
")
I place the lights so it’s just barely touching the plastic covers or plants. Raise them as the plants grow.
")
Other Grow Light Shelf Options
Now don’t think you must have a dedicated area specifically for seed starting indoors. My friend Sam sent me some great photos of the Victory Garden’s office where they have seeds growing all over the place. I particularly love them growing under the desk–what a smart use of space!

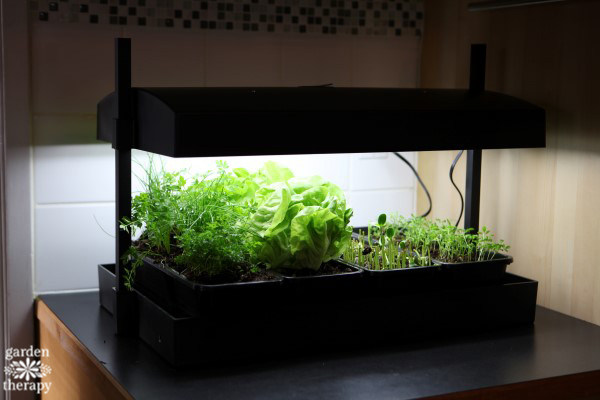
I also have a grow light countertop set-up. This is a much smaller operation that grows food indoors year-round, primarily microgreens and lettuce. A countertop garden works great for someone who wants access to fresh, homegrown greens no matter the time of year.
Frequently Asked Questions About Grow Light Shelves
I fit one standard tray on each shelf and placed two grow lights above. Having two grow lights ensures there is enough light to cover all the seedlings inside the tray. If you only place one light in the middle, the seedlings on the outer edge will reach for the light and become leggy.
Different grow lights will have varying intensities. For my fluorescent light set-up, place the grow lights about 2” above the plants. The grow lights must be as close as possible to prevent the plants from becoming leggy. As the plants grow, slowly lift the lights to go with them. If you have a plastic dome (greenhouse) over the seedlings, place the grow light 2” above the plastic.
This depends on how many seeds you want to grow. Aim to have two lights for each 11” x 22” tray, which can hold six plastic six-cell packs. I have a total of six lights for three trays, and I find this to be enough to start all my seedlings.
More About Seed Starting
- DIY Seed Starting Trays
- The Real Dirt on Seed Starting Containers
- Seed Starting 101
- These Easy and Economical Soil Blocks Will Change How You Garden
A city girl who learned to garden and it changed everything. Author, artist, Master Gardener. Better living through plants.


What is the brand of lighting units you used? Where can they be found?
Thank you, Stephanie- this is exactly what I needed!
I’ve always used seedling heat mats to give enough of the right temperatures to sprout the seedlings. Chili peppers require at least 30c steady continuous heat to sprout, some taking as long as 3 weeks. That IKEA wood shelf looks great! Having a warm tent to cover the unit would really help to keep the humidity and warmth up. I’ve a small IKEA shelf with tent I bought several years ago but there is no way to hang lights, so I’m wanting to upgrade to either the wood one or a wire rack