Making your own beauty products is not only incredibly satisfying but great for your skin as well. Homemade lotion is one of the best things you can do to moisturize and revitalize dull, dry skin. It feels amazing on your skin and you can feel safe knowing you’re using 100% natural ingredients. Here are the foundations of how to make lotion for yourself and some of my tried-and-true recipes.
At this point, I have been making homemade lotion for quite a while. I keep a bottle at my bedside table, by my desk, in the bathroom, and even have a few bottles on the go. I’m using it constantly and not just because it smells and feels amazing, but it really works.
I won’t lie and say that making lotion is easy. It’s one of the more complicated natural beauty recipes I make and share here on the blog. But once you’ve mastered the technique, it’s so worthwhile.
When you make the lotion yourself, you know that only quality and natural ingredients are going on your skin. We should care just as much about what’s going on the outside of our bodies as what’s going in them!
Since I now have quite a few lotion recipes on the blog, I wanted to include them all in one place for easy reference and tackle the basics of how to make homemade lotion for those just getting started.
This post will cover…
- What Ingredient Makes Lotion?
- Emulsifier
- Thickeners
- Preservatives
- Essential Oils and Hydrosols
- How to Make Lotion
- Packaging Your Homemade Lotion
- Homemade Lotion Recipes
- Ultra Moisturizing Lotion
- Rose Face Cream
- DIY Hand Cream
- Lavender Marshmallow Root Conditioner
- Rosemary Mint Conditioner
- Calendula Lotion Bars
- Frequently Asked Questions About How to Make Lotion
- More DIYs to Try
What Ingredient Makes Lotion?
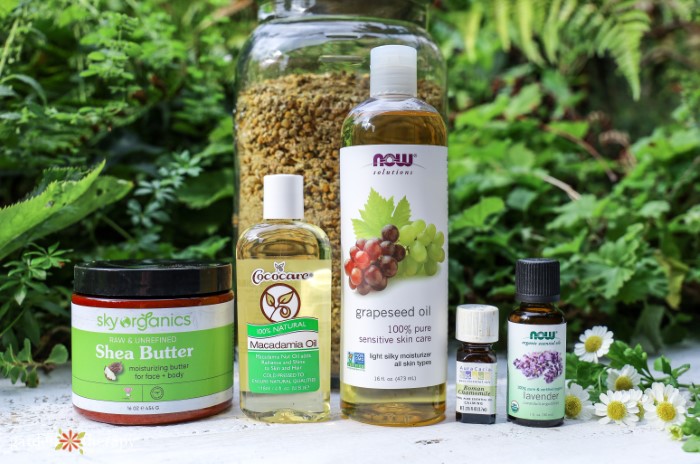
When it comes to homemade lotion, things get a little more complicated than simply mixing together a bunch of ingredients. The main components for making lotion are an emulsifier, thickener, and a preservative. While you may not recognize all the names, I promise you these ingredients are all 100% natural.
Emulsifier
Emulsifiers hold together water and oil. You’ve probably noticed that water and oil do not want to mix together. To keep them joined in the lotion, you can use either an eWax (emulsifying wax) or Behentrimonium Methosulfate (BTMS).
eWax comes from naturally occurring fats and esters while BTMS is a vegetable-based conditioning emulsifier. I prefer to use BTMS as it absorbs quickly and is lighter. eWax is better suited for body lotion or foot creams when you want a heavier and thicker formula.
Thickeners
Thickeners also help to keep the water and oil bound but they also thicken things up. Cetyl alcohol and stearic acid are the most common thickeners you can use for homemade lotion. Cetyl is fattier and lighter feeling while stearic acid is heavy and adds fluffiness.
Preservatives
When learning how to make lotion, you cannot skip out on the preservatives. They stop mold, yeast, and bacteria from growing. Anytime you are adding water to a natural product, you will need a preservative.
In my recipes, I use Leucidal. Using a peptide from fermenting radish root in kimchi, it has antimicrobial properties to keep away bacteria. Easy to find, it’s also eco-certified.
Besides Leucidal, you can also use potassium sorbate, sodium levulinate combined with sodium anisate, and Geogard ECT.
Some people believe that grapefruit seed extract, Vitamin E oil, and rosemary seed extract are natural preservatives, but they are not effective when it comes to stopping bacteria growth.
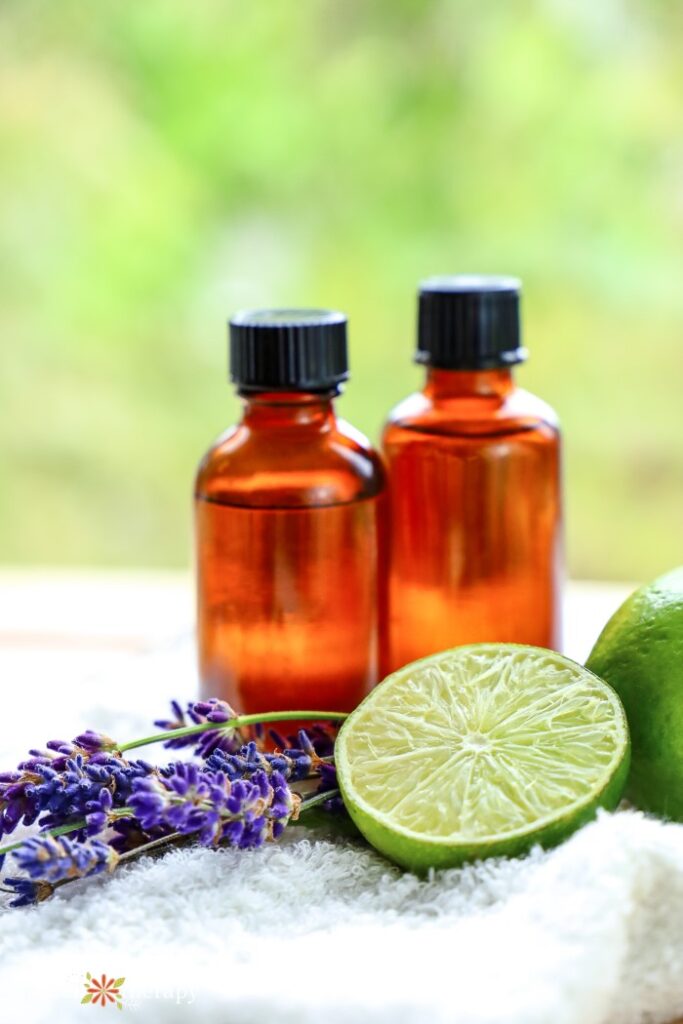
Essential Oils and Hydrosols
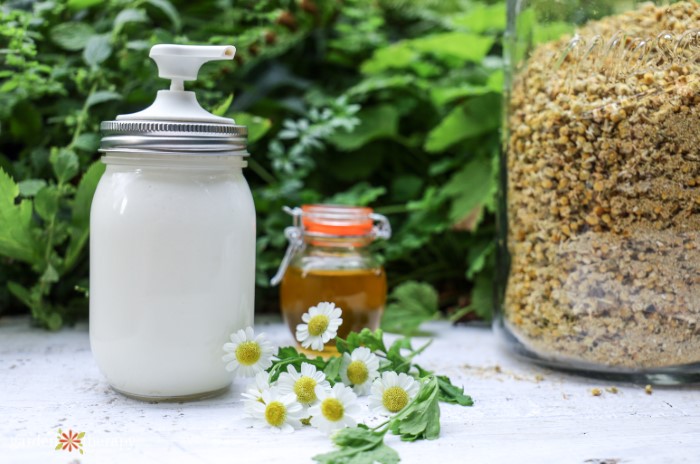
To scent my lotion, I like to use hydrosols. Similar to essential oils, hydrosols are less concentrated as they’re made from distilling fresh plant materials. When essential oils are too expensive, these are a great alternative. You can still get the scent and beneficial properties of the plants.
In soap making, you can’t use hydrosols as any kind of infused oils lose most of their properties and scents after saponification. This is what makes them so great to use in lotion!
Instead of hydrosols, you can also use essential oils. I find the hydrosols are more lightly scented than essential oils so it comes down to preference.
I like my lotion to be scented, but you don’t have to. Hydrosols and essential oils are completely optional.
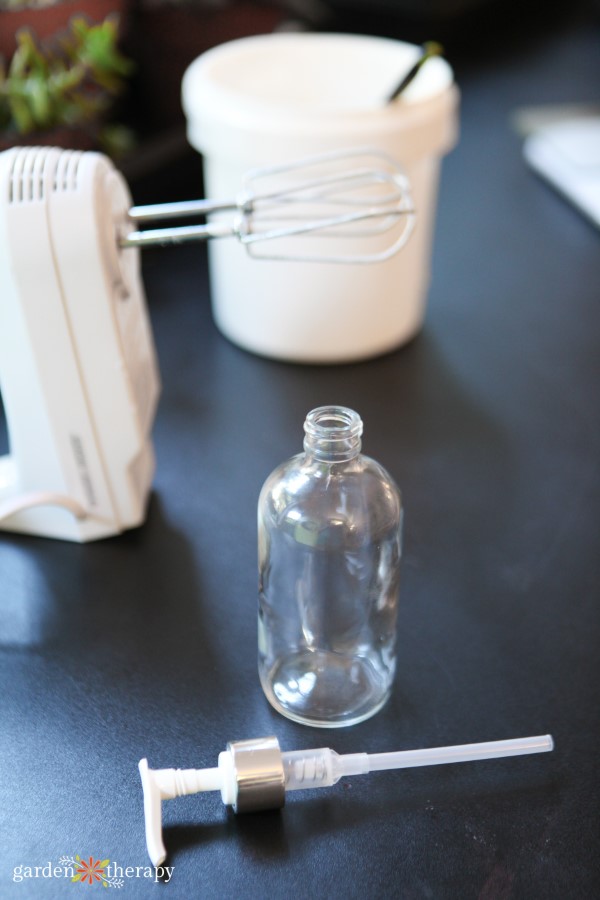
How to Make Lotion
Now that you understand all the ingredients that go into lotion making, how exactly do you put it all together? I did hint earlier that the process is a little tricky but when done right, the lotion is a worthwhile reward.
First and foremost, avoid any kind of contamination. Before you start, you will want to sterilize all your equipment and general area with alcohol. This is an important step that should not be skipped. This prevents any bacteria or growth in your DIY lotion.
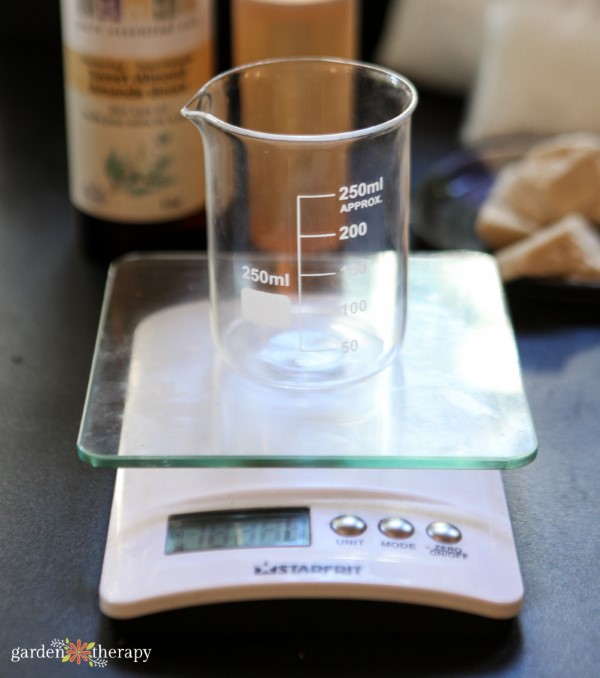
Next, you’ll weigh all your ingredients. Lotion making is separated into three categories:
- aqueous phase: includes liquids such as hydrosols and water
- oil phase: oil, butter, thickeners, and emulsifiers
- cool phase: essential oils, preservatives, and other ingredients that can get damaged from heat
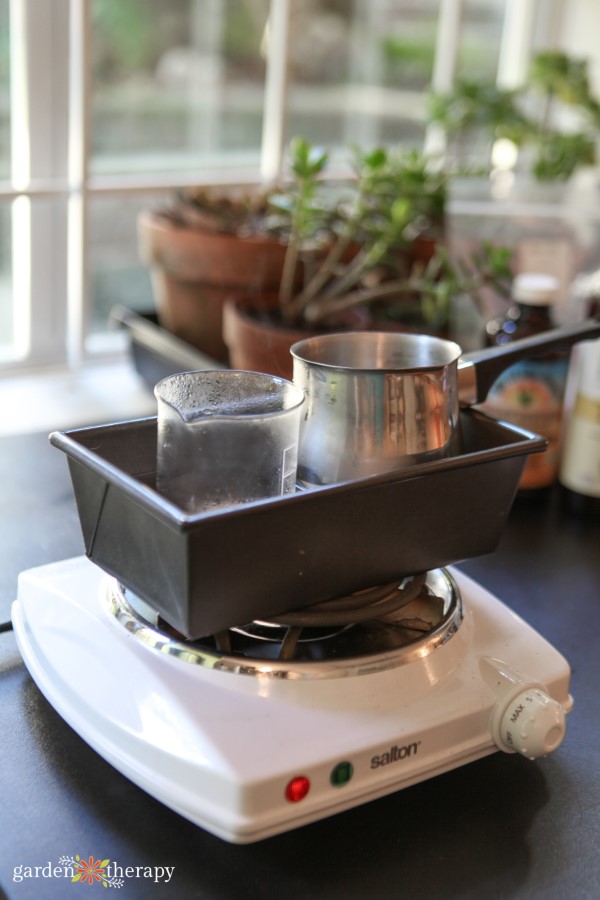
In a double boiler, you’ll then heat your oil and water ingredients separately to 160°F. You’ll want to hold them at this temperature for 20 minutes to help kill off any bacteria.
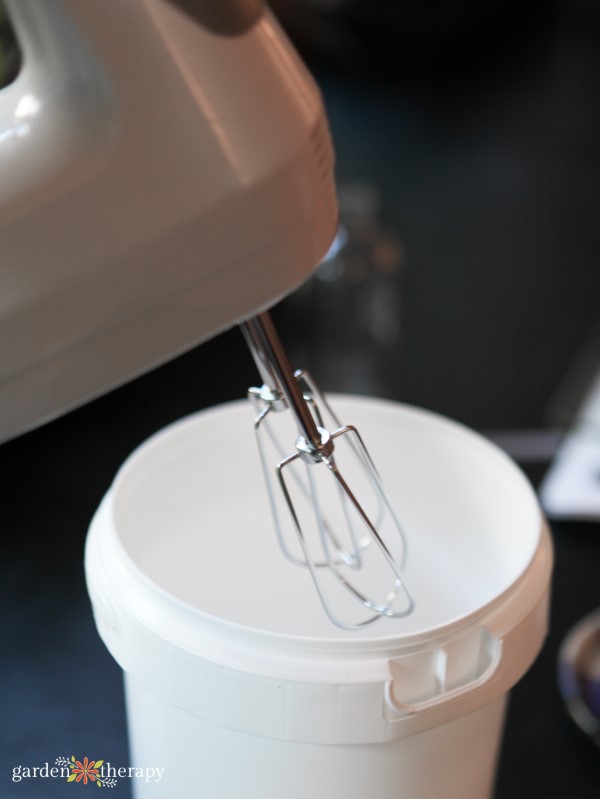
In a bowl, add your oil then water ingredients. Using an electric mixer, you’ll combine them together and they should thicken relatively quickly.
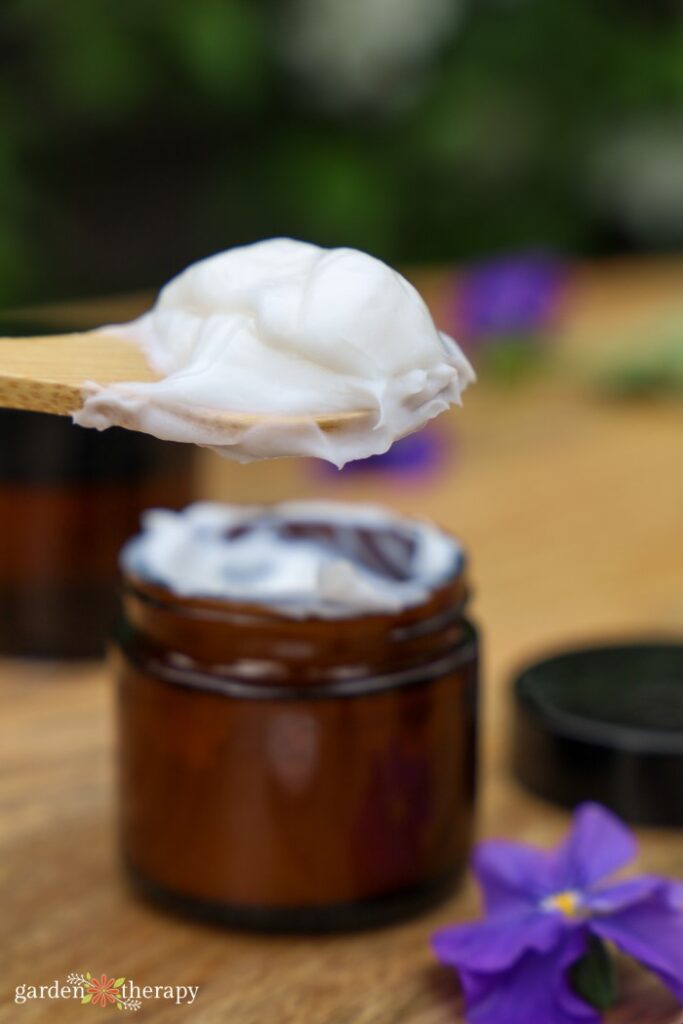
At 80°F, you can then add in your cool phase ingredients. Blend until it’s reached that fluffy and lovely consistency we all love!
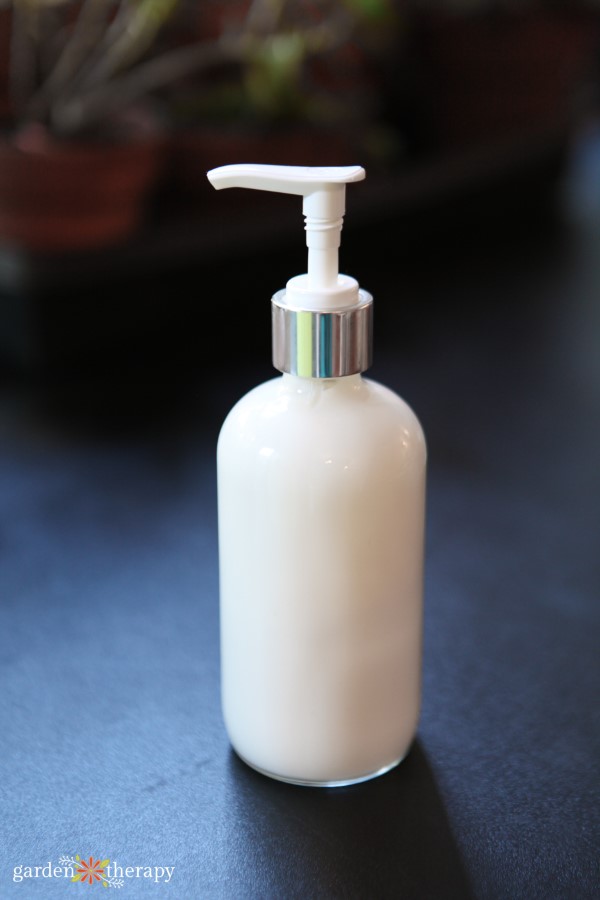
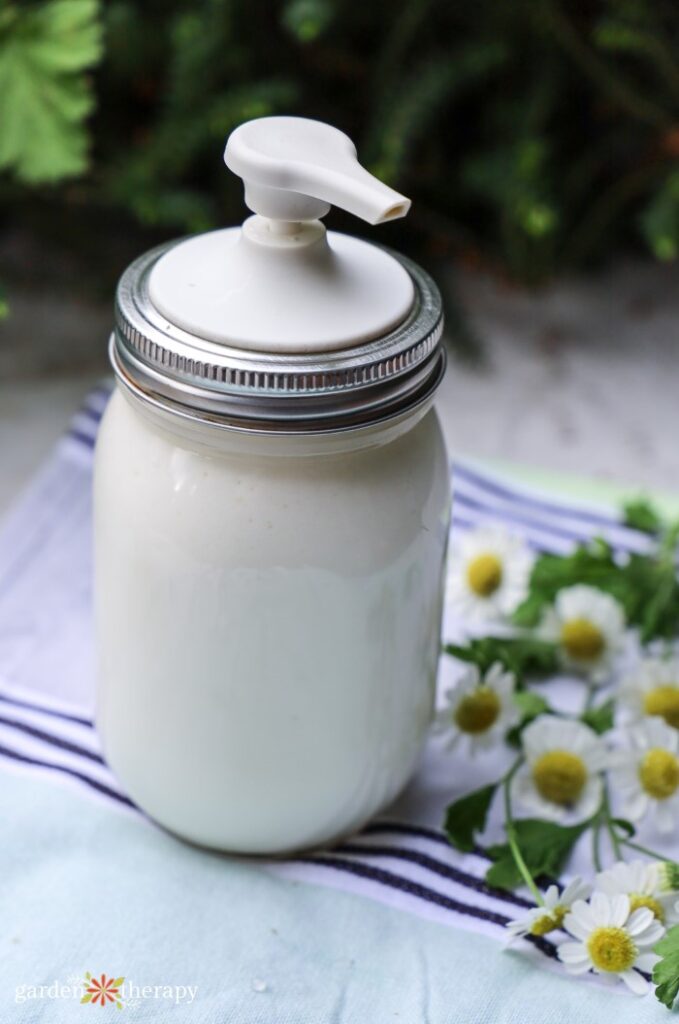
Packaging Your Homemade Lotion
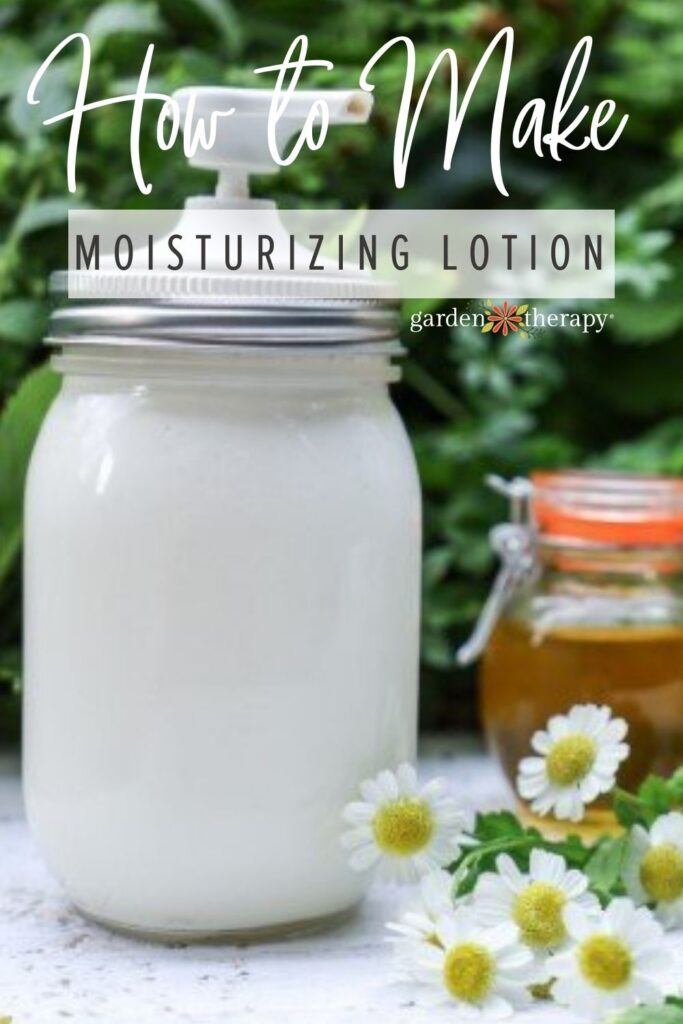
Once you’ve made your lotion, you’ll then put it into a sterilized container. If the opening is small, you can use a piping bag or a zipped top bag with the corner cut to feed it into the container.
I prefer using a pump container to not only easily use my lotion but also avoid contaminating it with my hands.
Homemade Lotion Recipes
Over the years, I’ve made quite a few different DIY lotion recipes. From conditioner (yes it’s a lotion!) to lotion bars, here are some of the recipes I use frequently.
Ultra Moisturizing Lotion
This lotion is lightly scented with floral hydrosols including chamomile, calendula, rose, or lavender. This lotion is super moisturizing and absorbs quickly. Since I have sensitive skin, it doesn’t clog pores and isn’t too heavy. This is my go-to, basic lotion recipe.
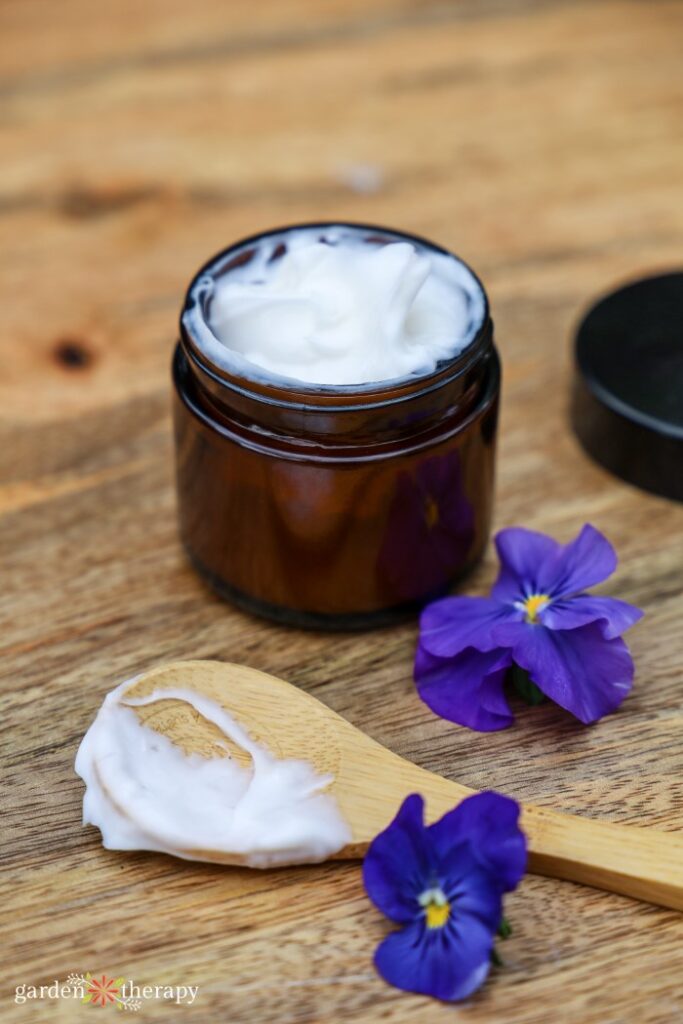
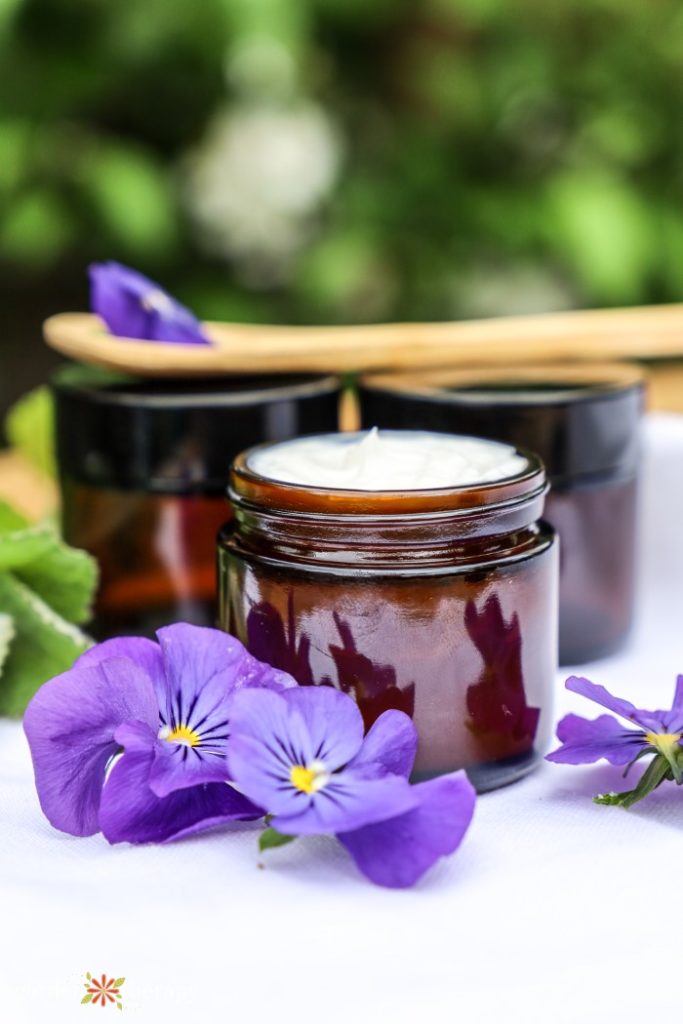
Rose Face Cream
Infused with rose, this lotion hydrates and replenishes dull, dry skin. While I use it primarily as a face cream, you can apply it all over the body for a heavier lotion in the winter. Roses have been used in skincare for thousands of years and your skin will adore its health benefits.

Magnesium Lotion
When absorbed through the skin, magnesium can help to ease aches and pains and even counteract restless leg syndrome. I use this recipe to help calm my pain at night before bed for a restful sleep. It’s made a world of a difference.
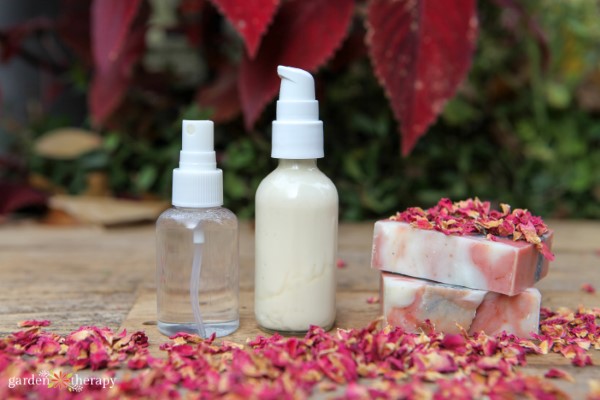
DIY Hand Cream
The skin on our hands is surprisingly delicate for all that we put them through! Using a hand cream keeps them soft and moisturized, making them feel more comfortable and youthful in appearance. Compared to more commercial lotions, this hand cream is richer and not at all greasy.
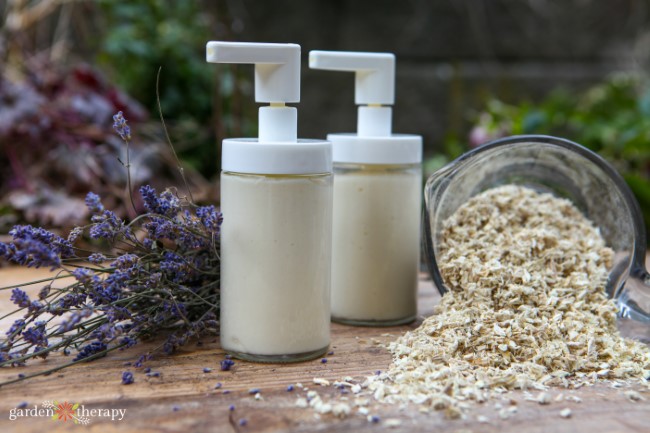
Lavender Marshmallow Root Conditioner
Lotion and conditioner are pretty well the same thing, following the same 3 phases and requiring emulsifiers and thickening agents. For this recipe, I use marshmallow root which is a natural hair conditioner on its own. It’s best for super dry hair that needs some repairing.
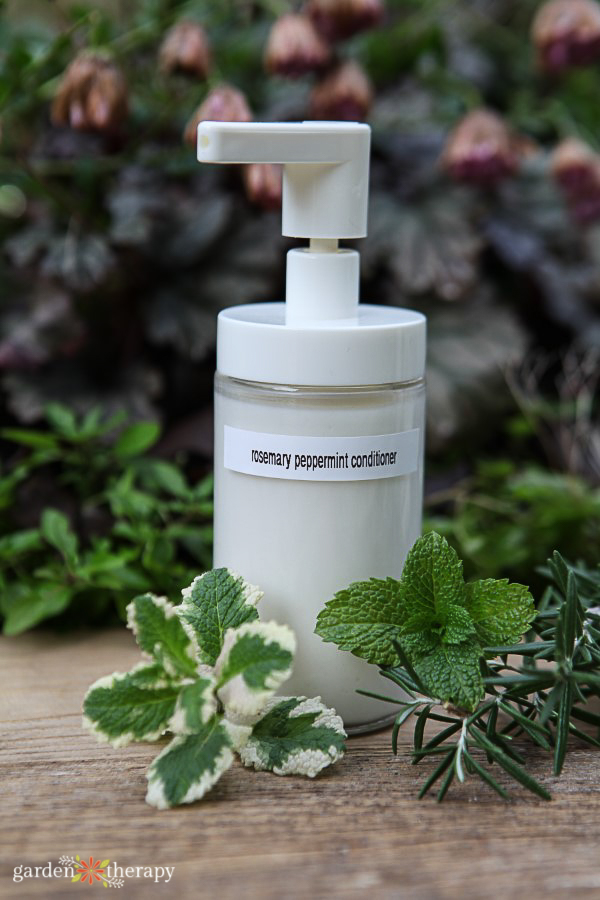
Rosemary Mint Conditioner
When your hair is nice and repaired, you will want to use this conditioner featuring rosemary, peppermint, and rosehip seed oil. One of the best herbs for hair, rosemary helps with scalp issues by relieving flakes, stimulating hair growth, and increasing circulation. And it smells oh so good!
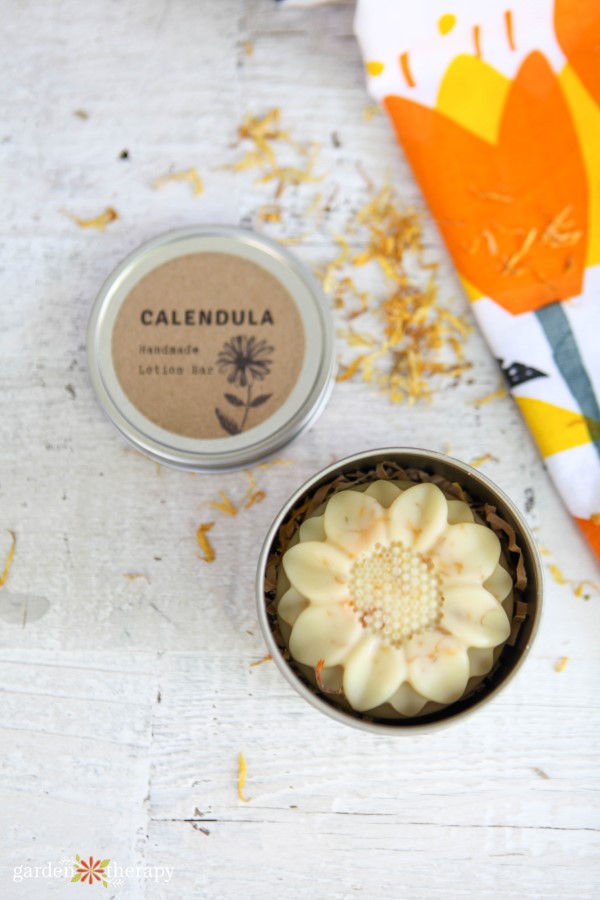
Calendula Lotion Bars
Looking for a beginner’s project? Try this! Lotion bars do not need any water so they require no emulsifiers or preservatives. Therefore, they’re much easier to make.
This recipe is nice and light, perfect for the summer months. Calendula is a powerful herb for the skin that helps to heal tissue gently.
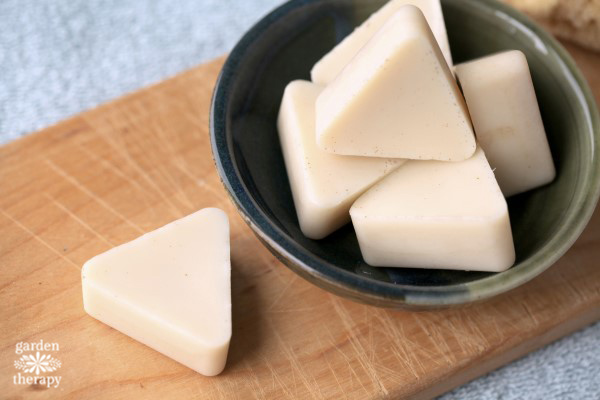
Vanilla Bean Winter Lotion Bar
This lotion bar recipe is made with winter in mind. Pocket-sized and ready for easy use, it contains cocoa butter and coconut oil, both of which are heavier oils that will keep skin well moisturized during the drier months.
Lavender Grapefruit Whipped Coconut Oil Lotion
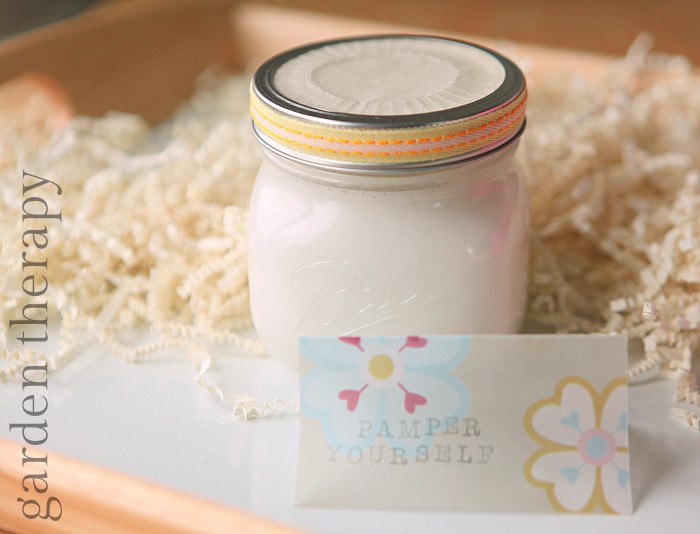
This recipe only requires three ingredients: coconut oil, lavender essential oil, and grapefruit essential oil. Like the lotion bars, it’s much simpler to make as you whip up the coconut oil until is it’s fluffy and luxurious. Perfect for pampering!
Frequently Asked Questions About How to Make Lotion
Without preservatives, the shelf life for lotion is very short. In the refrigerator, it will only like about a week. This is why we add preservatives!
I use my homemade lotion within six months, but often I find I use it all up before then and need to make another batch.
Everyone has different skin types, so what might work for one person is not best for someone else. Typically, you want to use heavier oils and butter for dry skin such as cocoa butter, sweet almond oil, and shea butter. In the winter, I use this rose cream as my skin gets much drier.
In the summer, I prefer this moisturizing lotion recipe. It uses lighter oils, grapeseed and sunflower oil, that will moisturize the skin without feeling too heavy.
More DIYs to Try
- Why Make Lotion Bars + an Easy Lotion Bar Recipe
- How to Make Sugar Scrub + 6 Sugar Scrub Recipes
- Essential Oil Perfume: Blend Your Own Custom Scent
- How to Make a DIY Herbal Foot Soak (with Video!)
A city girl who learned to garden and it changed everything. Author, artist, Master Gardener. Better living through plants.


Hi Stephanie, I read your post and really enjoyed it. I always wondered about making lotions. I would love to be able to make a lotion that is just perfect for my really dry skin. I will read more on this top and follow your recipe;) thank you